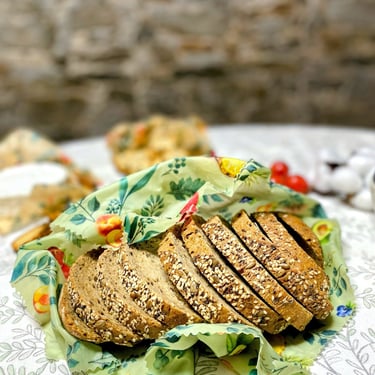
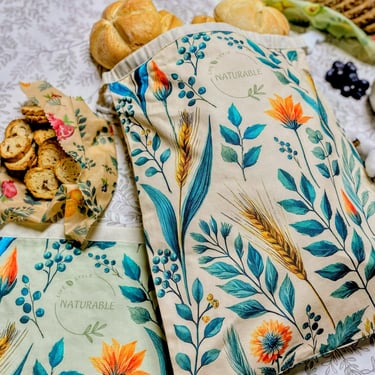
Naturally fresh, beautifully stored

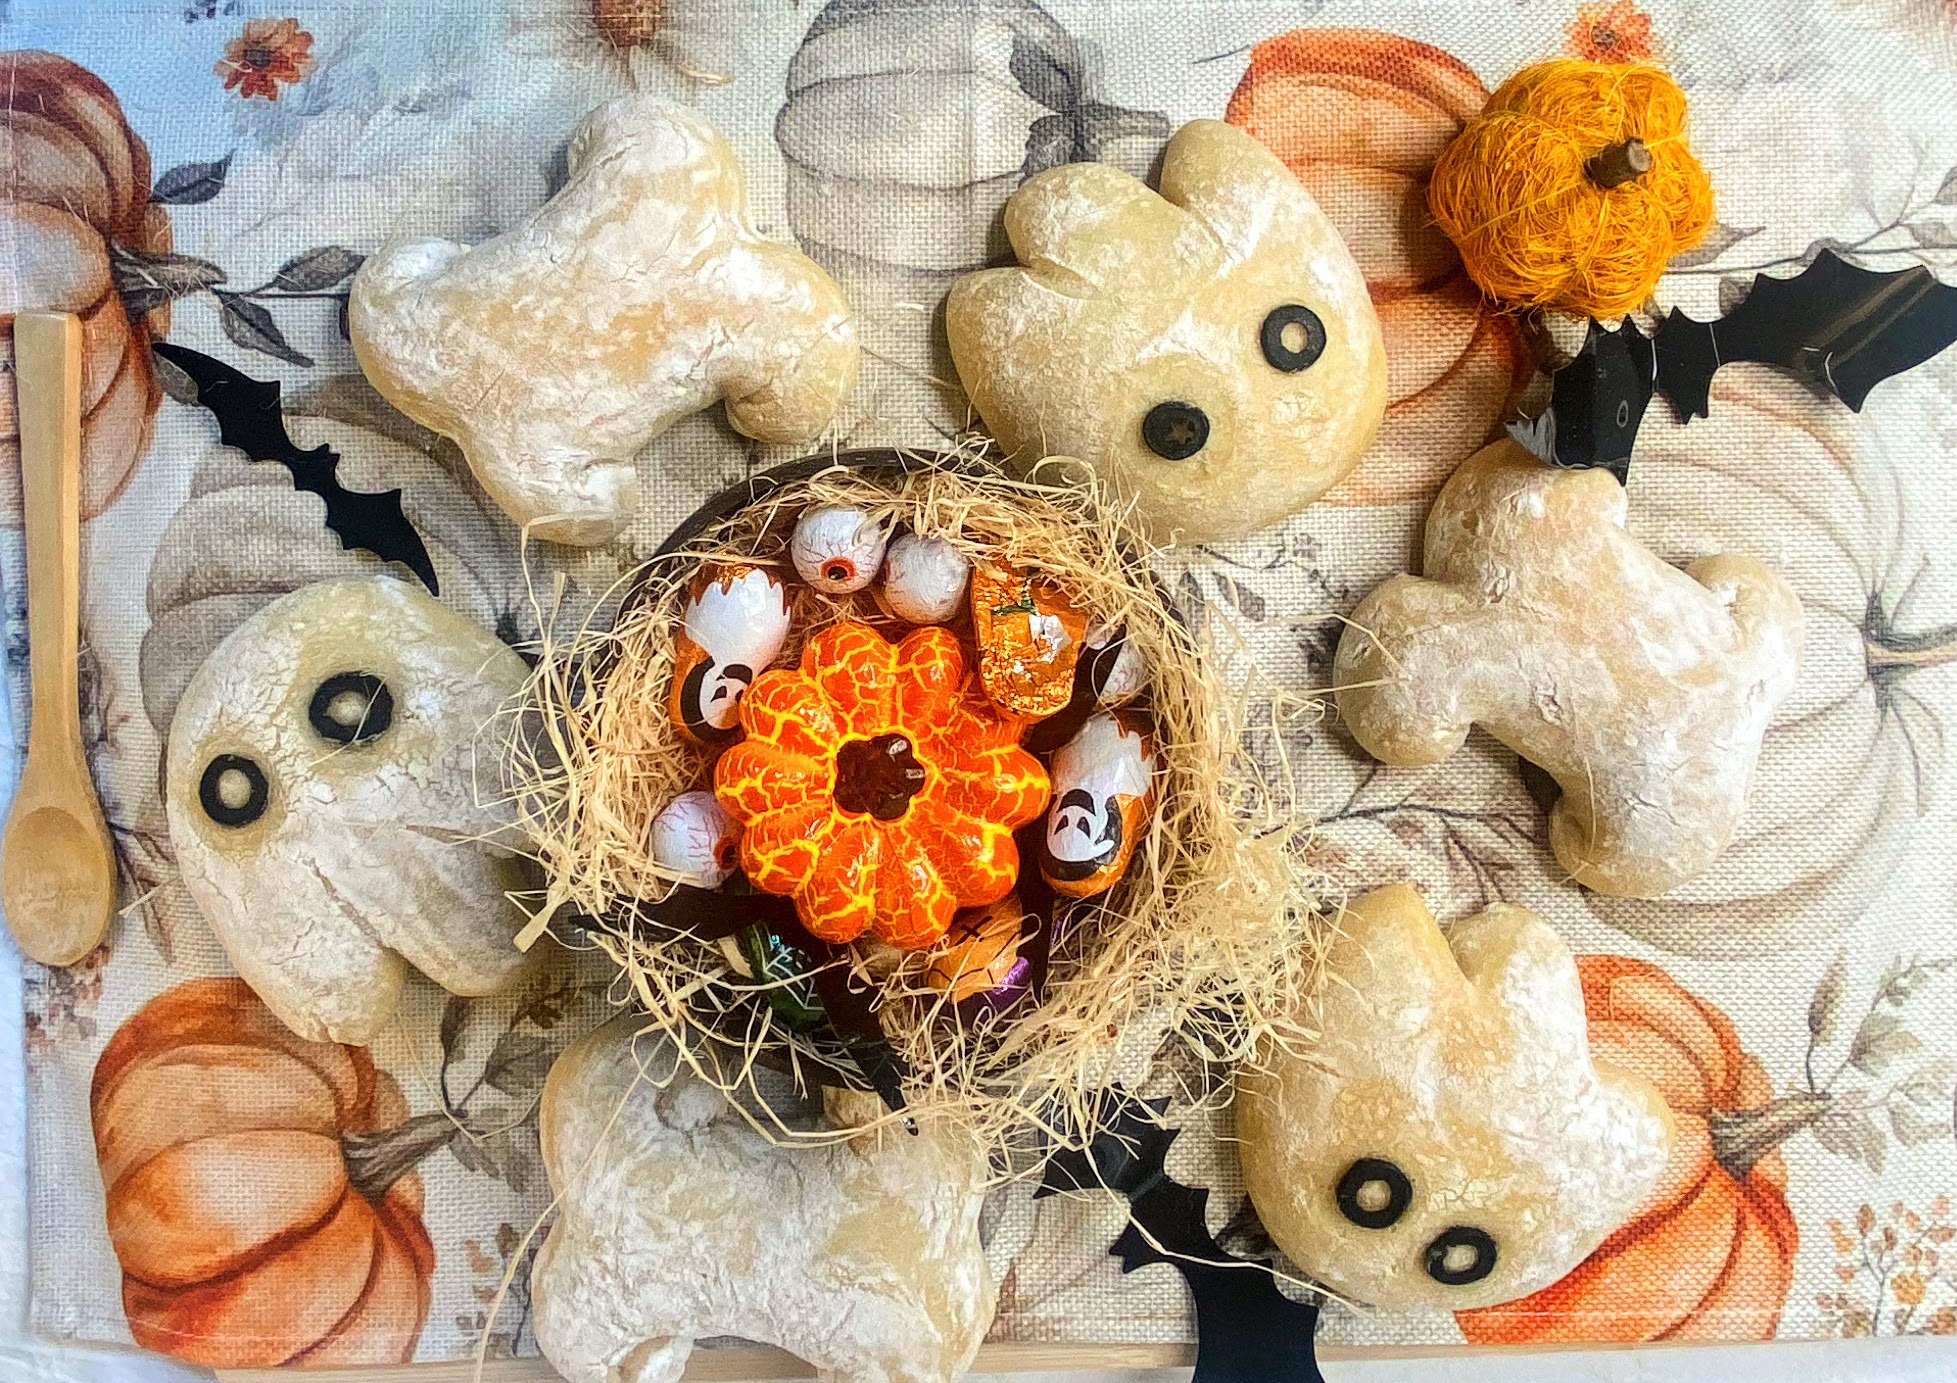
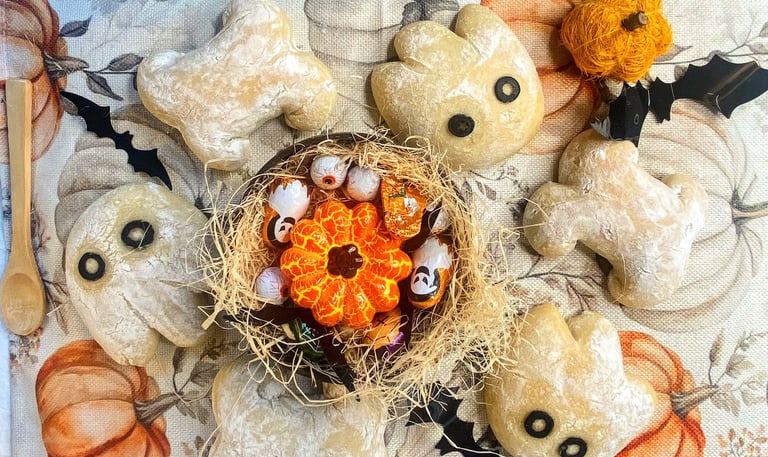
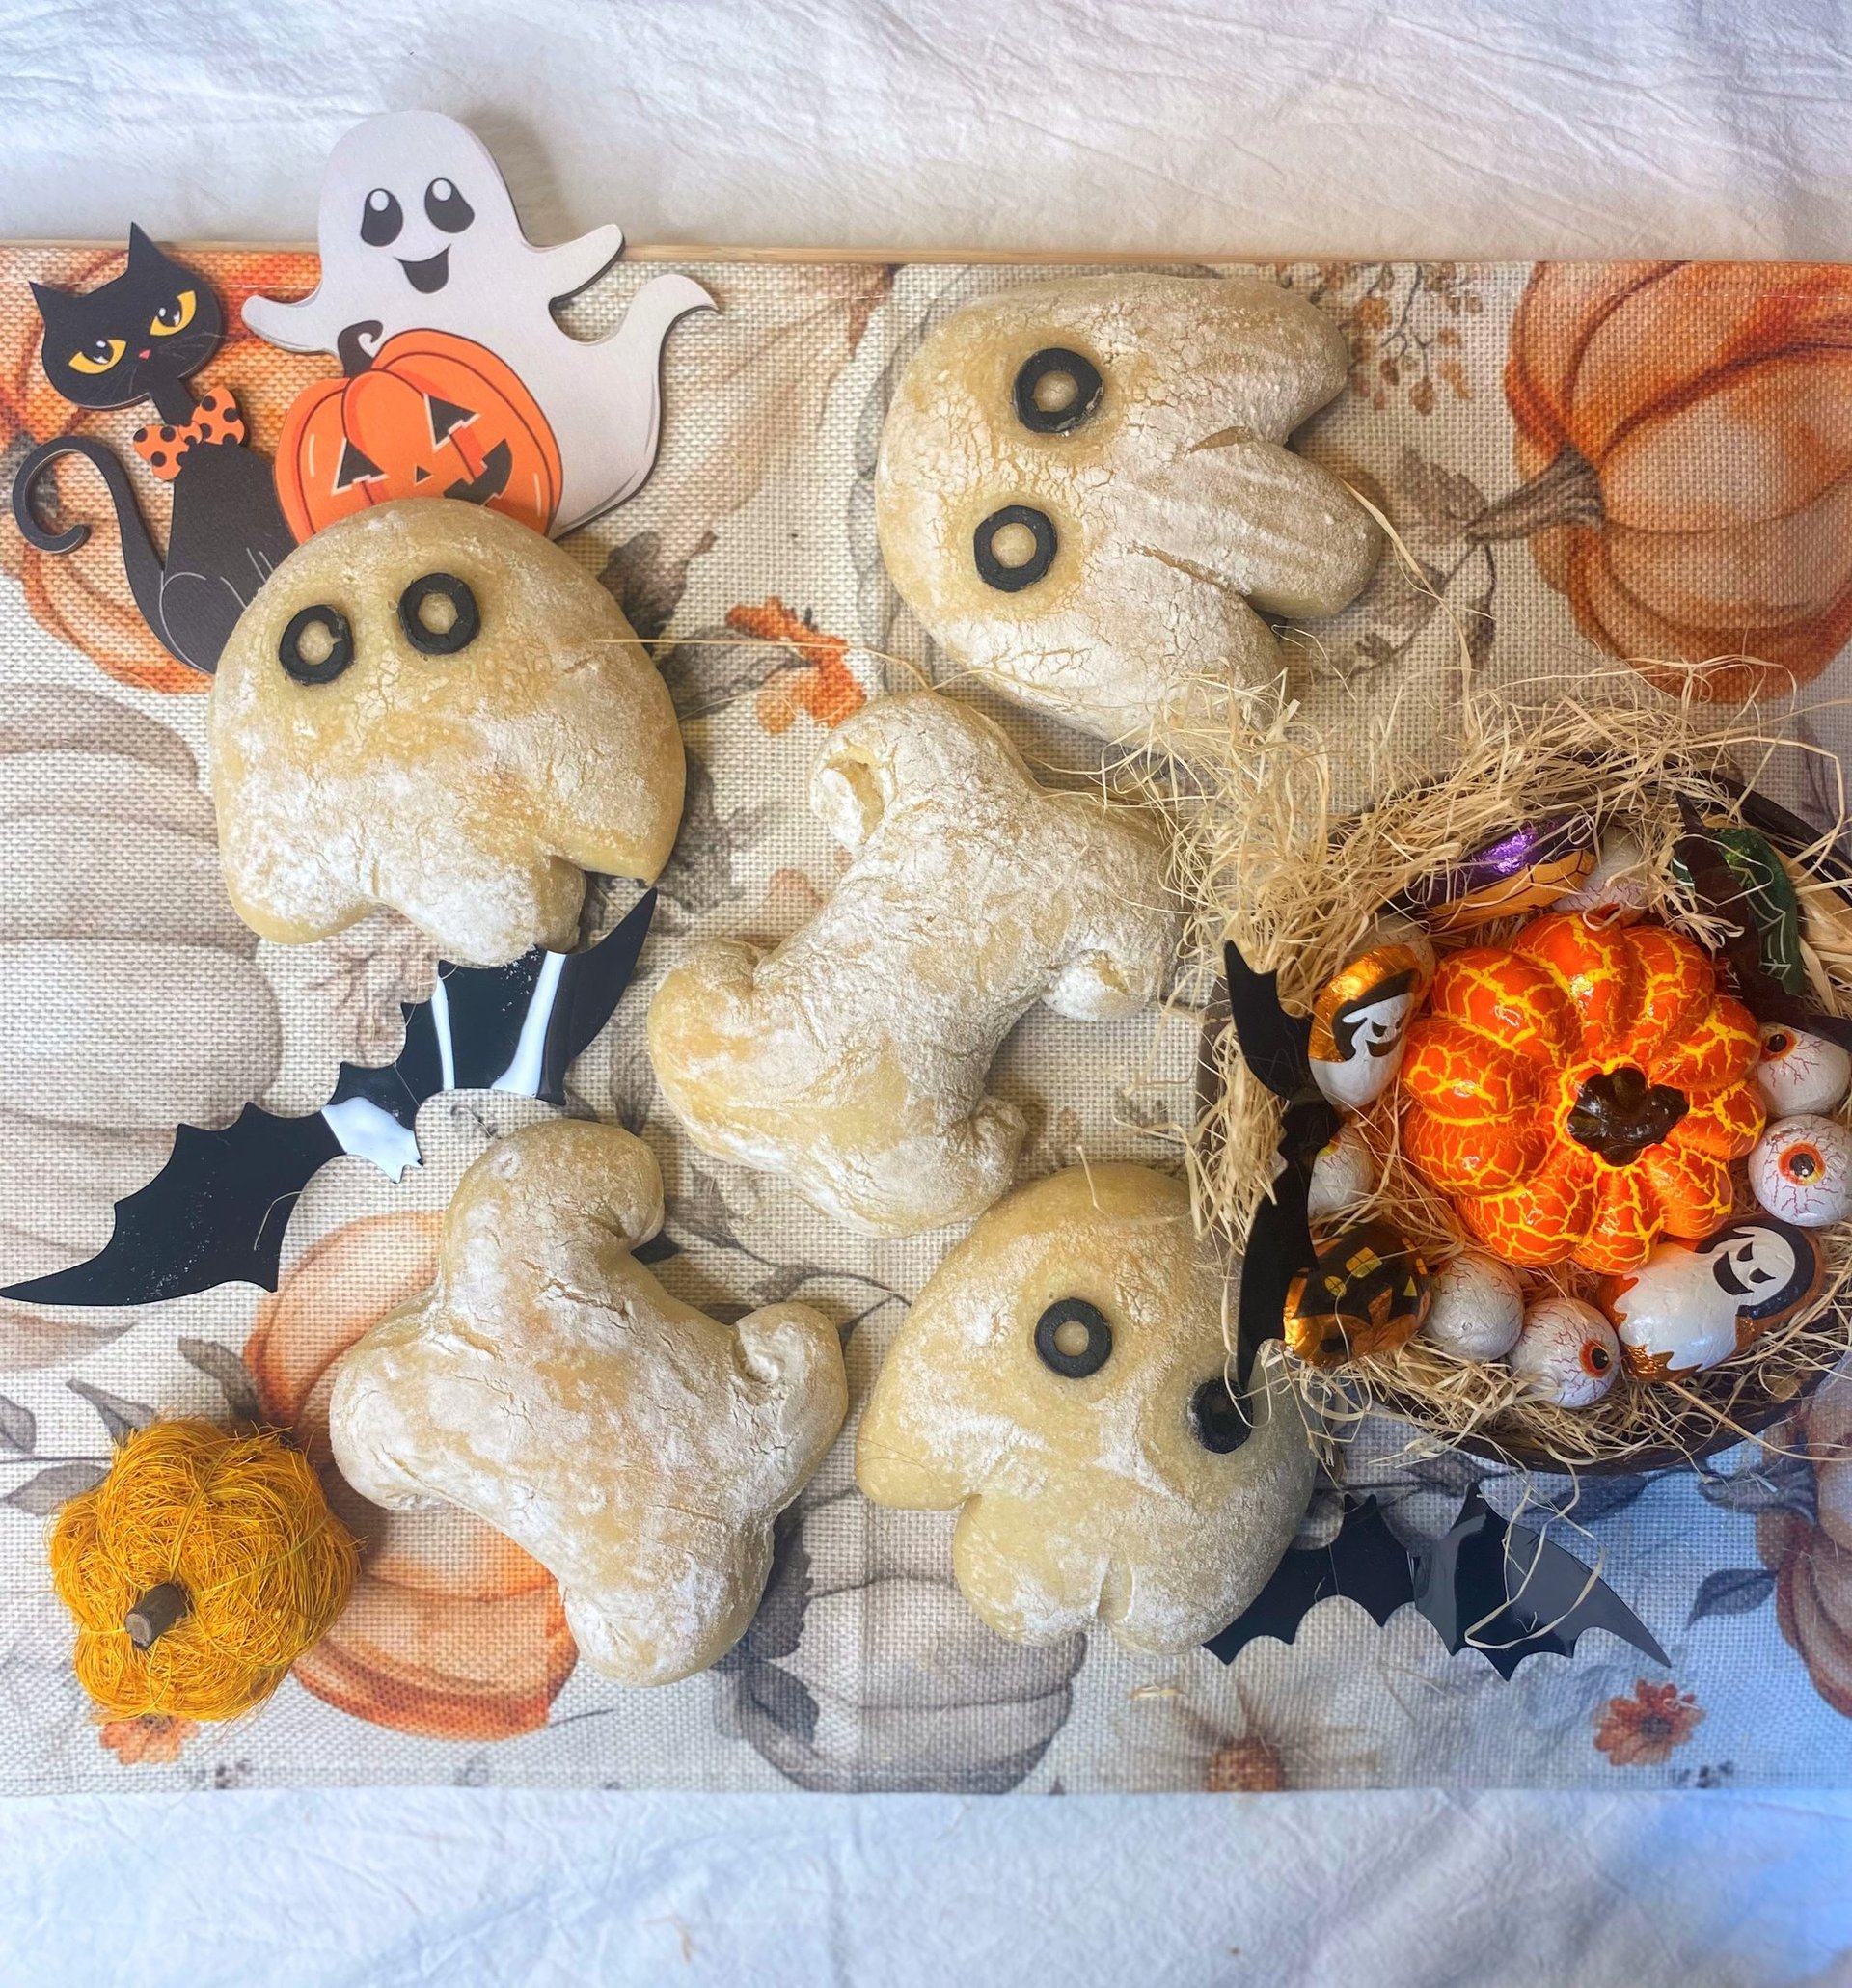
Sourdough Bones & Ghosts: My Spooky Halloween Experiment
Soft milk buns take a spooky twist in this Halloween-inspired bake. Shaped into little bones and ghosts, these sourdough (or yeast) buns combine creativity, simplicity, and flavor, a seasonal recipe that brings playful charm to the kitchen.
A


As Halloween gets closer, I always end up back in the kitchen experimenting, sometimes re-creating recipes I find, sometimes bringing to life an idea that only exists in my head. This one began with a simple yeast recipe for little bone-shaped milk buns. I adapted it to sourdough, learned a few things along the way, and also made some ghost-shaped ones for fun.
Two Ways to Make It
In this post, I’ll walk you through the version I made with sourdough, where I experimented a little with how I usually work with my starter, and also share the original recipe made with dry or fresh yeast for anyone who wants to try the quicker version.
Ingredients:
500 g strong/bread flour
250–270 ml warm milk
10 g honey
50 g sunflower or light olive oil
8 g salt
100 g active sourdough starter (or 5 g instant dry yeast / 15 g fresh yeast for the classic version)
For decoration:
For a pale, ghostly look: rice flour for dusting
If you prefer a shiny, glazed surface: 1 beaten egg
For the ghosts: sliced black olives for the eyes
The Sourdough Version (My Experiment)
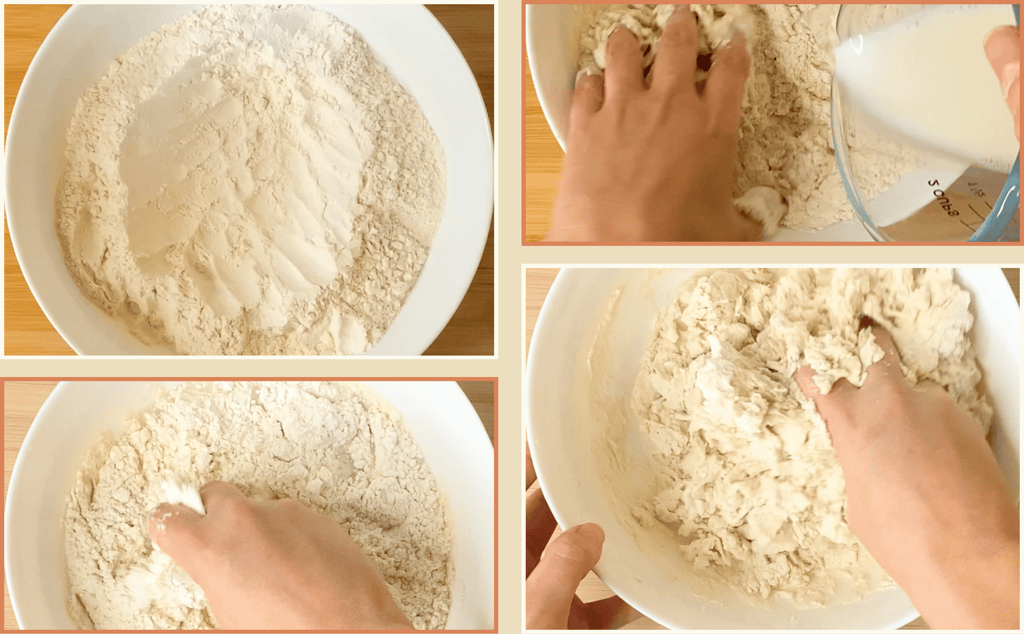
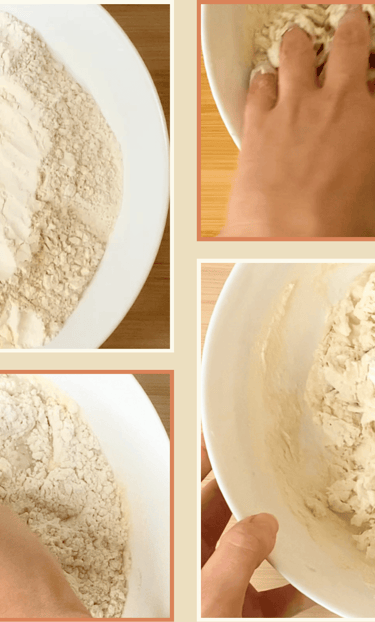
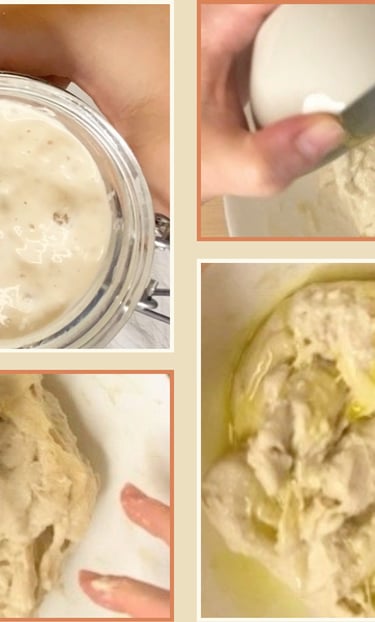
I mixed the flour and milk first and let the mixture rest for about thirty minutes. This autolysis makes the dough more manageable, especially in enriched doughs. It’s not how I always do it, but this time I added the sourdough starter after autolysis, when the dough was just flour and milk. Because this version isn’t very hydrated, incorporating the starter at that point can be quite difficult; the dough feels tight and resistant at first. If you want an easier start, it’s perfectly fine to dissolve your sourdough starter in the warm milk before adding the flour. In this recipe, both methods work, so choose whichever feels more comfortable to you.
Once the starter was mixed in, I added the honey and worked it through. When the honey was about halfway integrated, I added the salt, and only then the oil. This order matters: honey first, then salt, and oil at the end so it doesn’t interfere with gluten development. The dough feels firm at first, which is normal for an enriched dough. I kneaded for about ten minutes by hand, taking short two-to-three-minute rests whenever it tightened up. Those pauses let the gluten relax and make the dough easier to finish. In a stand mixer, six to seven minutes on low to medium speed should be enough.
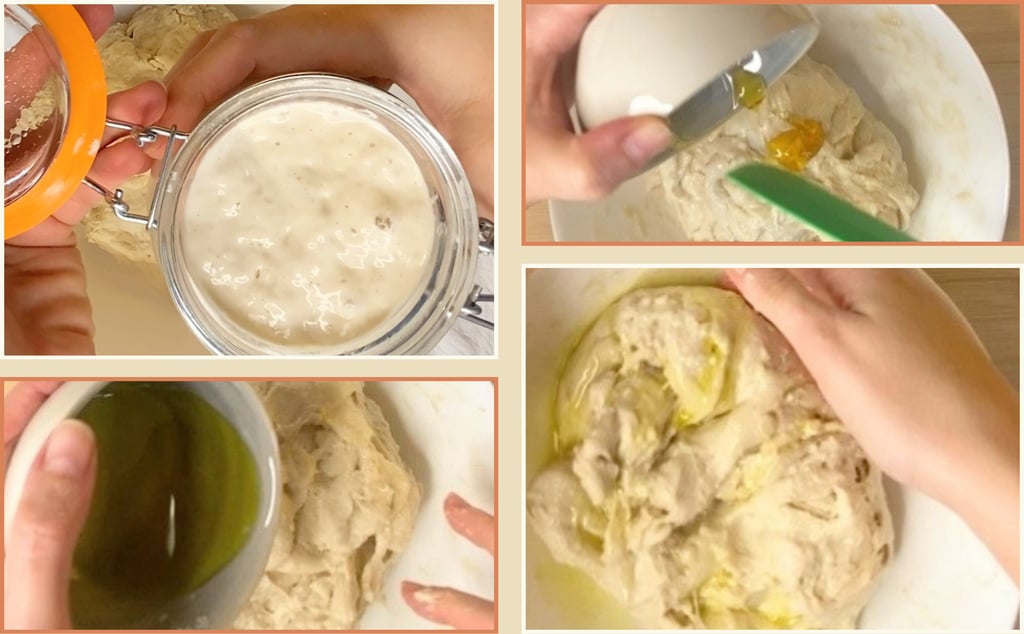
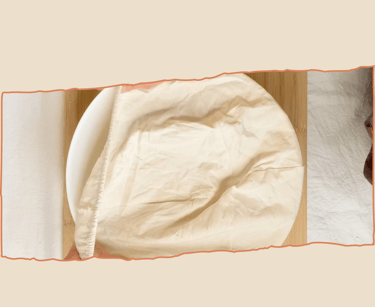
I transferred the dough to a lightly oiled bowl, covered it, and let it rise at around 24–25 °C. It took roughly four to four and a half hours. Don’t chase a perfect double here. You’re looking for about a 70% volume increase and a gentle, slow spring-back when you press the surface with a fingertip.
This yeast version rises faster and gives a slightly sweeter, milder flavor, perfect for both sweet and savory fillings. From this point onward, the shaping, proofing, and baking steps are exactly the same as in the sourdough version.
I turned the dough onto a lightly floured surface, divided it into 90 g portions, shaped each one into a smooth ball, and let them relax for ten minutes.
The Original Recipe with Yeast
If you prefer the classic version, dissolve 5 g of instant dry yeast (or 15 g of fresh yeast) in a small amount of warm milk, just warm to the touch, never hot. Let it sit for about five minutes until it looks slightly foamy on the surface; this means the yeast is active and ready to use.
In a large bowl, mix the flour and salt, then add the milk with the yeast, followed by the honey and oil. Mix until everything starts to come together into a soft dough. It should feel slightly tacky but not sticky. If the dough feels too dry, add a tablespoon or two of extra milk until it feels smooth and elastic.
Knead for about eight to ten minutes by hand, or five to six minutes in a stand mixer, until the dough becomes silky and stretches easily without tearing. Compared to the sourdough version, this dough will feel a bit softer and lighter, which makes shaping easier later on.
Once kneaded, place it in a lightly greased bowl, cover it with a clean cloth, and leave it to rise in a warm, draft-free spot (around 24–26 °C / 75–78 °F). Let it proof for 45–60 minutes, or until it has almost doubled in size and feels light and airy when pressed gently with your finger.
NOTE
Turn the dough onto a lightly floured surface, divide it into 90 g portions, shape each one into a smooth ball, and let them relax for ten minutes.
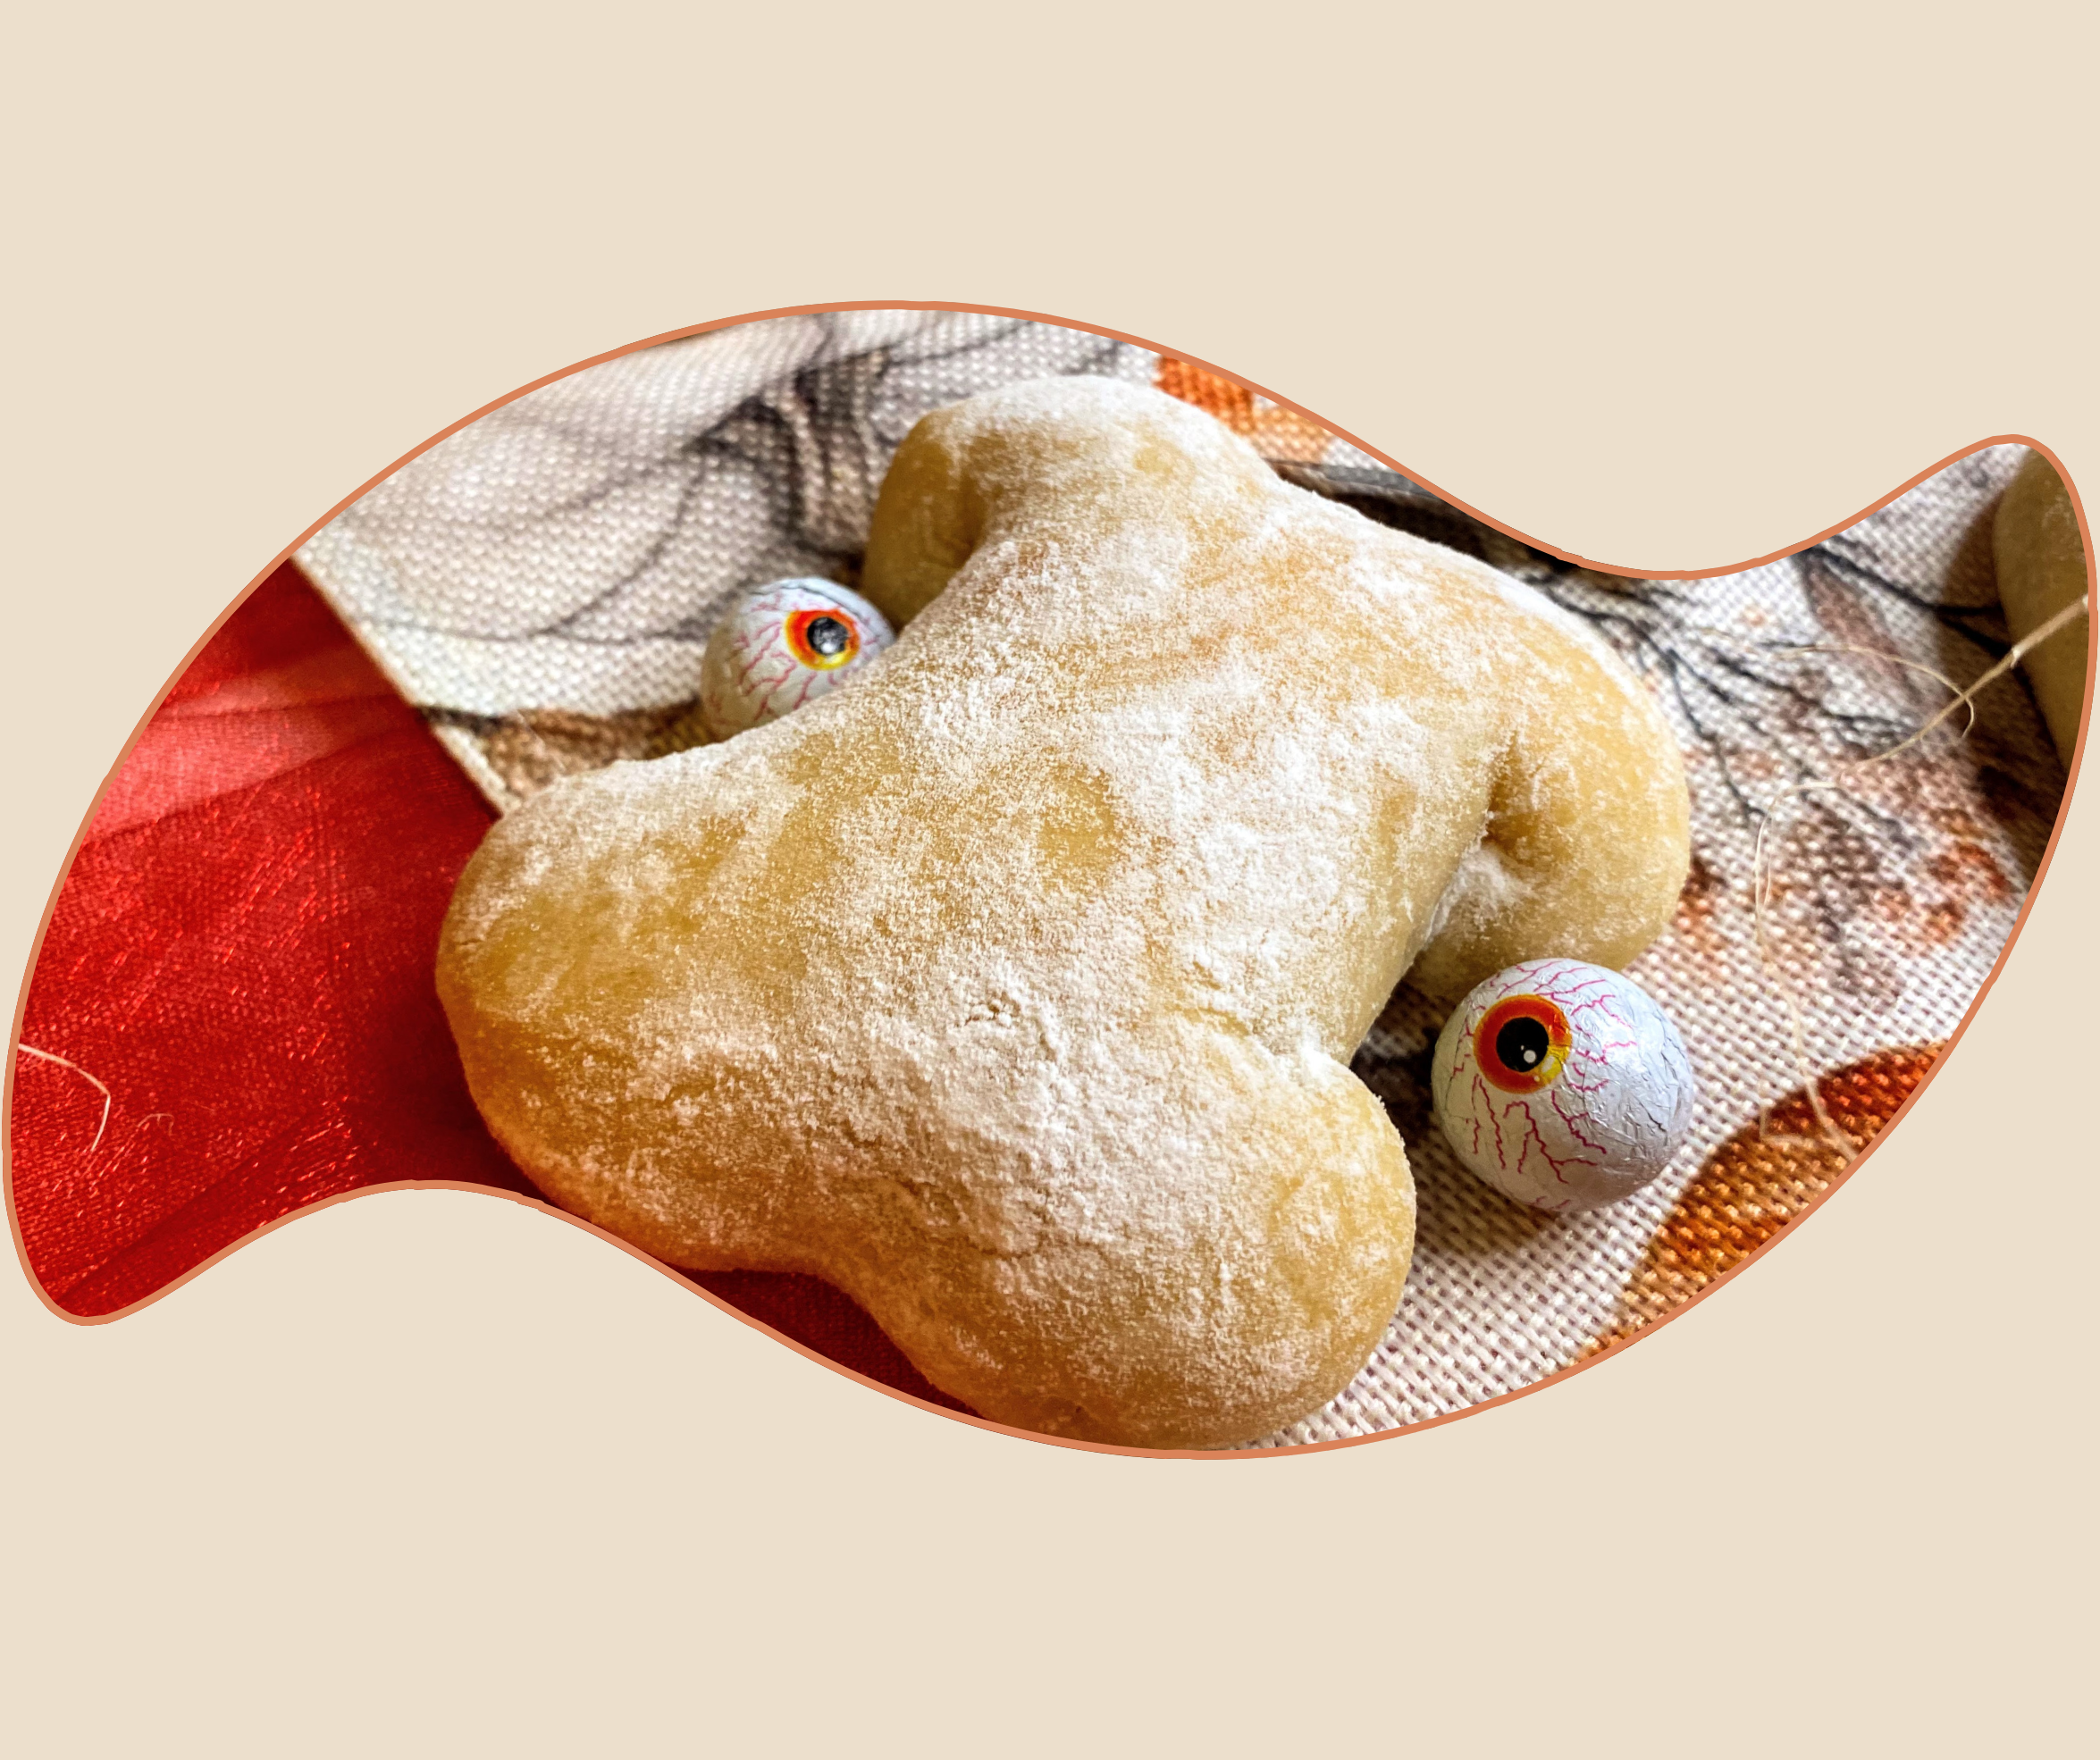
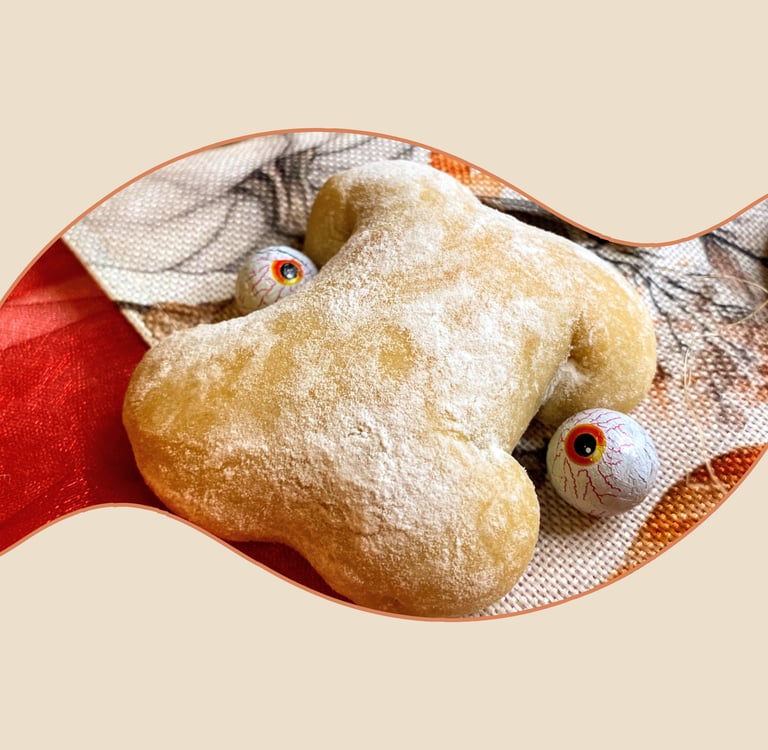
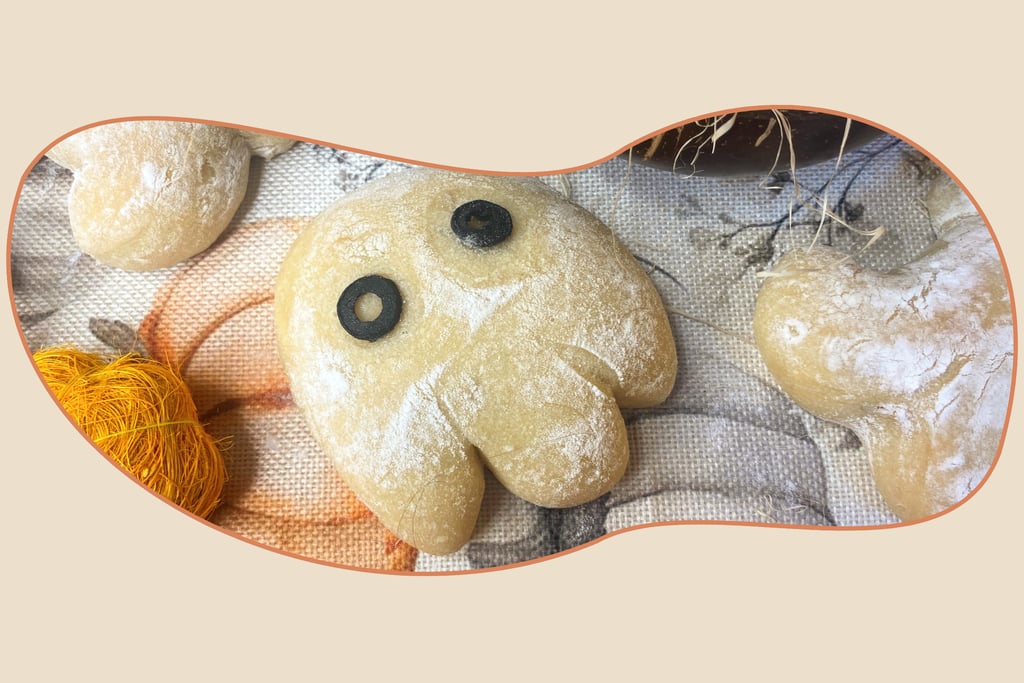
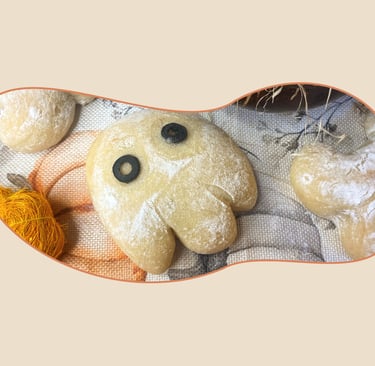
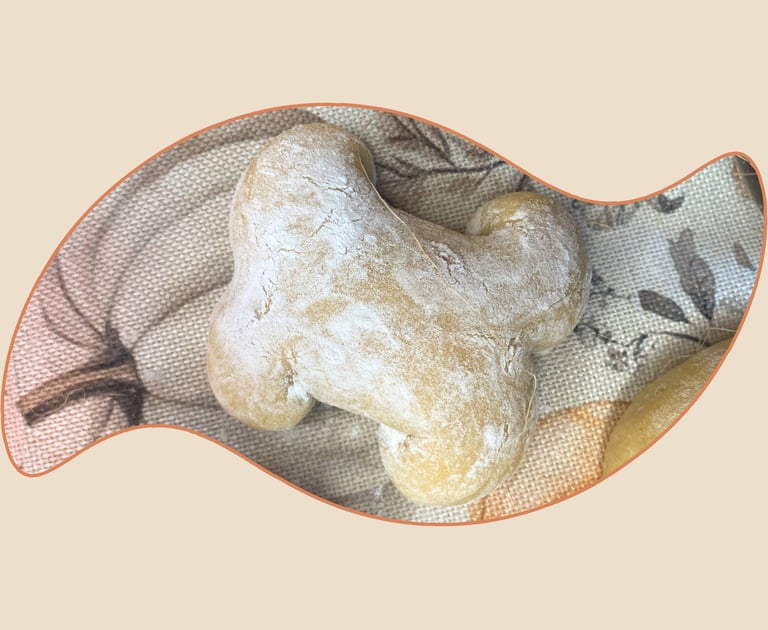
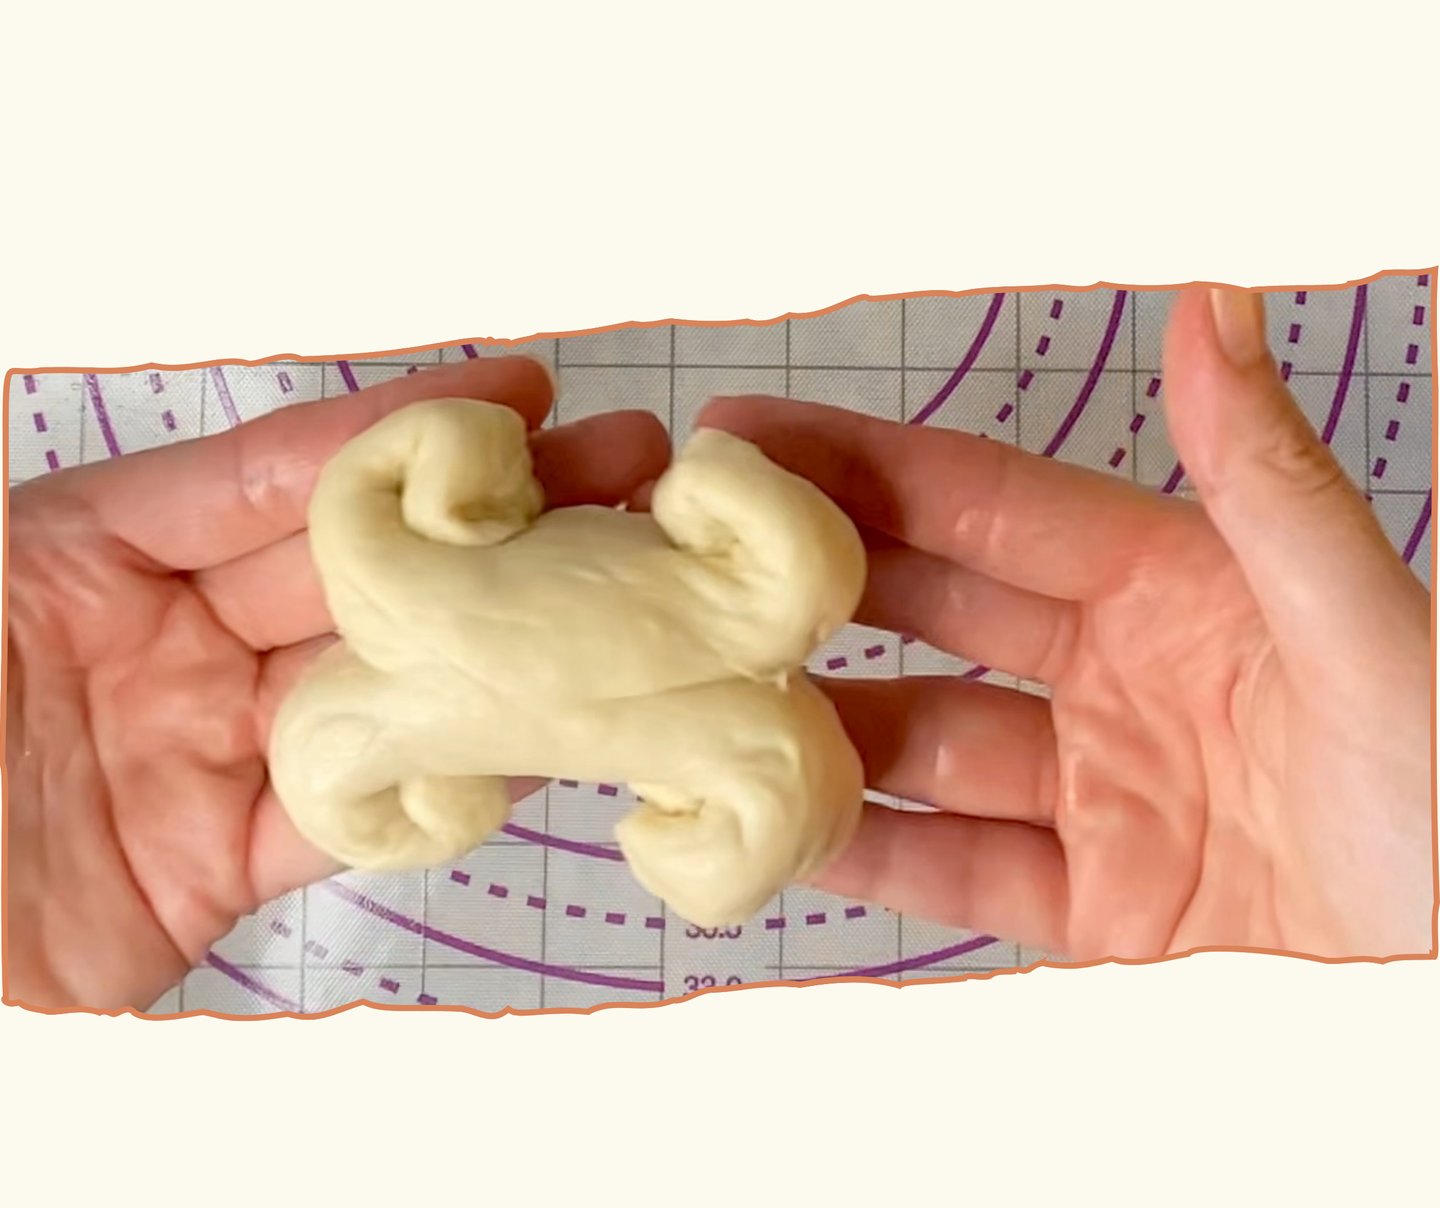
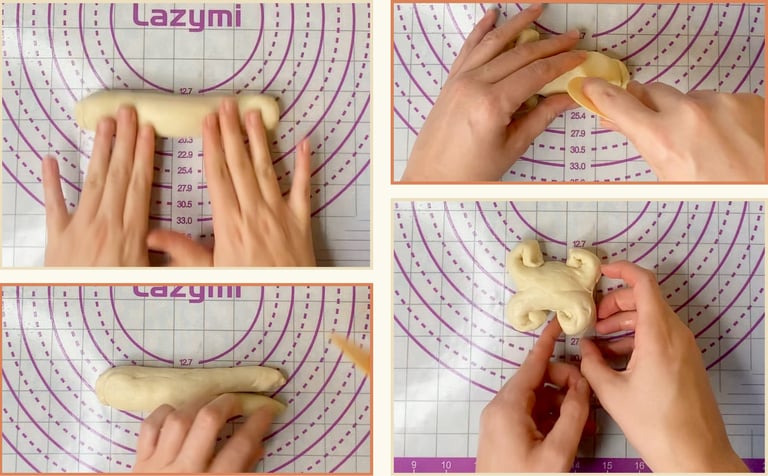
Shaping The Bones
Shaping The Ghosts
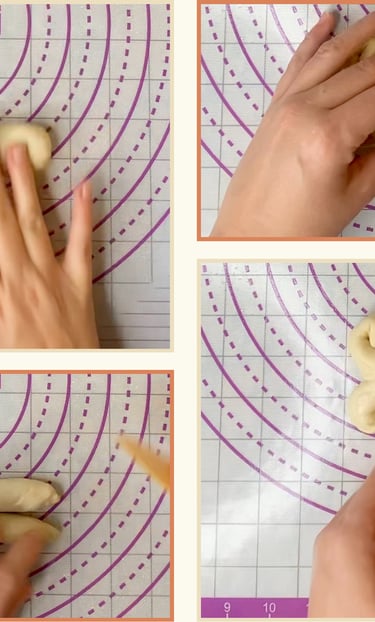
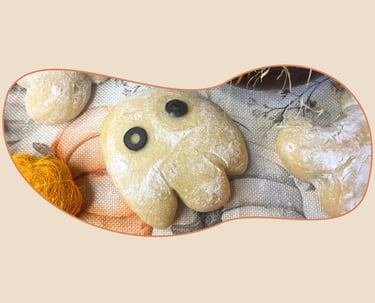
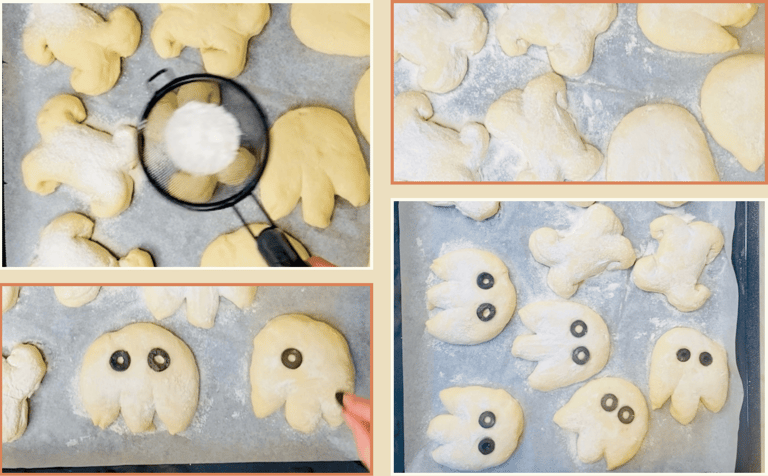
For the ghosts, I flattened a ball gently with my hand, shaping the top into a soft oval and the bottom into a slightly flatter edge. Then, using a dough scraper or scissors, I made two small cuts at the bottom and used my hands to round and stretch them slightly into a soft tail shape. You can see in the photos how the form comes together naturally once you shape it by hand.
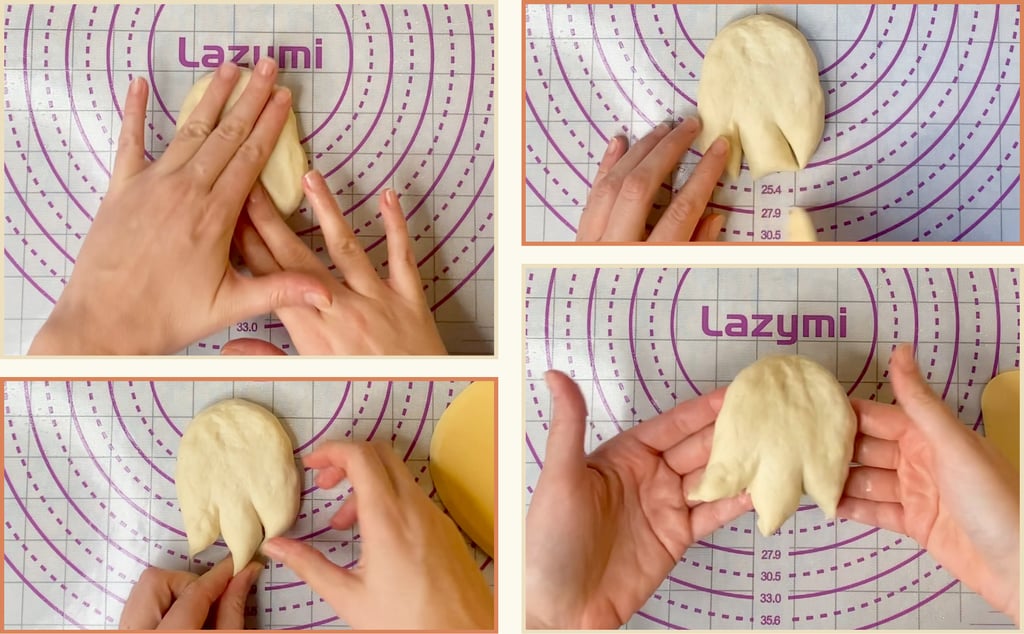
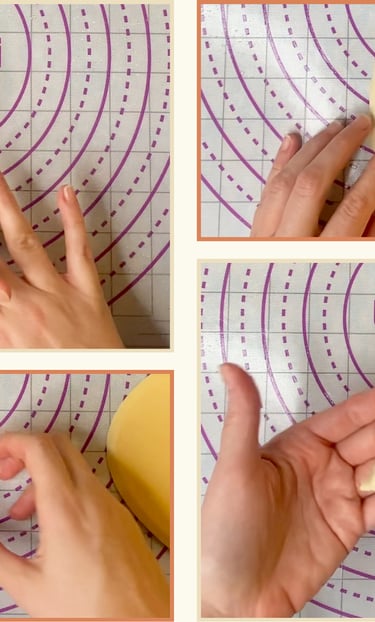
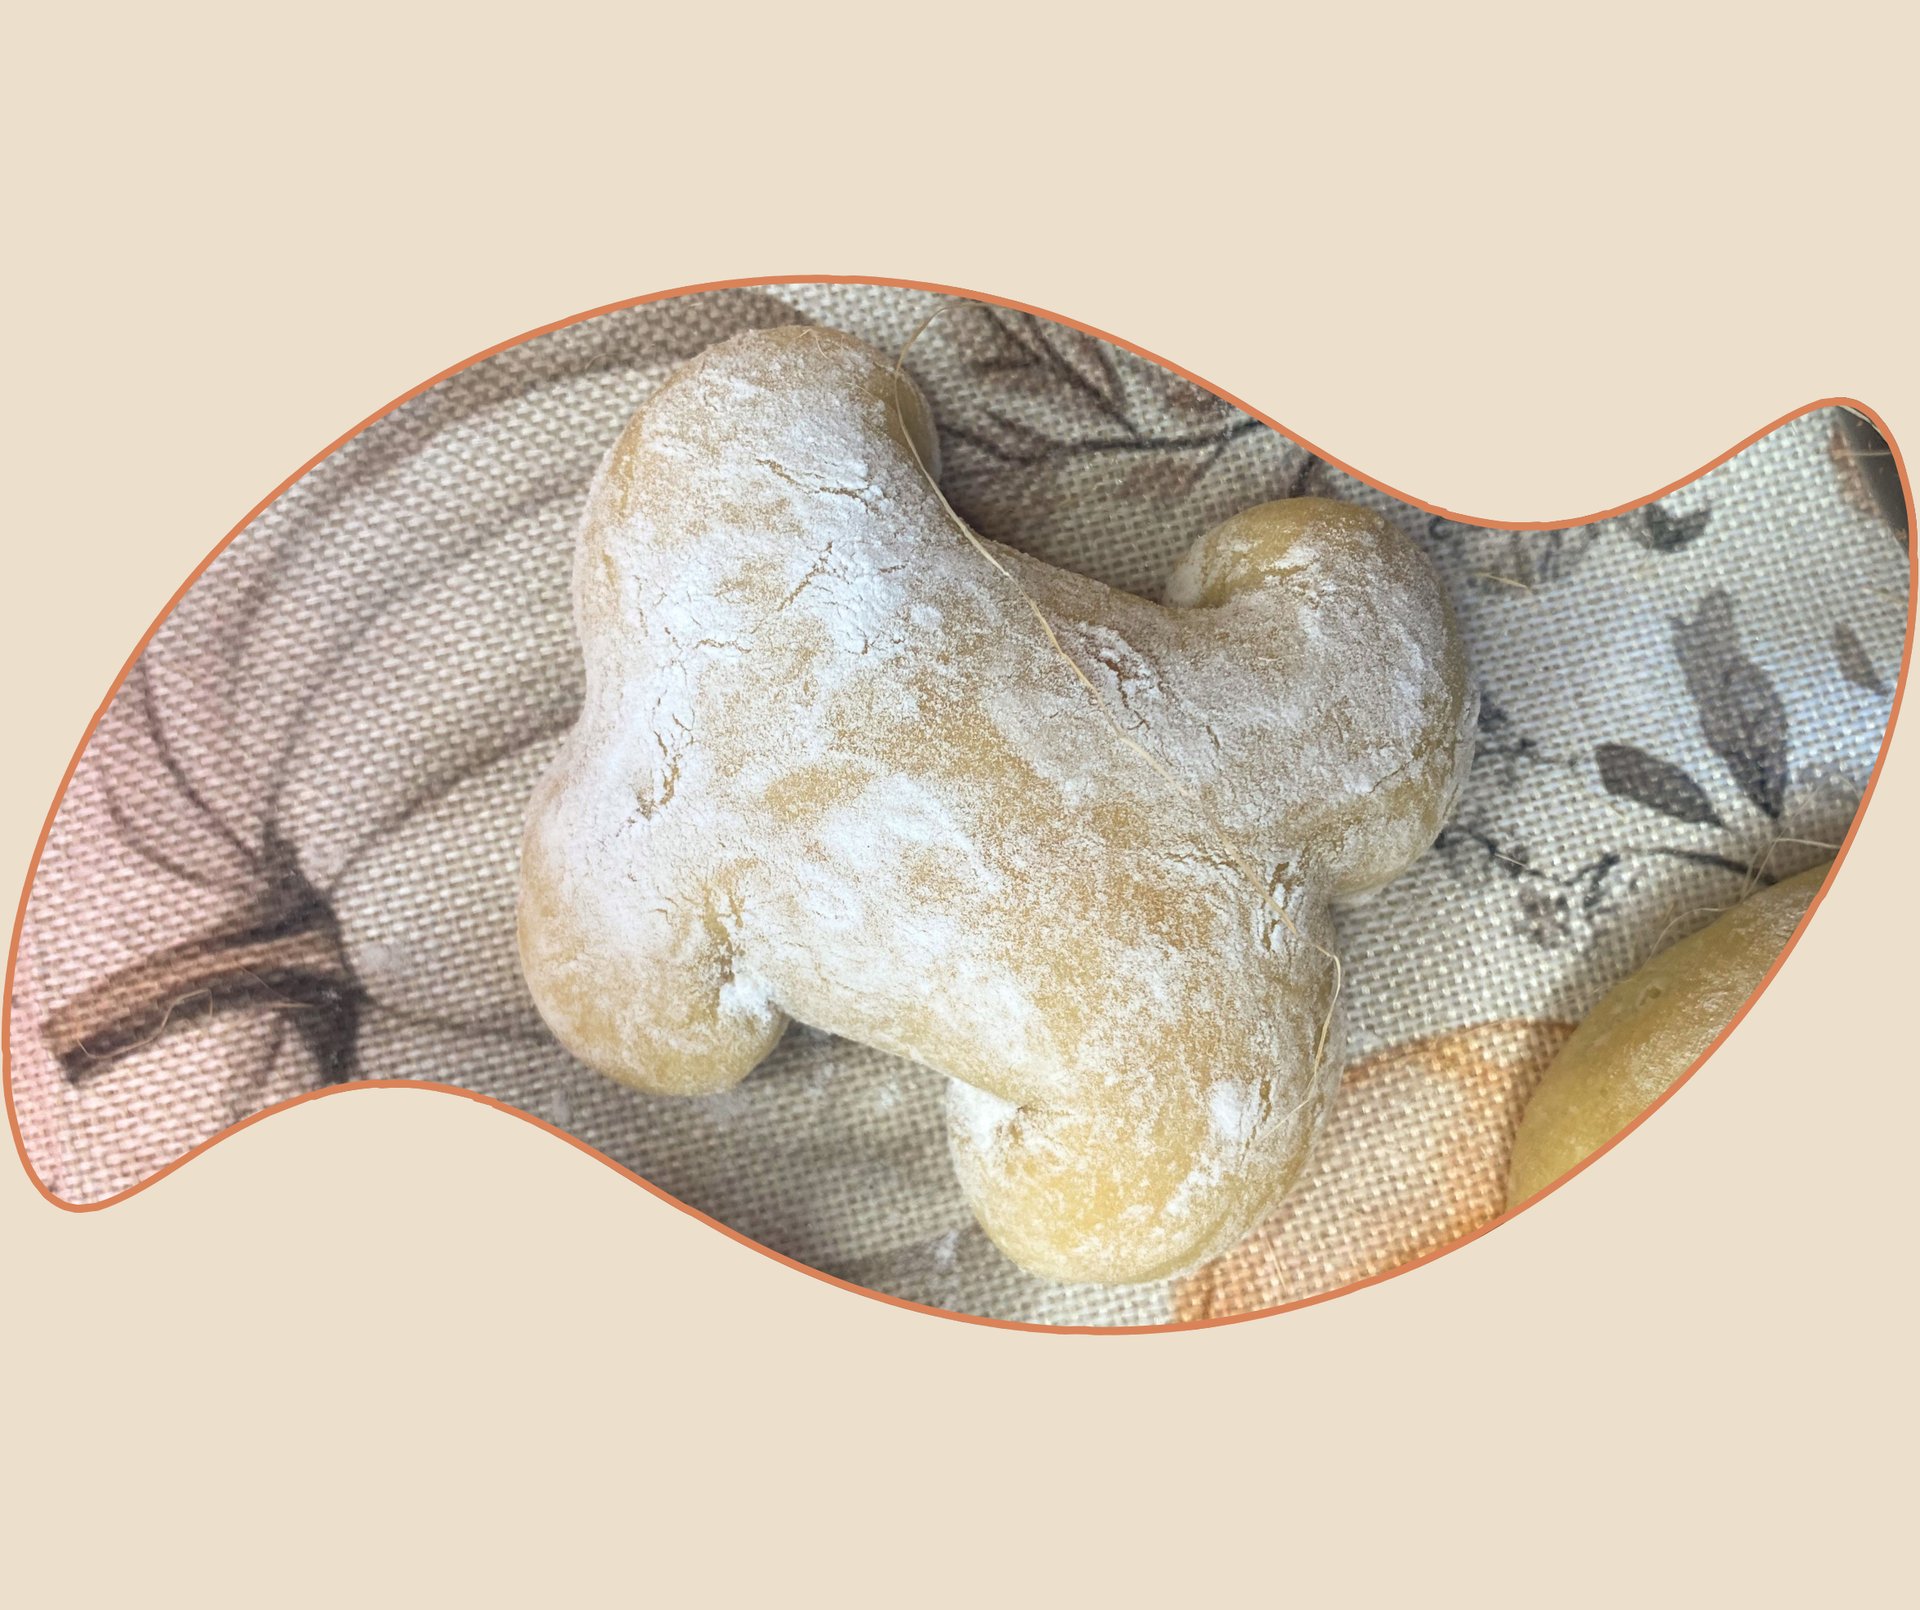
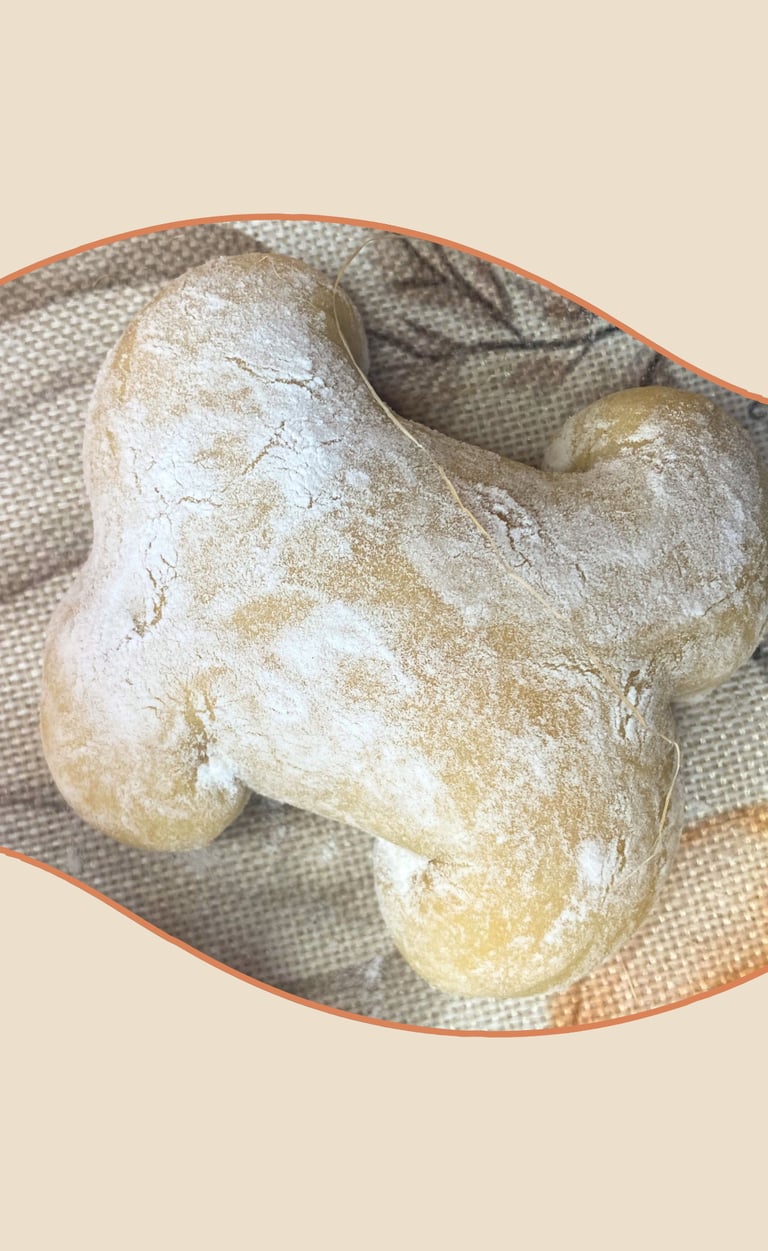
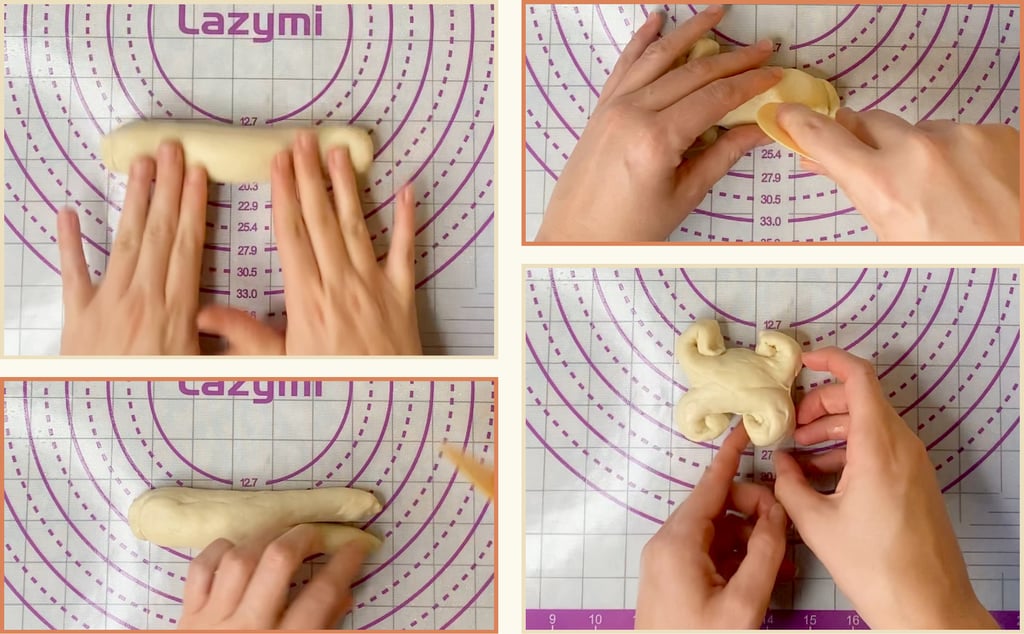
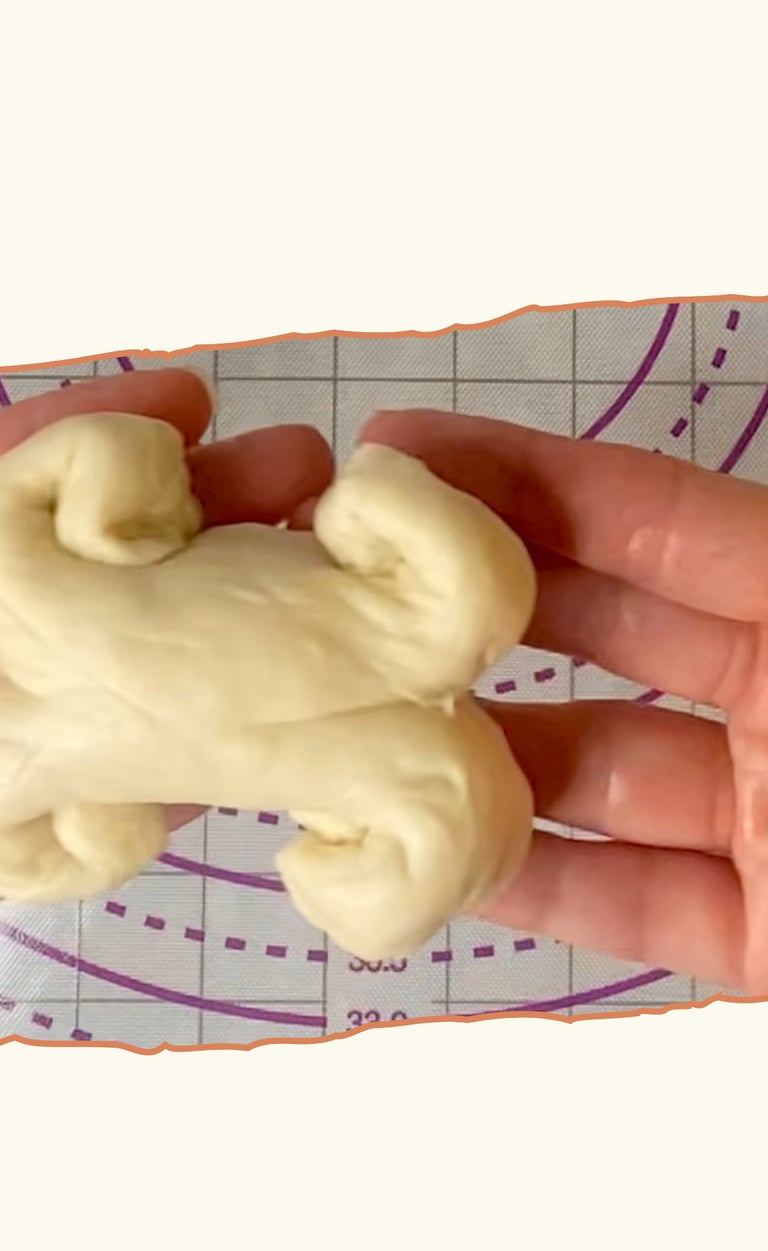
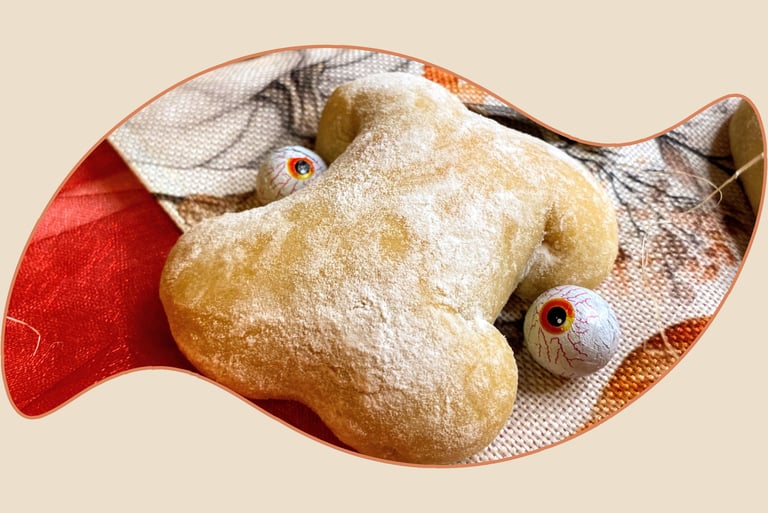
I rolled each ball into a 12–13 cm cylinder. Using a dough scraper or a pair of scissors, I made a clean cut right through the center of each tip, then gently rolled the two halves outward to form the bone “knobs.” It’s a simple move that gives a clear and playful shape.
Thinking about how to fill these buns?
Try them with our Pumpkin Cocoa Bliss, a sweet Halloween trick.
And if you’re in the mood for something savory, try our Comfy Creamy Pumpkin Soup ,

NOTE
Once shaped and finished, let the buns rest until they look slightly puffy and airy again. They lose a bit of volume while shaping, so this short rest helps them recover their light, fluffy texture before baking.
Baking
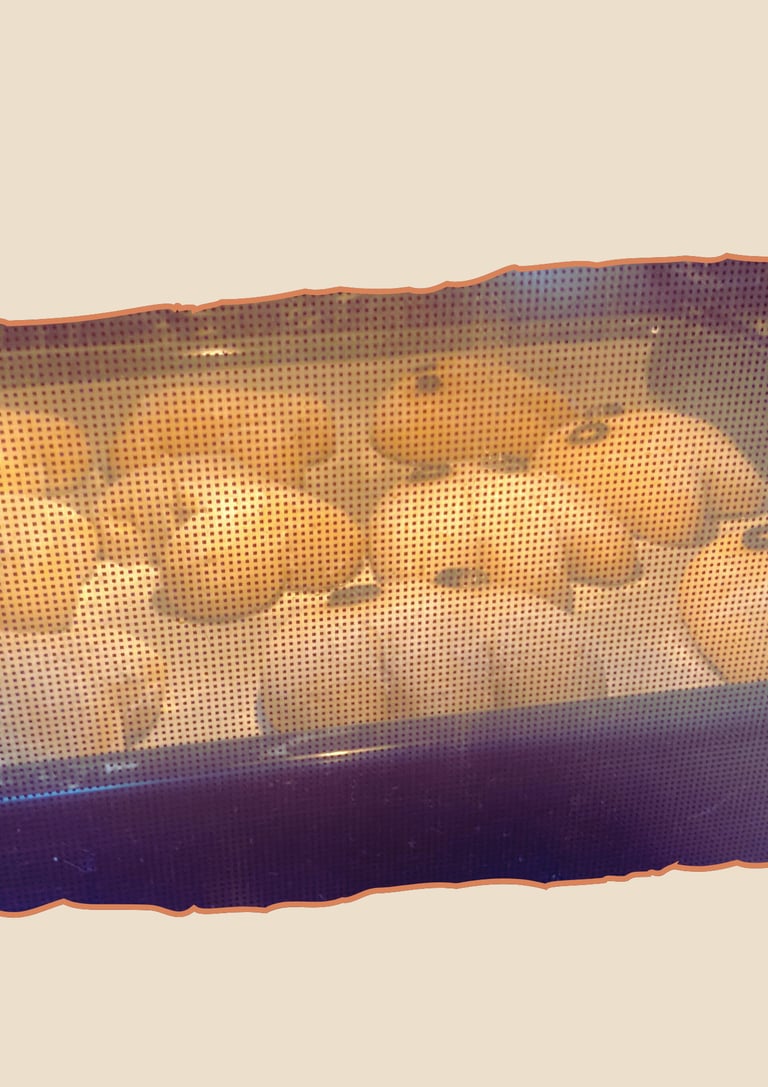
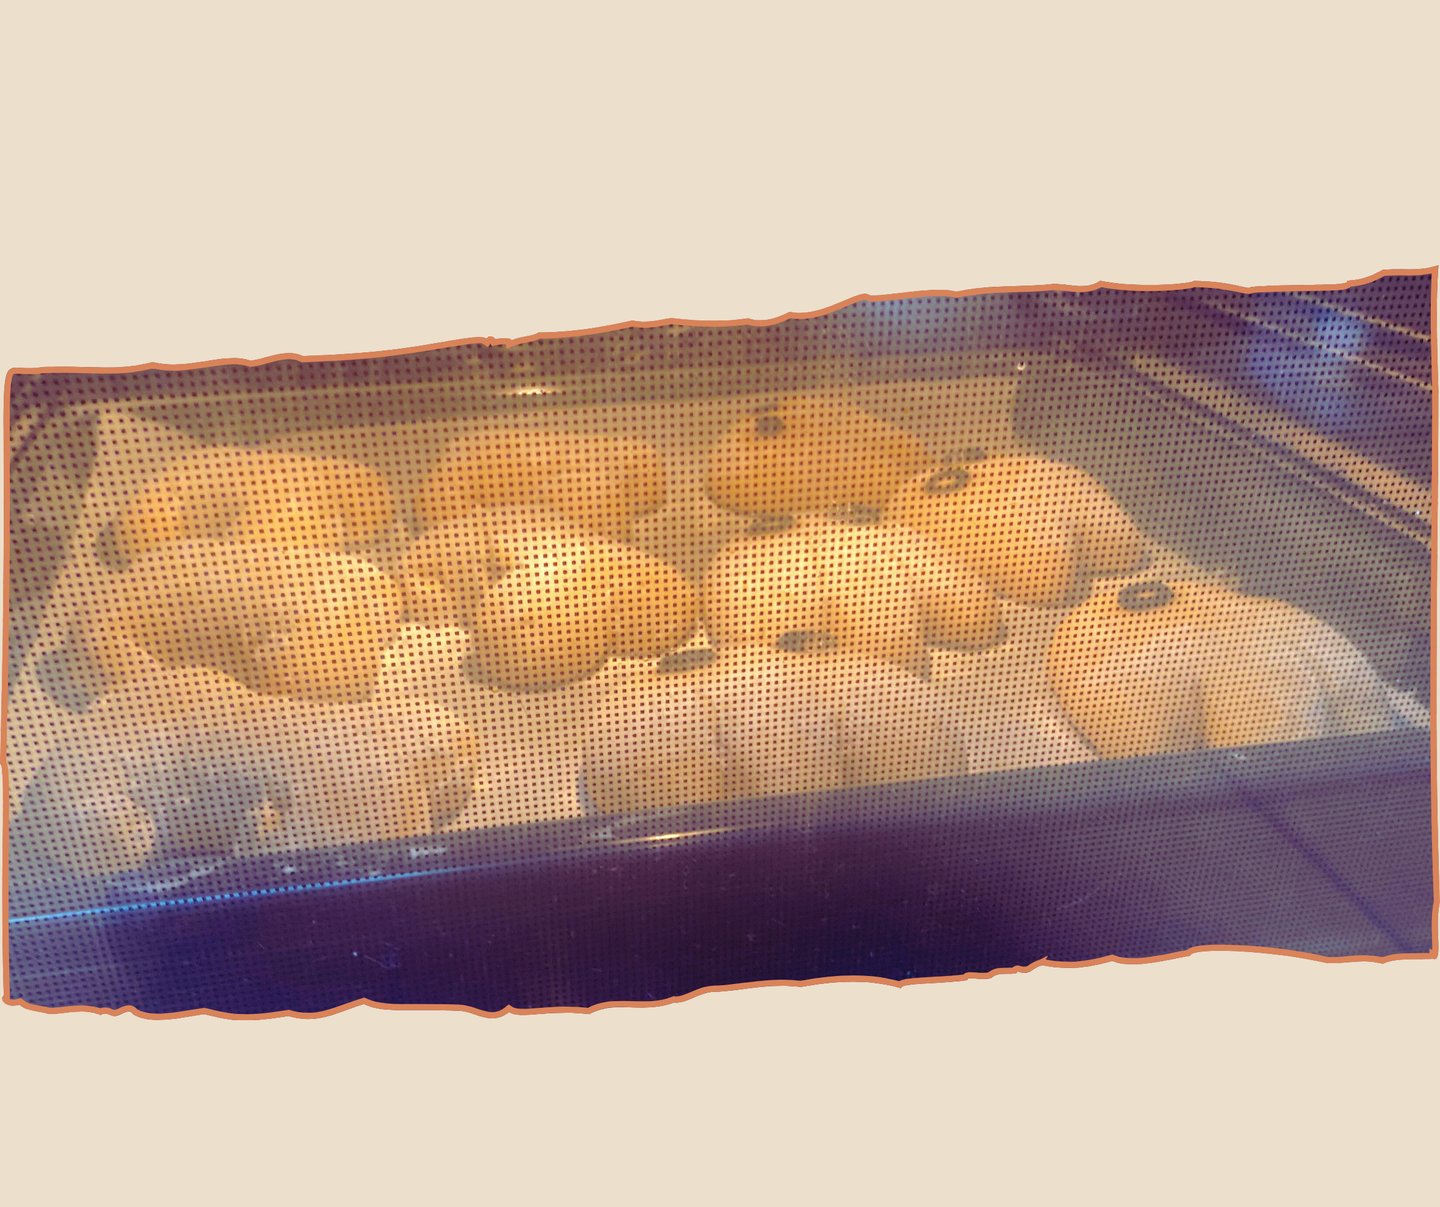
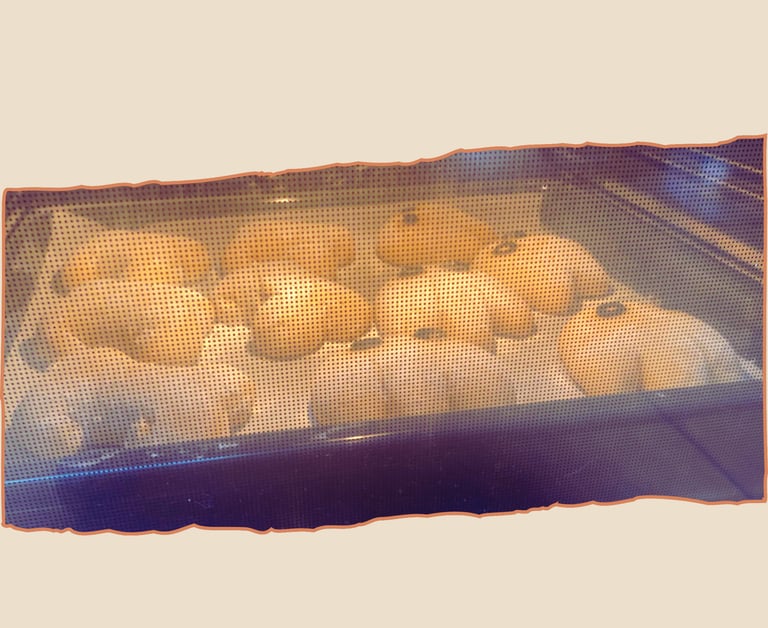
I preheated the oven to 180 °C / 350 °F with top and bottom heat. To keep the tops from browning too quickly, I placed an empty tray on the upper rack and baked for about 18 minutes. Then I removed the top tray and baked for another two to three minutes to get just a hint of color.
If you don’t want to use a top tray, bake as normal, and if they start to brown too fast, tent them loosely with aluminum foil. They should come out soft, lightly golden, and still pale enough to look like spooky bones and ghosts. I cooled them on a wire rack before serving.
Final Touch
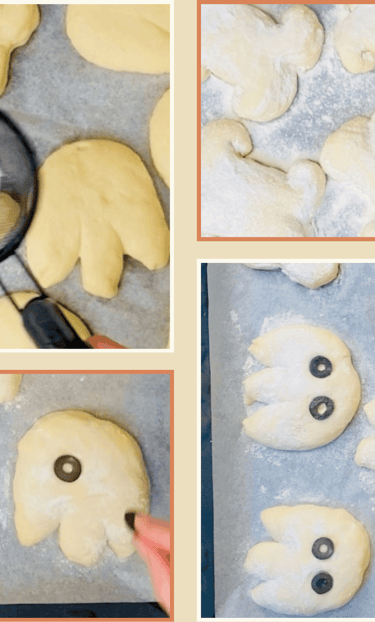
For the final finish, coat the buns and bones with a light dusting of rice flour for a pale, matte look, or brush them with beaten egg if you prefer a shiny, glazed surface. After dusting or brushing, add the eyes made from sliced black olives, pressing them gently into the dough so they stay in place while baking.


Every Halloween, I love to experiment in the kitchen, trying new recipes, re-creating ideas I’ve seen, or bringing to life the ones that just pop into my head.
This time, I started with a recipe for little bone-shaped milk buns I found online and ended up creating my own sourdough version (and adding a few ghosts along the way).
The original recipe uses baker’s yeast, a quick dough that rises in about an hour. But I was curious to see how it would work with sourdough starter, so I gave it a try, keeping the same ingredients but changing the process. It turned into a fun and insightful experiment.
Two Ways to Make It
In this post, I’ll walk you through the version I made with sourdough, where I experimented a little with how I usually work with my starter, and also share the original recipe made with dry or fresh yeast for anyone who wants to try the quicker version.
Ingredients:
500 g strong/bread flour
250–270 ml warm milk
10 g honey
50 g sunflower or light olive oil
8 g salt
100 g active sourdough starter (or 5 g instant dry yeast / 15 g fresh yeast for the classic version)
For decoration:
For a pale, ghostly look: rice flour for dusting
If you prefer a shiny, glazed surface: 1 beaten egg
For the ghosts: sliced black olives for the eyes
The Sourdough Version (My Experiment)
I mixed the flour and milk first and let the mixture rest for about thirty minutes. This autolysis makes the dough more manageable, especially in enriched doughs. It’s not how I always do it, but this time I added the sourdough starter after autolysis, when the dough was just flour and milk. Because this version isn’t very hydrated, incorporating the starter at that point can be quite difficult; the dough feels tight and resistant at first. If you want an easier start, it’s perfectly fine to dissolve your sourdough starter in the warm milk before adding the flour. In this recipe, both methods work, so choose whichever feels more comfortable to you.
Once the starter was mixed in, I added the honey and worked it through. When the honey was about halfway integrated, I added the salt, and only then the oil. This order matters: honey first, then salt, and oil at the end so it doesn’t interfere with gluten development. The dough feels firm at first, which is normal for an enriched dough. I kneaded for about ten minutes by hand, taking short two-to-three-minute rests whenever it tightened up. Those pauses let the gluten relax and make the dough easier to finish. In a stand mixer, six to seven minutes on low to medium speed should be enough.
The Original Recipe with Yeast
If you prefer the classic version, dissolve 5 g of instant dry yeast (or 15 g of fresh yeast) in a small amount of warm milk, just warm to the touch, never hot. Let it sit for about five minutes until it looks slightly foamy on the surface; this means the yeast is active and ready to use.
In a large bowl, mix the flour and salt, then add the milk with the yeast, followed by the honey and oil. Mix until everything starts to come together into a soft dough. It should feel slightly tacky but not sticky. If the dough feels too dry, add a tablespoon or two of extra milk until it feels smooth and elastic.


I transferred the dough to a lightly oiled bowl, covered it, and let it rise at around 24–25 °C. It took roughly four to four and a half hours. Don’t chase a perfect double here. You’re looking for about a 70% volume increase and a gentle, slow spring-back when you press the surface with a fingertip.
Knead for about eight to ten minutes by hand, or five to six minutes in a stand mixer, until the dough becomes silky and stretches easily without tearing. Compared to the sourdough version, this dough will feel a bit softer and lighter, which makes shaping easier later on.
Once kneaded, place it in a lightly greased bowl, cover it with a clean cloth, and leave it to rise in a warm, draft-free spot (around 24–26 °C / 75–78 °F). Let it proof for 45–60 minutes, or until it has almost doubled in size and feels light and airy when pressed gently with your finger.

This yeast version rises faster and gives a slightly sweeter, milder flavor, perfect for both sweet and savory fillings. From this point onward, the shaping, proofing, and baking steps are exactly the same as in the sourdough version.
NOTE
Turn the dough onto a lightly floured surface, divide it into 90 g portions, shape each one into a smooth ball, and let them relax for ten minutes.
Shaping The Bones
Shaping The Ghosts
For the ghosts, I flattened a ball gently with my hand, shaping the top into a soft oval and the bottom into a slightly flatter edge. Then, using a dough scraper or scissors, I made two small cuts at the bottom and used my hands to round and stretch them slightly into a soft tail shape. You can see in the photos how the form comes together naturally once you shape it by hand.
NOTE
Once shaped and finished, let the buns rest until they look slightly puffy and airy again. They lose a bit of volume while shaping, so this short rest helps them recover their light, fluffy texture before baking.

I rolled each ball into a 12–13 cm cylinder. Using a dough scraper or a pair of scissors, I made a clean cut right through the center of each tip, then gently rolled the two halves outward to form the bone “knobs.” It’s a simple move that gives a clear and playful shape.

Thinking about how to fill these buns? Try them with our Pumpkin Cocoa Bliss, a sweet Halloween trick.
And if you’re in the mood for something savory, try our Comfy Creamy Pumpkin Soup, a cozy bowl full of autumn goodness. 🍂
Baking
I preheated the oven to 180 °C / 350 °F with top and bottom heat. To keep the tops from browning too quickly, I placed an empty tray on the upper rack and baked for about 18 minutes. Then I removed the top tray and baked for another two to three minutes to get just a hint of color.
If you don’t want to use a top tray, bake as normal, and if they start to brown too fast, tent them loosely with aluminum foil. They should come out soft, lightly golden, and still pale enough to look like spooky bones and ghosts. I cooled them on a wire rack before serving.
Final Touch
For the final finish, coat the buns and bones with a light dusting of rice flour for a pale, matte look, or brush them with beaten egg if you prefer a shiny, glazed surface. After dusting or brushing, add the eyes made from sliced black olives, pressing them gently into the dough so they stay in place while baking.
These buns are soft, slightly sweet, and perfect for both sweet and savory fillings. Try them with pumpkin spice cream cheese, apple-caramel butter, or a smooth chocolate ganache for a sweet touch. On the savory side, go for herbed cream cheese with toasted pepitas, roasted pumpkin with feta, or shredded chicken. You can even hollow them out slightly and serve them as tiny bread bowls for dips on a Halloween table.
These buns are soft, slightly sweet, and perfect for both sweet and savory fillings. Try them with pumpkin spice cream cheese, apple-caramel butter, or a smooth chocolate ganache for a sweet touch. On the savory side, go for herbed cream cheese with toasted pepitas, roasted pumpkin with feta, or shredded chicken. You can even hollow them out slightly and serve them as tiny bread bowls for dips on a Halloween table.
liss.
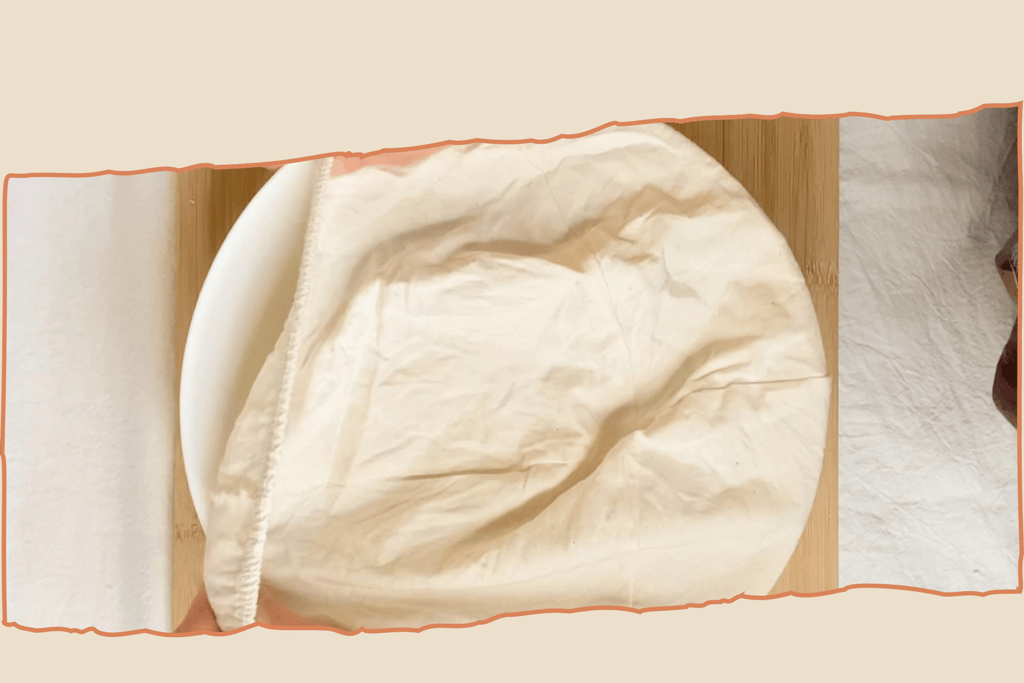
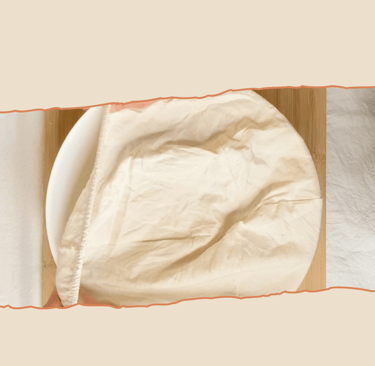
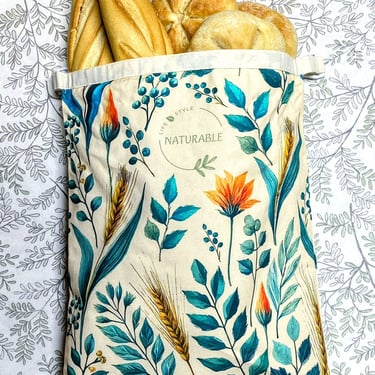
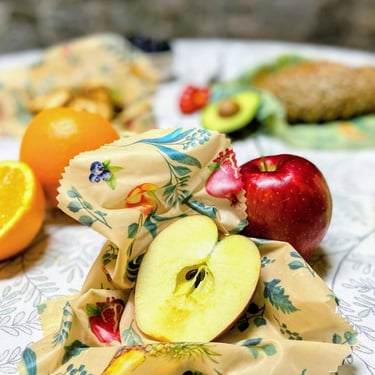
Have You Tried Our Beeswax Bags & Wraps?
A natural way to keep your food and bread fresh while reducing plastic in your kitchen.
Each set includes 2 reusable bread bags and 2 wraps, made from 100% cotton, beeswax, jojoba oil, and pine resin.
Simple, sustainable, and long-lasting.
Let’s Connect on Instagram
Subscribe to Our Newsletter
Join the Naturable Blog! Stay updated with our tips, kitchen hacks, and much more
Stay connected! Follow us for tips, updates, and a little extra inspiration for your home and kitchen.
Have a question or need assistance?
Feel free to contact us!
© 2025. Naturable – A brand of Horizon Origin LLC