Naturally fresh, beautifully stored

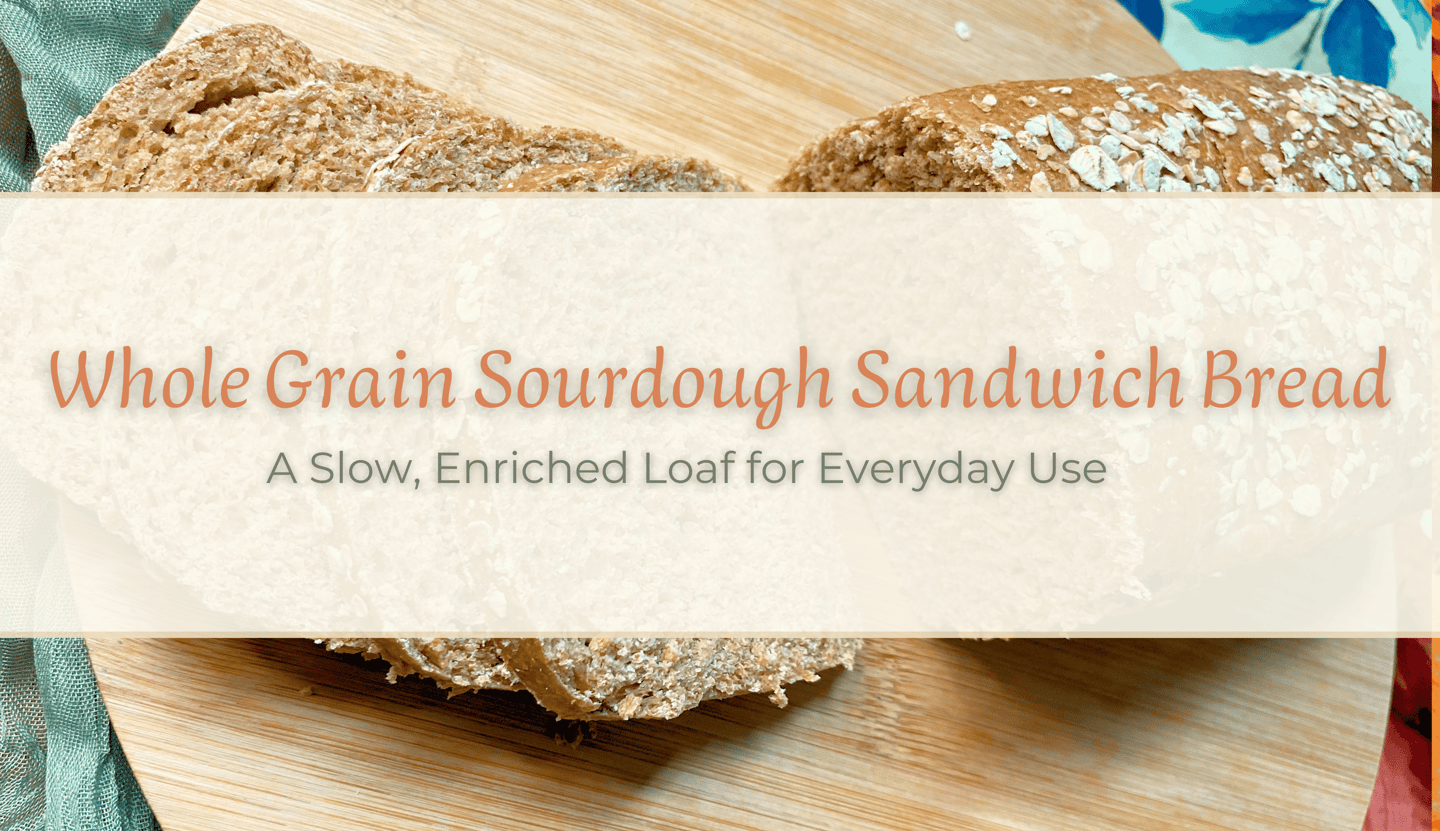
Whole Grain Sourdough Sandwich Bread: A Slow, Enriched Loaf for Everyday Use
A whole grain sourdough loaf baked in a pan, enriched with milk and butter, designed for everyday use. A calm, step-by-step approach focused on understanding the dough.
A

This is not a fast bread, and it’s not meant to be.
It’s a whole grain sourdough loaf, enriched with milk, butter, honey, and panela, baked in a loaf pan for a soft crumb, reliable slices, and everyday use.
Because of the flours and the enrichment, this dough behaves differently from white sourdough. It won’t pass a perfect windowpane test, and that’s completely fine.
This recipe is about understanding the dough, giving it time, and focusing on what really matters: structure, fermentation, and how the bread fits into daily life.
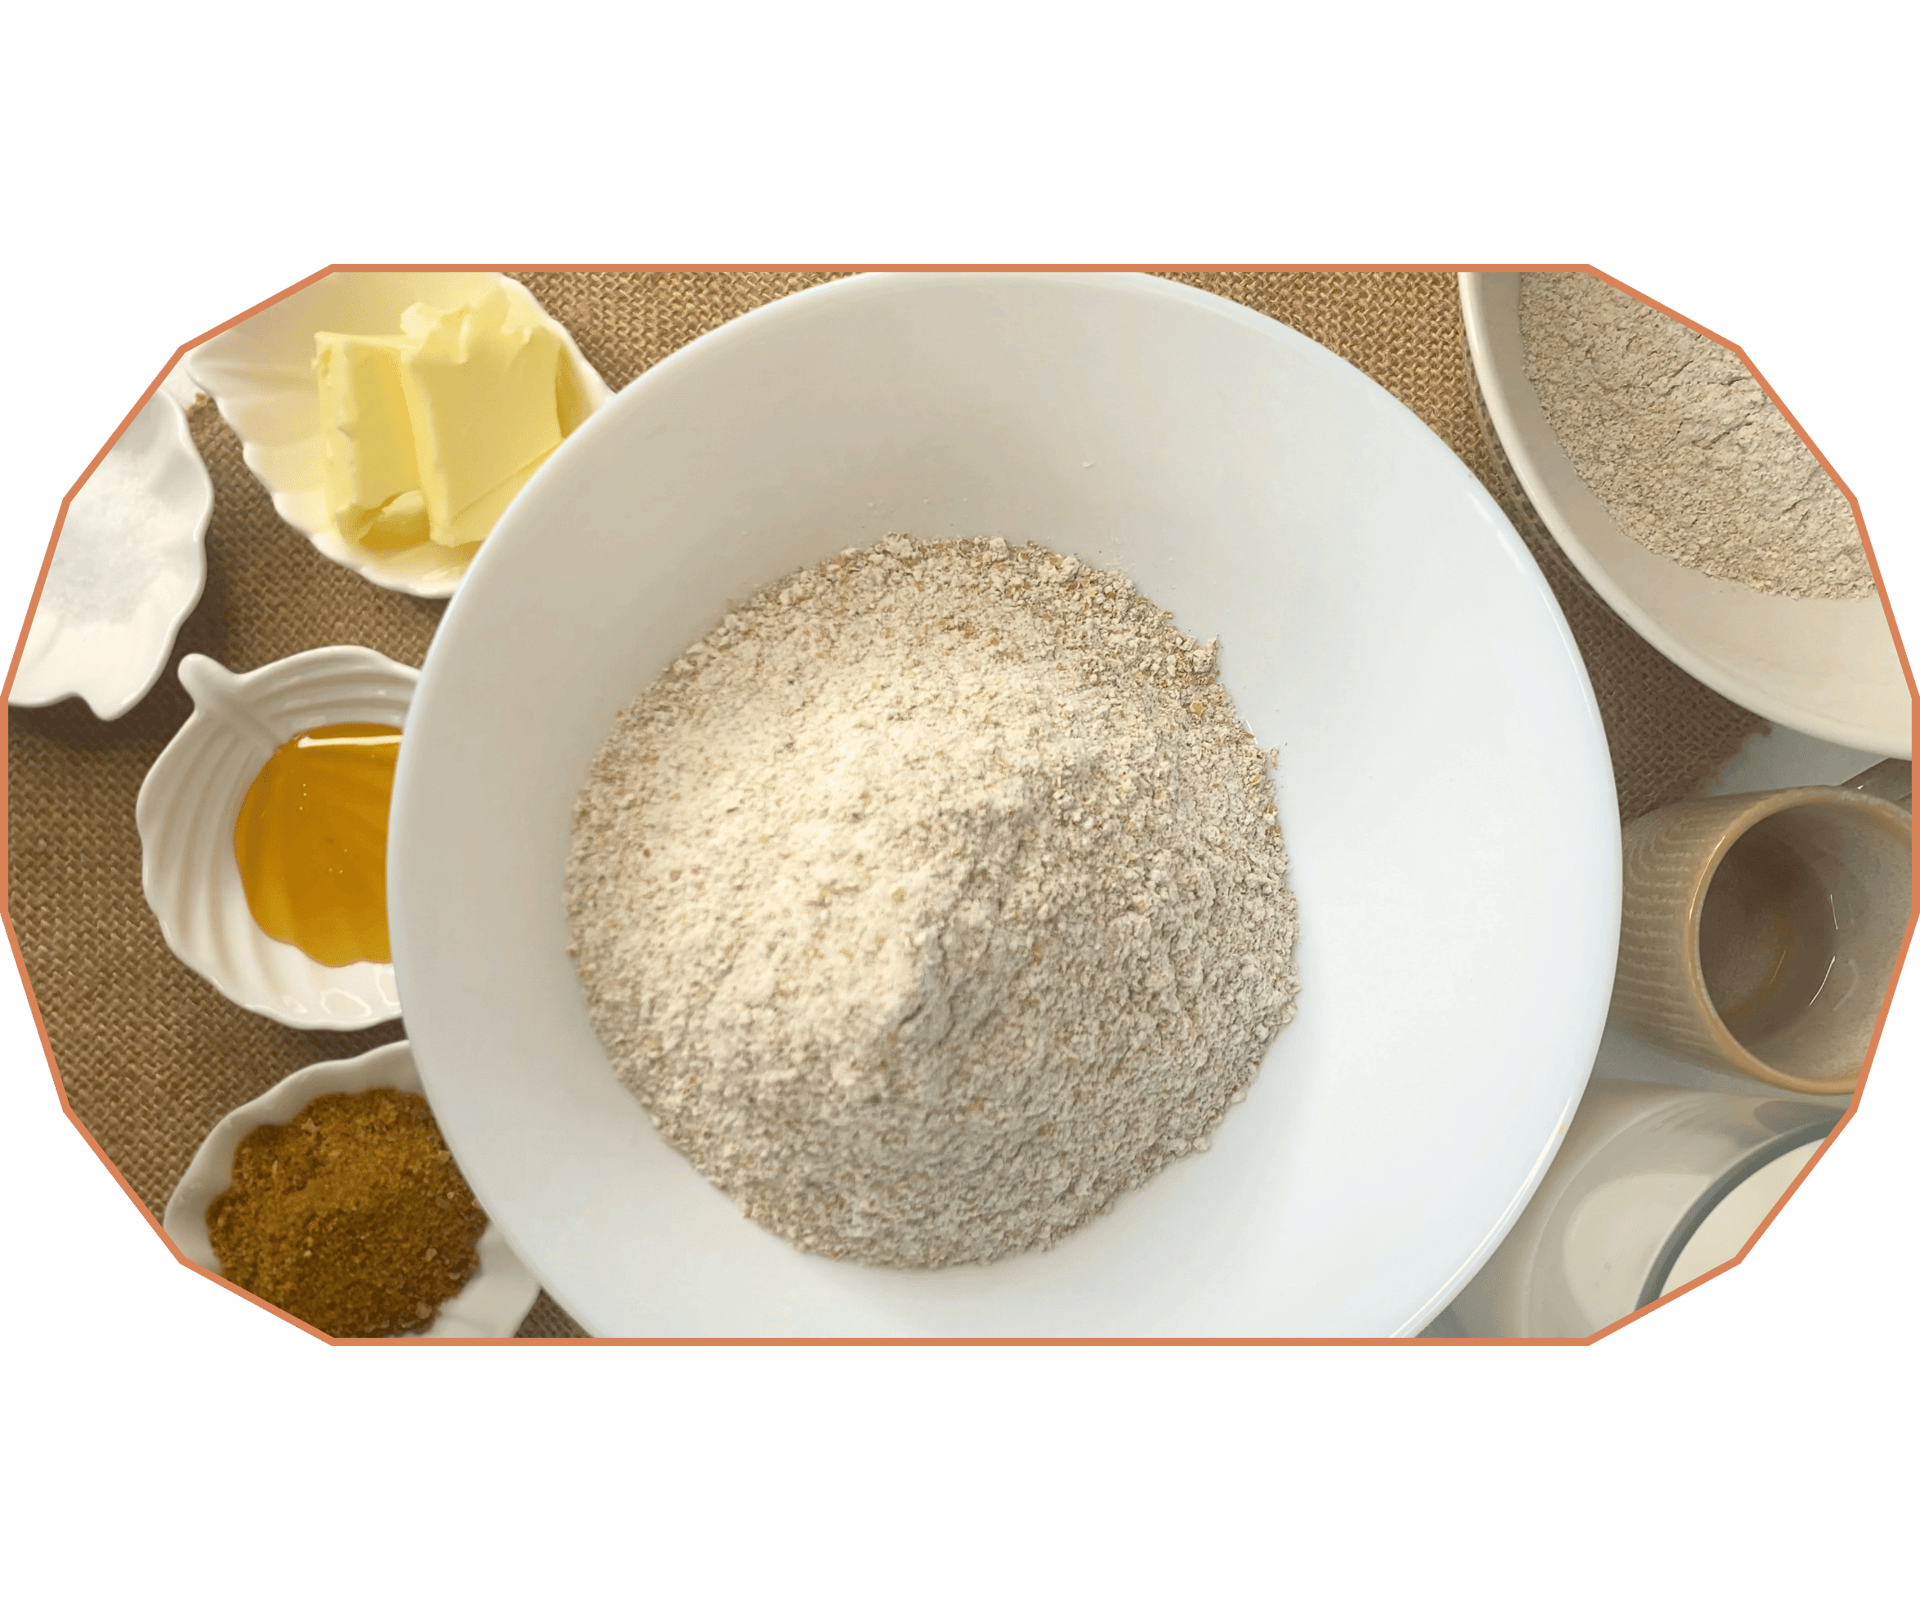
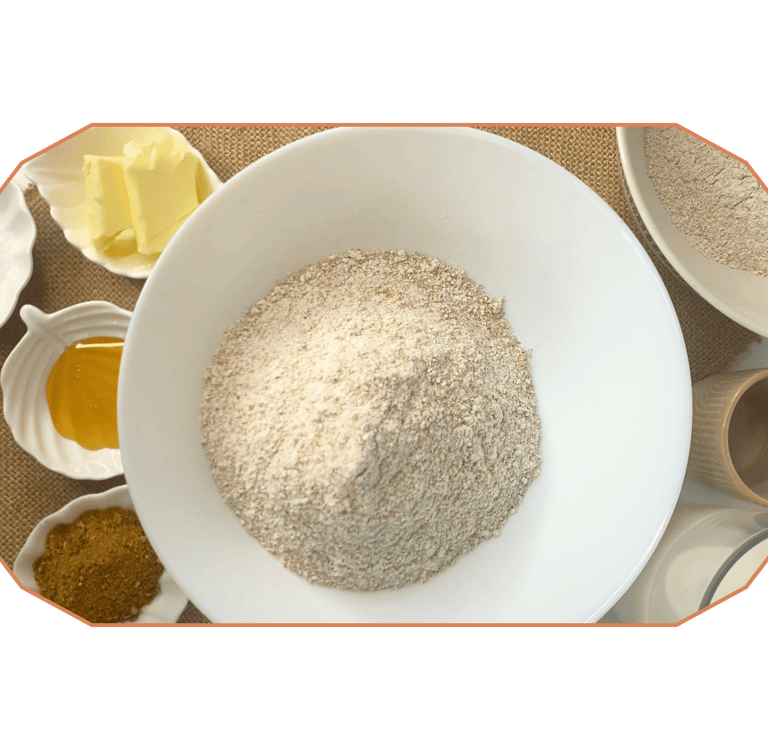
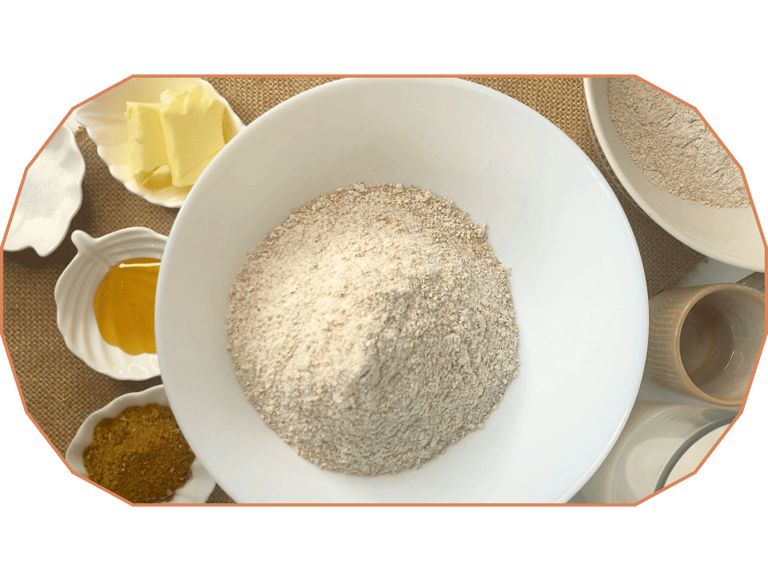
Ingredients
300 g whole wheat flour
100 g rye flour
100 g active sourdough starter (100% hydration)
300 g milk (used as most or all of the liquid)
30 g butter, softened
15 g sugar (panela, white sugar, or any sugar you prefer)
6–7 g salt
Notes:
The flour combination is flexible. You can use any whole grain flours you like and adjust the blend to your preference. The rye flour can be replaced with spelt, or you can make the loaf using 100% whole wheat flour if you prefer. Feel free to combine whole grain flours in a way that works for you.
This dough uses mostly milk as the liquid, but hydration may need slight adjustment depending on the flour you choose. You can add about 15 g of water if the dough feels too stiff, then adjust gradually if needed. Whole grain flours absorb liquid differently, so it’s best to add water little by little and let the dough guide you.
What you will need
A large bowl for mixing the dough
A spoon or your hands to combine the ingredients
A bench scraper (very helpful for handling the dough and keeping the surface clean)
A rolling pin, to shape the dough evenly before rolling
A sandwich loaf pan
A cooling rack, to let the loaf cool completely before slicing
Optional but helpful:
Parchment paper or a light coating of oil for the pan, to prevent sticking
A kitchen thermometer, if you like checking internal temperature for doneness
That’s all you need. No stand mixer, no special tools. Just simple equipment and time.

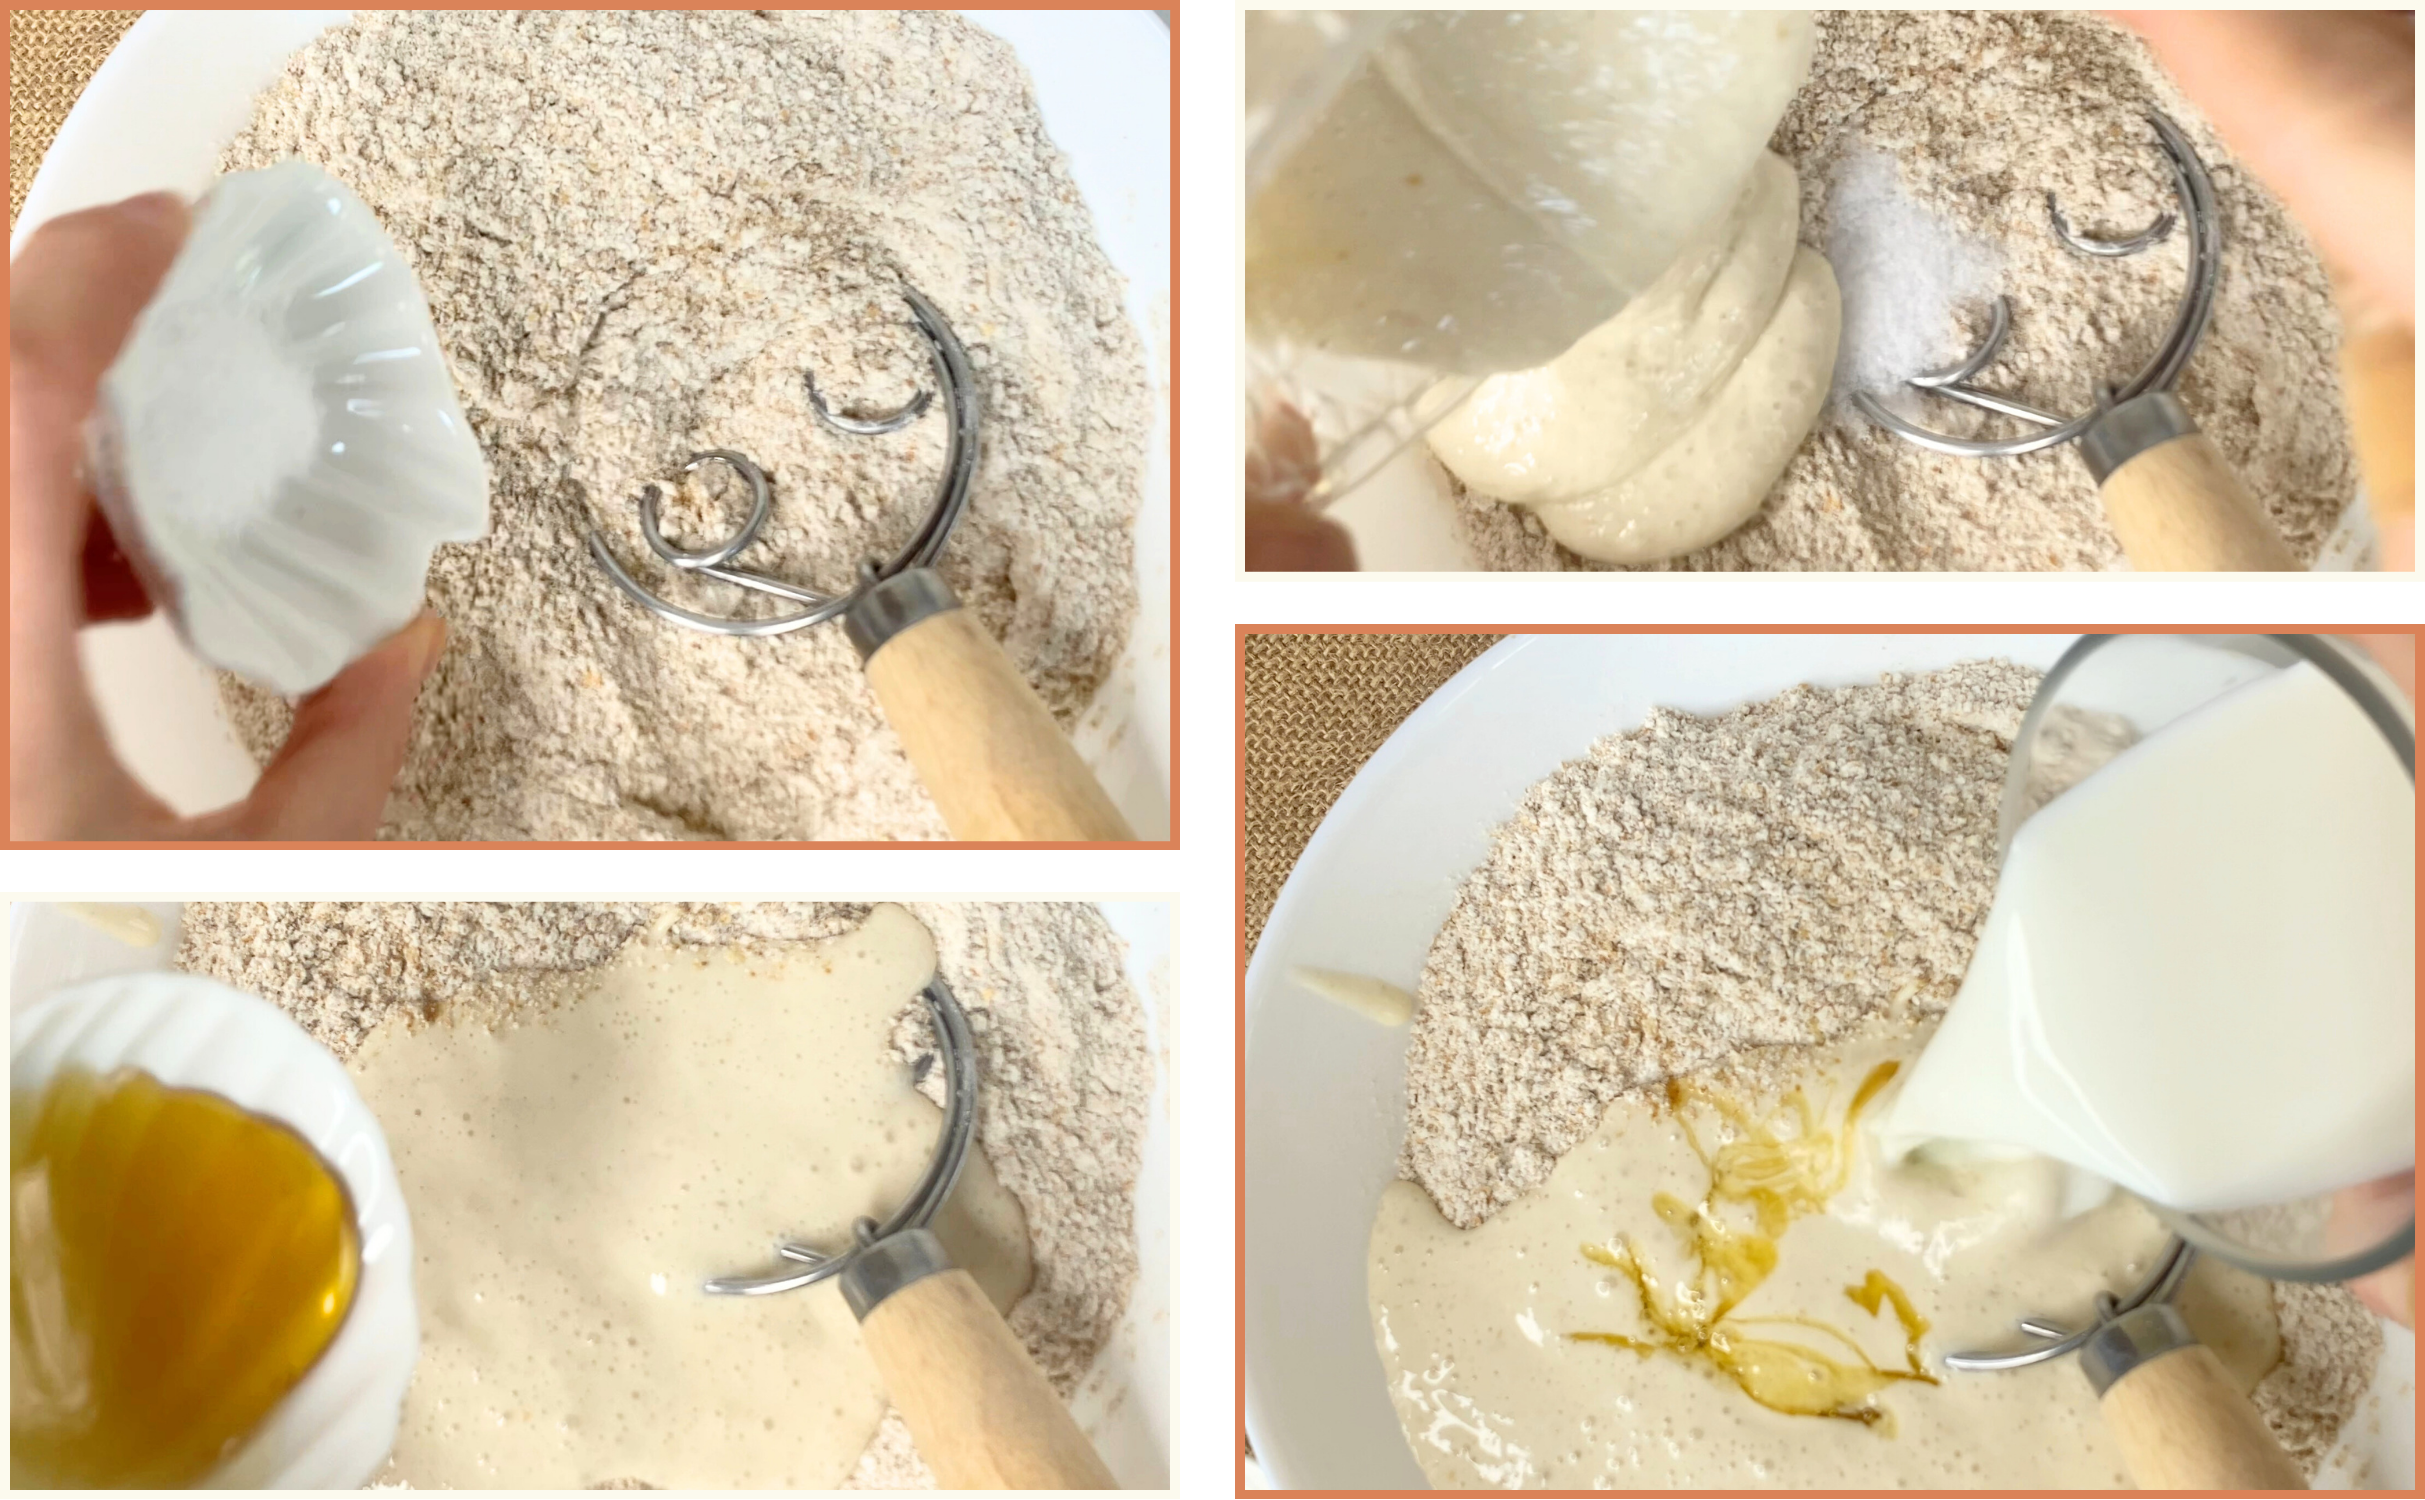
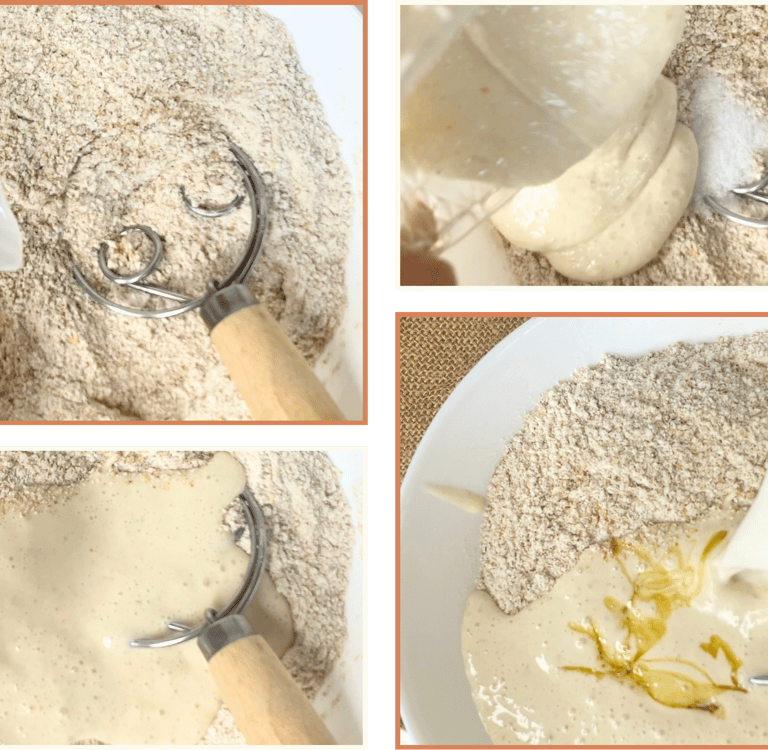
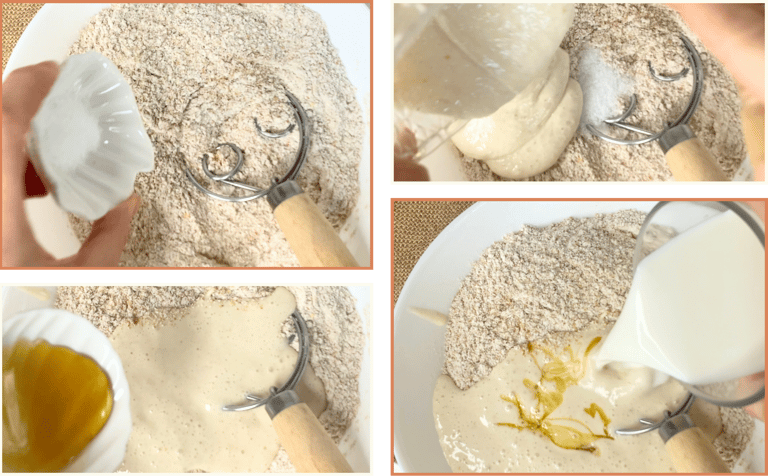
Mixing
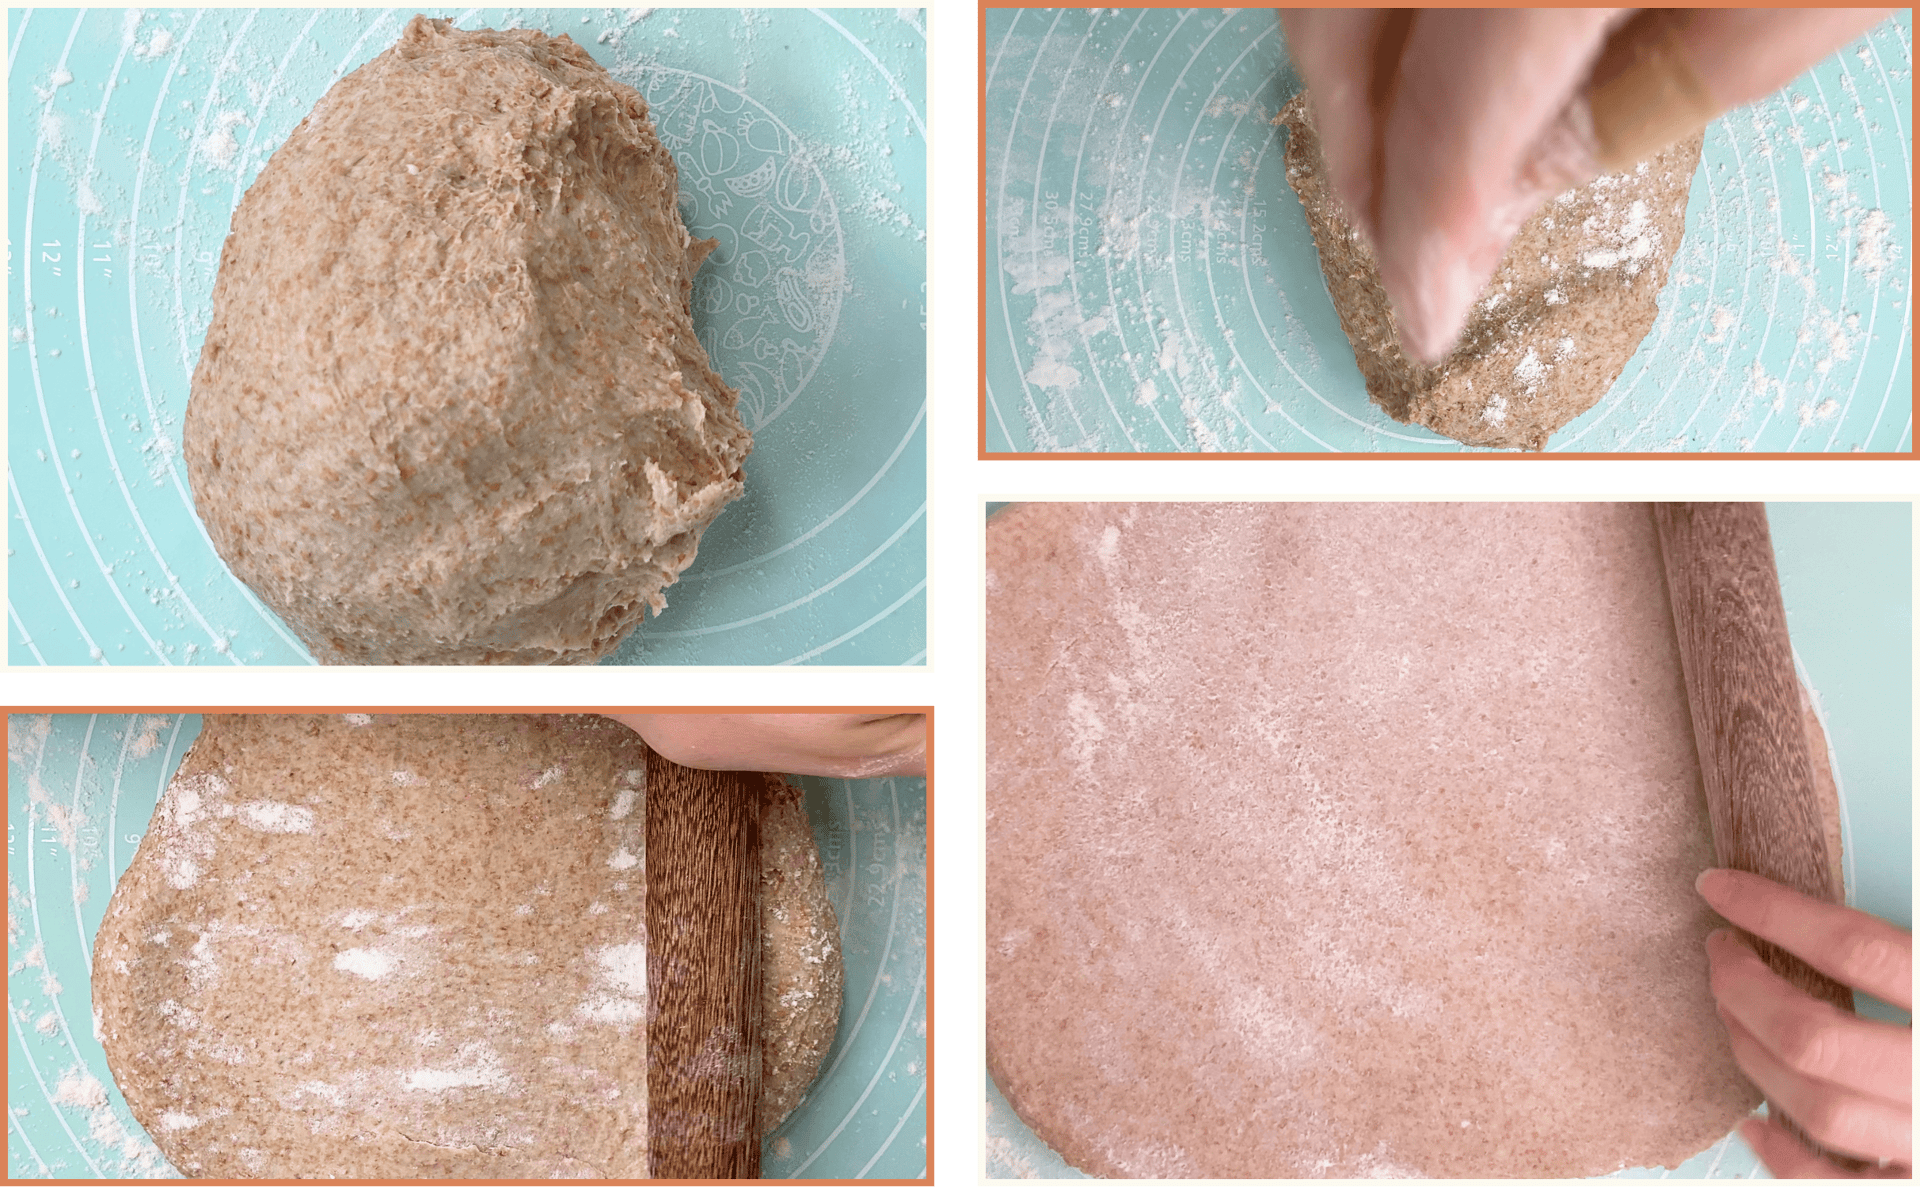
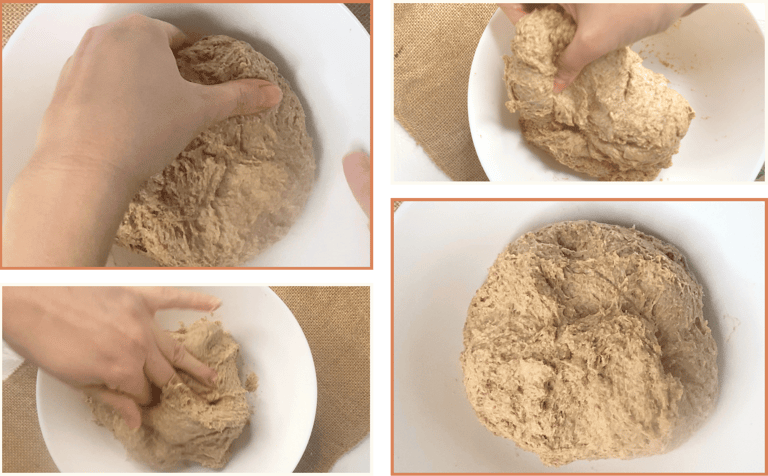
Start by mixing all the ingredients except the butter. In a large bowl, combine the whole wheat flour and the rye flour with most of the milk as the main liquid. Add the active sourdough starter, followed by the honey and the panela, and finally the salt. Mix until no dry flour remains and the dough looks fully combined. At this stage, the dough will feel soft and slightly weak, which is completely normal when working with whole wheat and rye, especially in enriched doughs made with milk.
Step by Step


Adding the butter and expectations around gluten development
Once the dough is cohesive, add the softened butter. Work it into the dough until it is fully absorbed and the dough no longer feels greasy. Continue kneading gently, just enough to bring everything together and give the dough some initial strength. Knead for about five to eight minutes, until the dough feels smoother than it did right after mixing.
Note: At this stage, it’s important to adjust expectations. This dough is not meant to develop strong or highly elastic gluten. Gluten development in this loaf depends heavily on the flours used. Whole wheat flour naturally develops less elastic gluten than white flour, and when it’s combined with other flours that are not wheat, such as rye or spelt, the gluten structure becomes even weaker. In addition, the presence of milk, butter, and sugar further softens the dough and limits elasticity.
Because of this, the dough will not feel as stretchy or elastic as a white sourdough dough, and it is not expected to pass a strong windowpane test. This is normal and not a sign of poor mixing. The goal at this point is simply a cohesive, evenly mixed dough, not maximum gluten development.
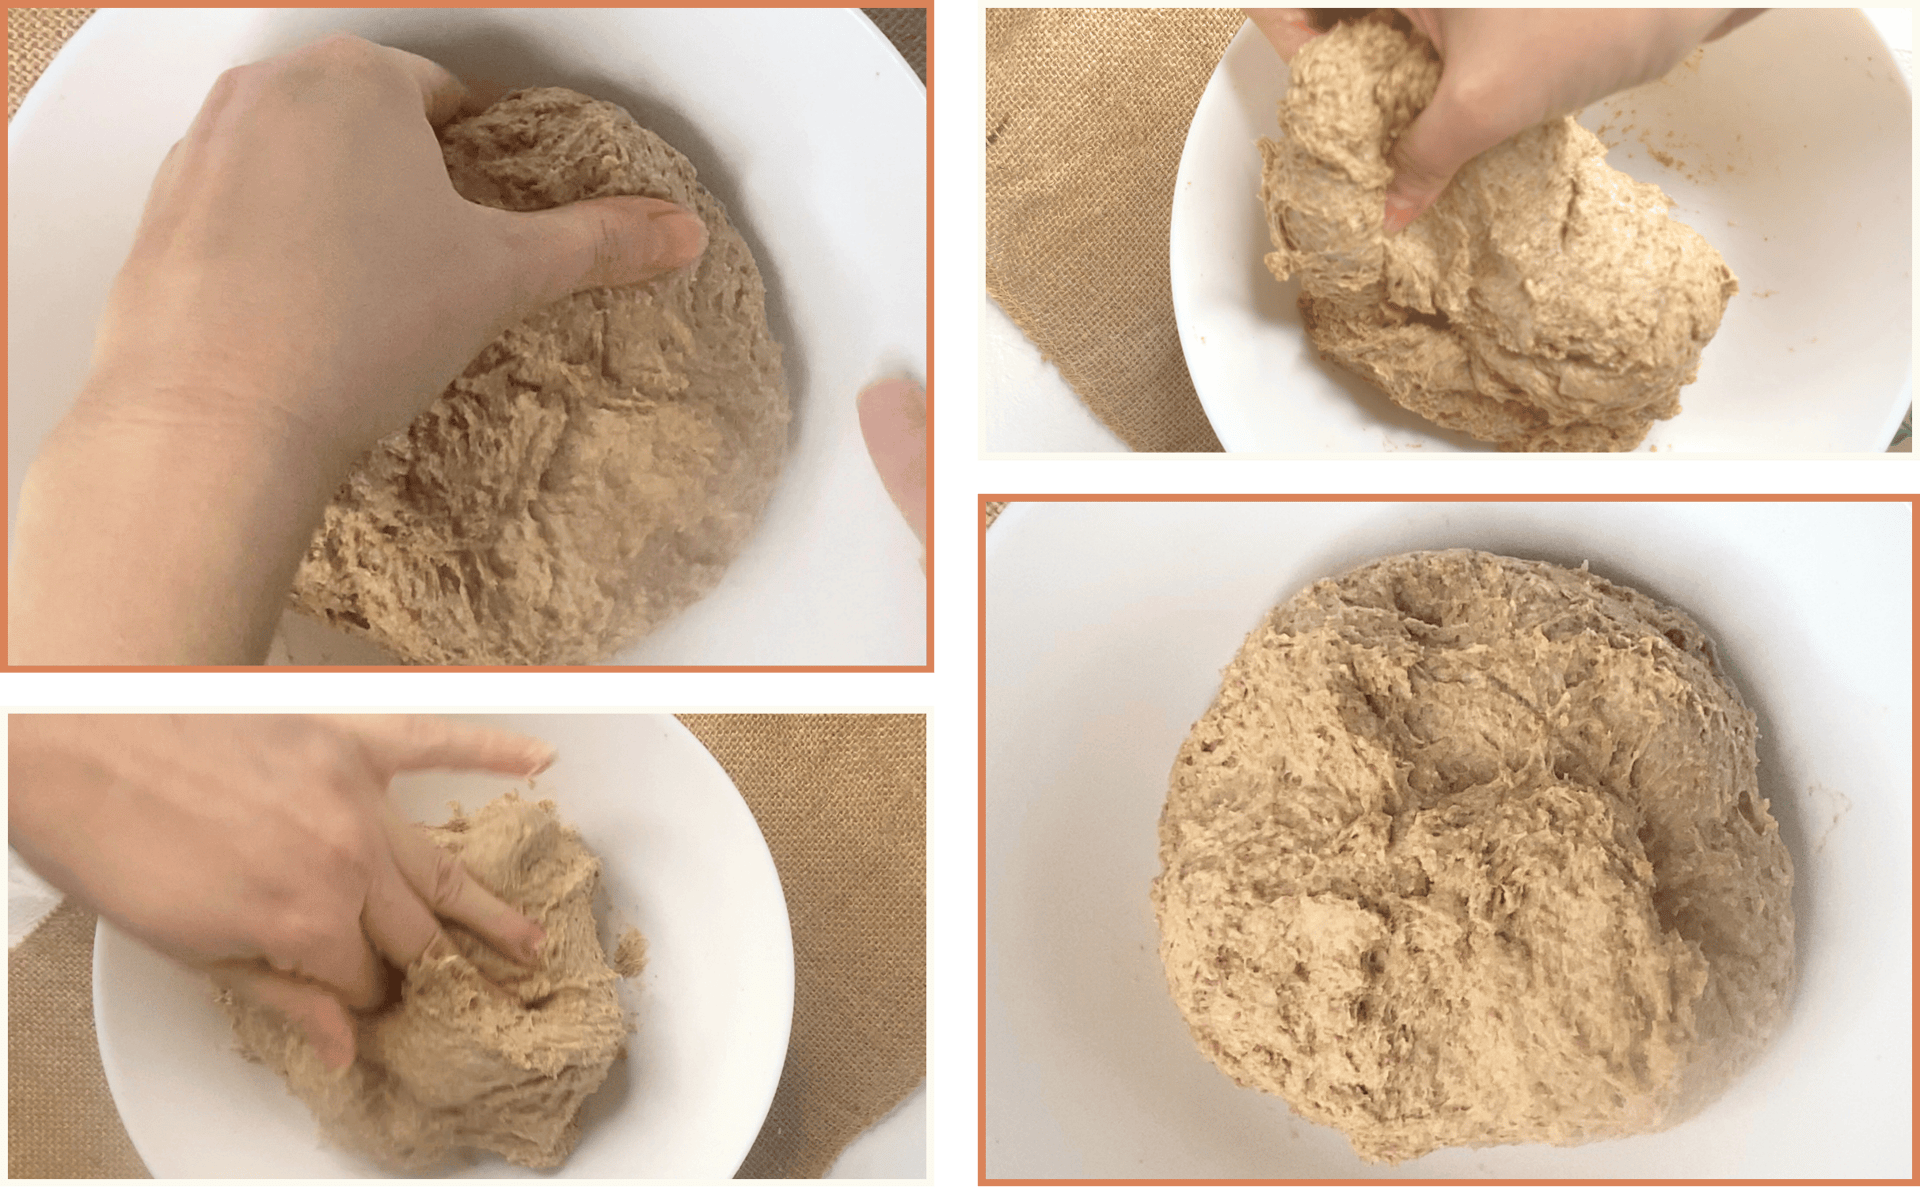
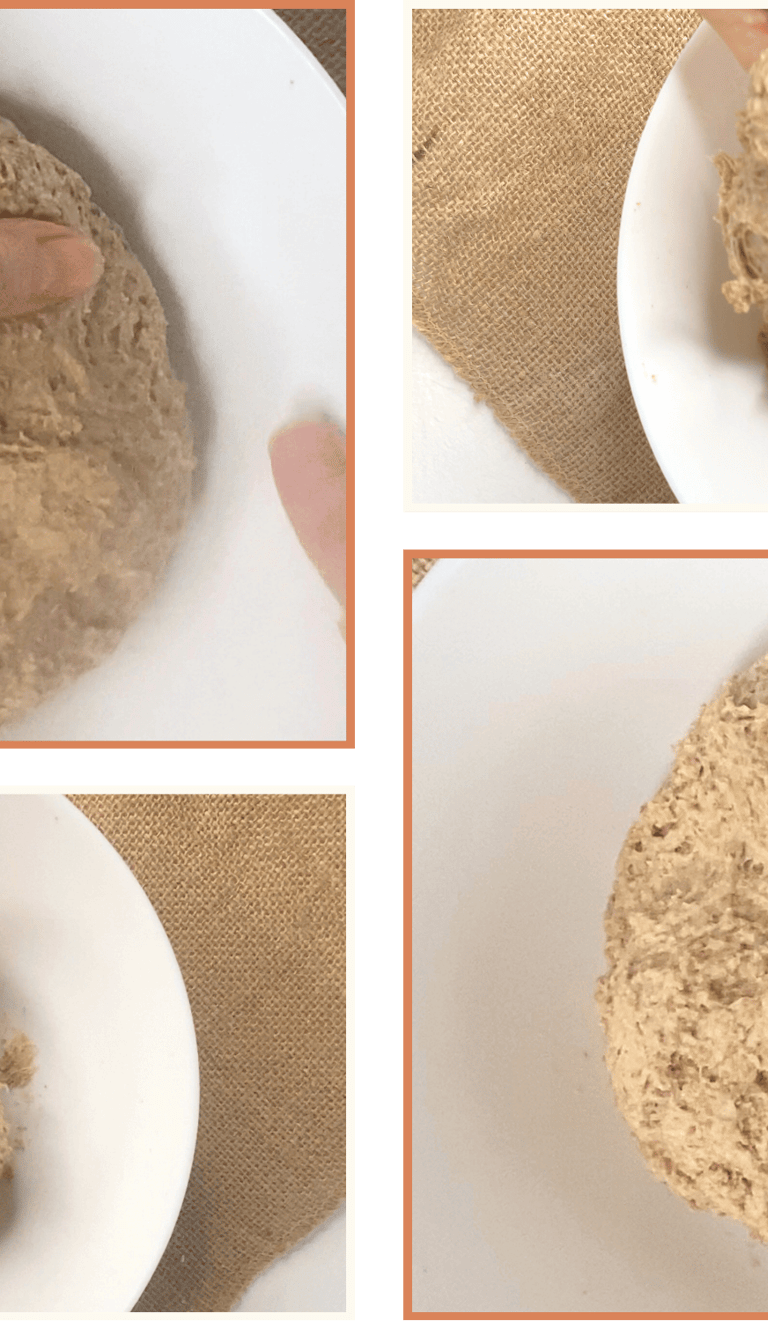
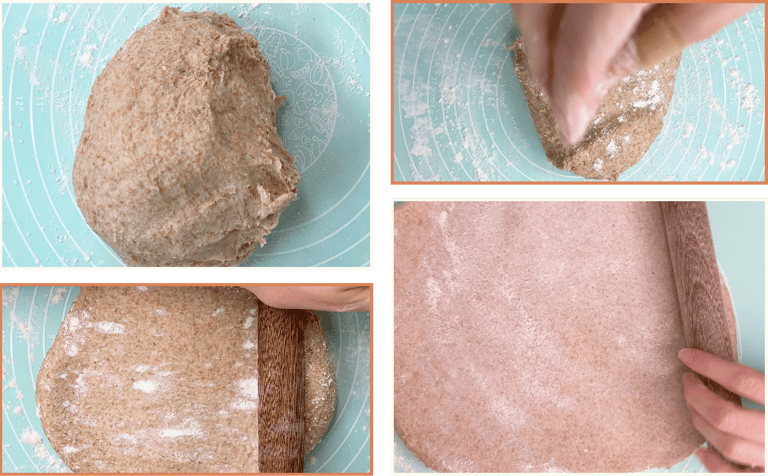
Rest and folds to build structure
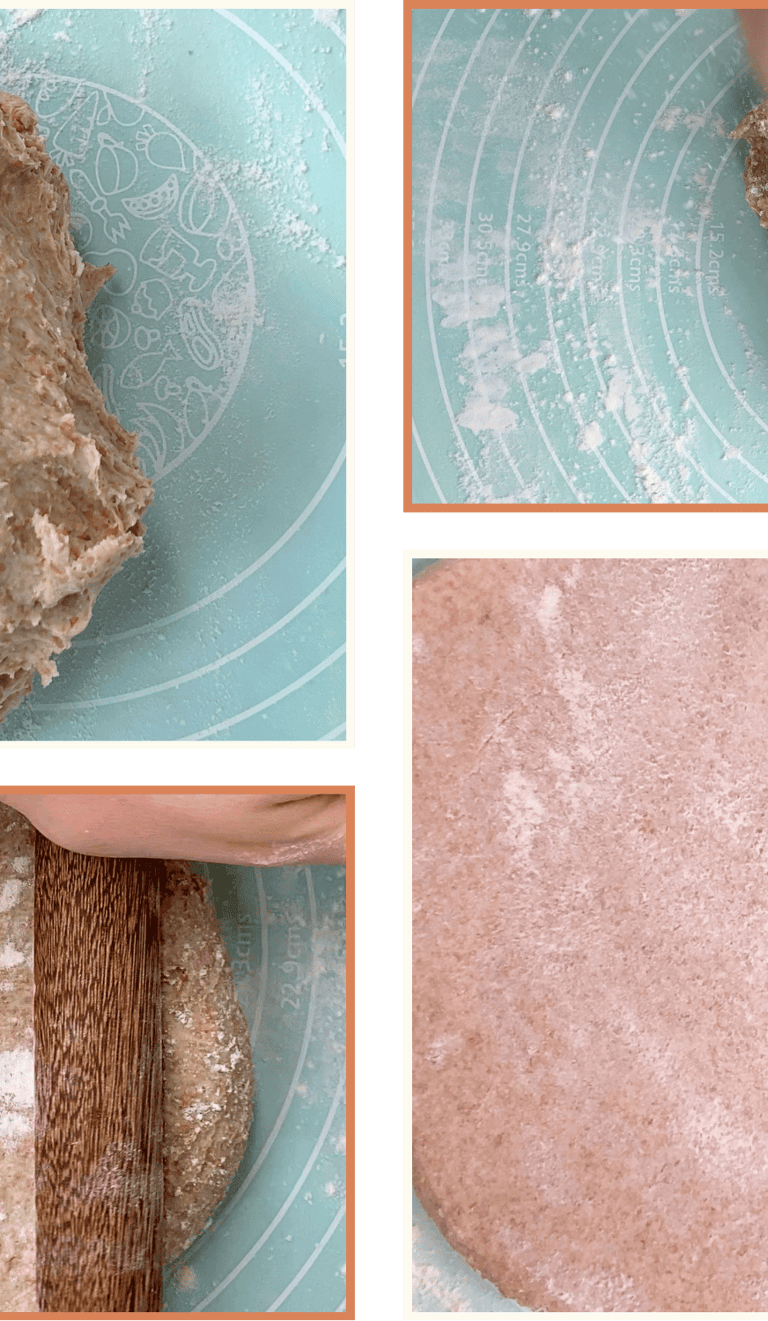
After kneading, let the dough rest for thirty minutes. Perform the first fold to help the dough gain structure without overworking it. Let the dough rest for another thirty minutes, then repeat the fold. Two folds are used because gluten development is slower and weaker in doughs high in whole wheat and rye. These folds help organize the existing gluten network and improve the final structure of the loaf.
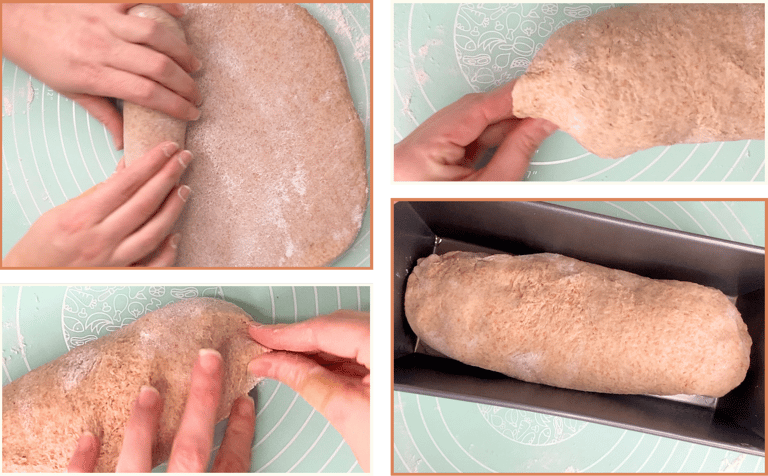
Shaping with a rolling pin
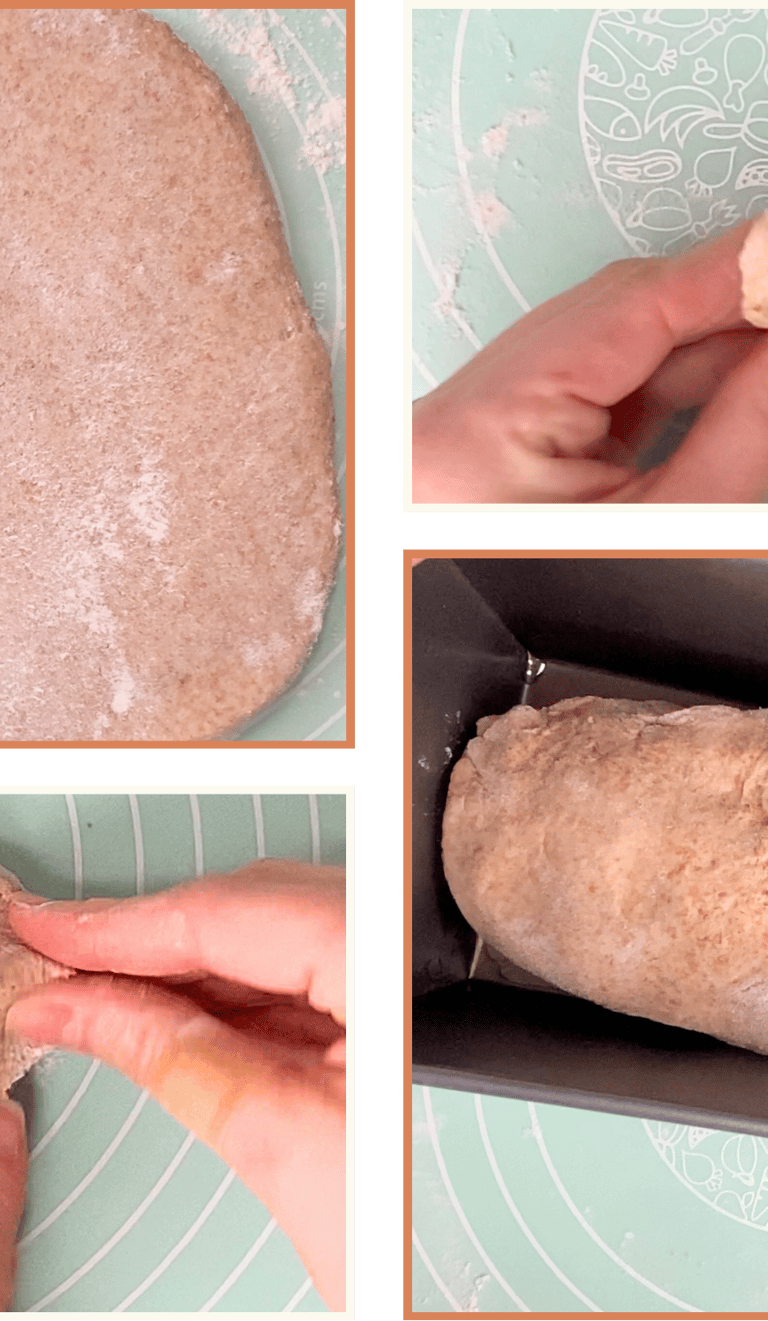
After the last fold and rest, shape the dough using a rolling pin. Gently roll the dough into a rectangle, keeping the thickness as even as possible. Roll it up tightly into a log, seal the seam, and tuck the ends so the loaf fits neatly into the pan. Adjust the length of the log so it matches the loaf pan. This shaping method helps create a tighter crumb and cleaner slices, which are ideal for a sandwich-style loaf.
If you enjoy practical, nourishing recipes like this one, you might also like:
High Protein Oat Muffins: Soft, Simple & Naturally Nourishing: A simple, everyday bake designed to keep you full and energized, without complicated ingredients or techniques.
Sourdough Made Simple: A Beginner’s Guide to Your First Loaf: A gentle introduction to sourdough, focused on understanding the process and building confidence in your kitchen.
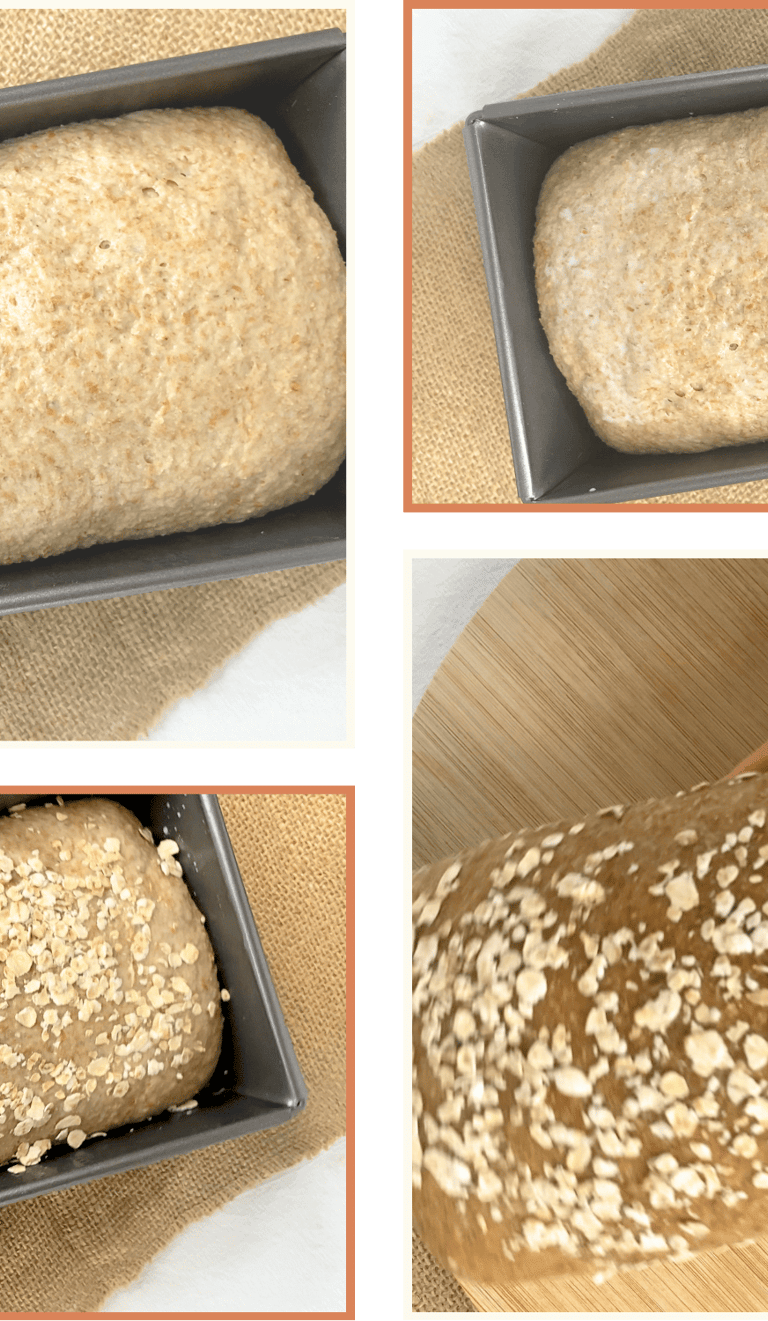
Into the pan and a short room temperature start
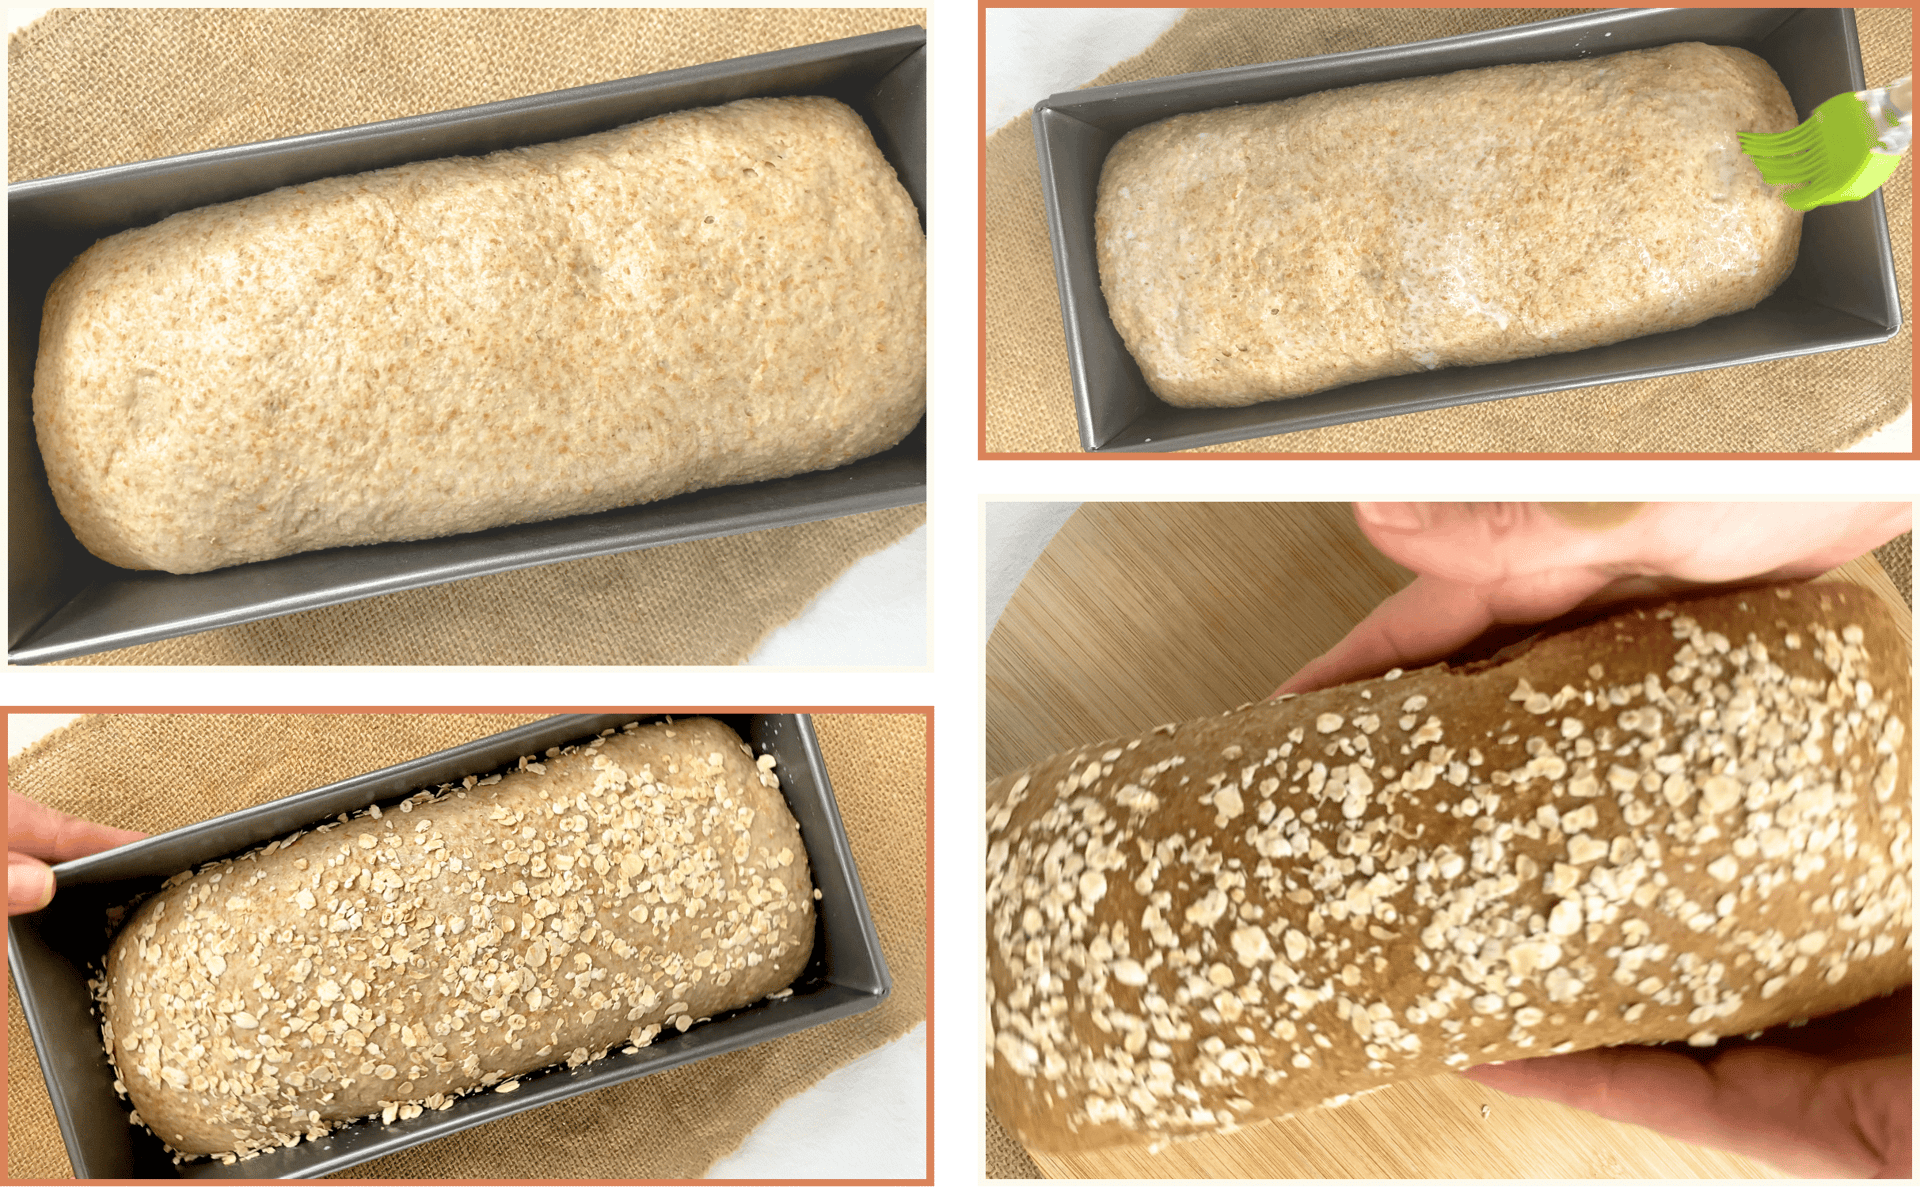
Lightly oil the loaf pan and place the shaped dough inside. Let the dough rest briefly at room temperature to start fermentation. The dough should rise only slightly at this stage. The goal is not to fully proof the loaf, but simply to avoid placing it into the refrigerator completely inactive.
Overnight cold fermentation
Cover the pan and place it in the refrigerator, ideally in the early evening. Leave the dough to ferment cold for about fourteen hours. During this time, the dough may show very little visible rise, which is normal for enriched doughs made with whole wheat and rye. The cold fermentation is used mainly for scheduling, gentle flavor development, and controlled fermentation.
Final proof the next day
Remove the loaf from the refrigerator and let it finish proofing at room temperature. This stage can feel slow, especially with this flour blend, but patience is important. Allow the dough to warm up and become active again. The loaf is ready to bake when it rises close to the top of the pan. If the rise is uneven, focus on the slower side and wait until it catches up and the overall height is near the rim.
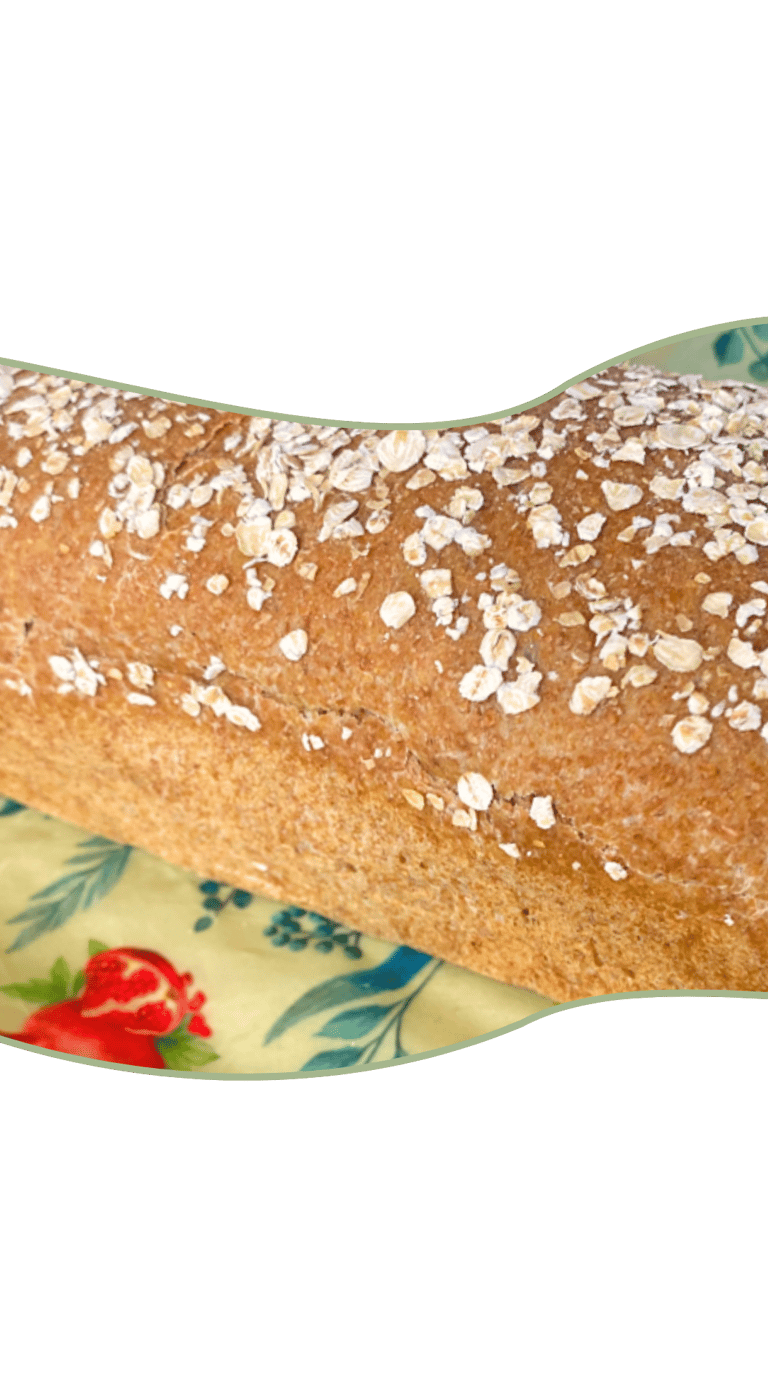
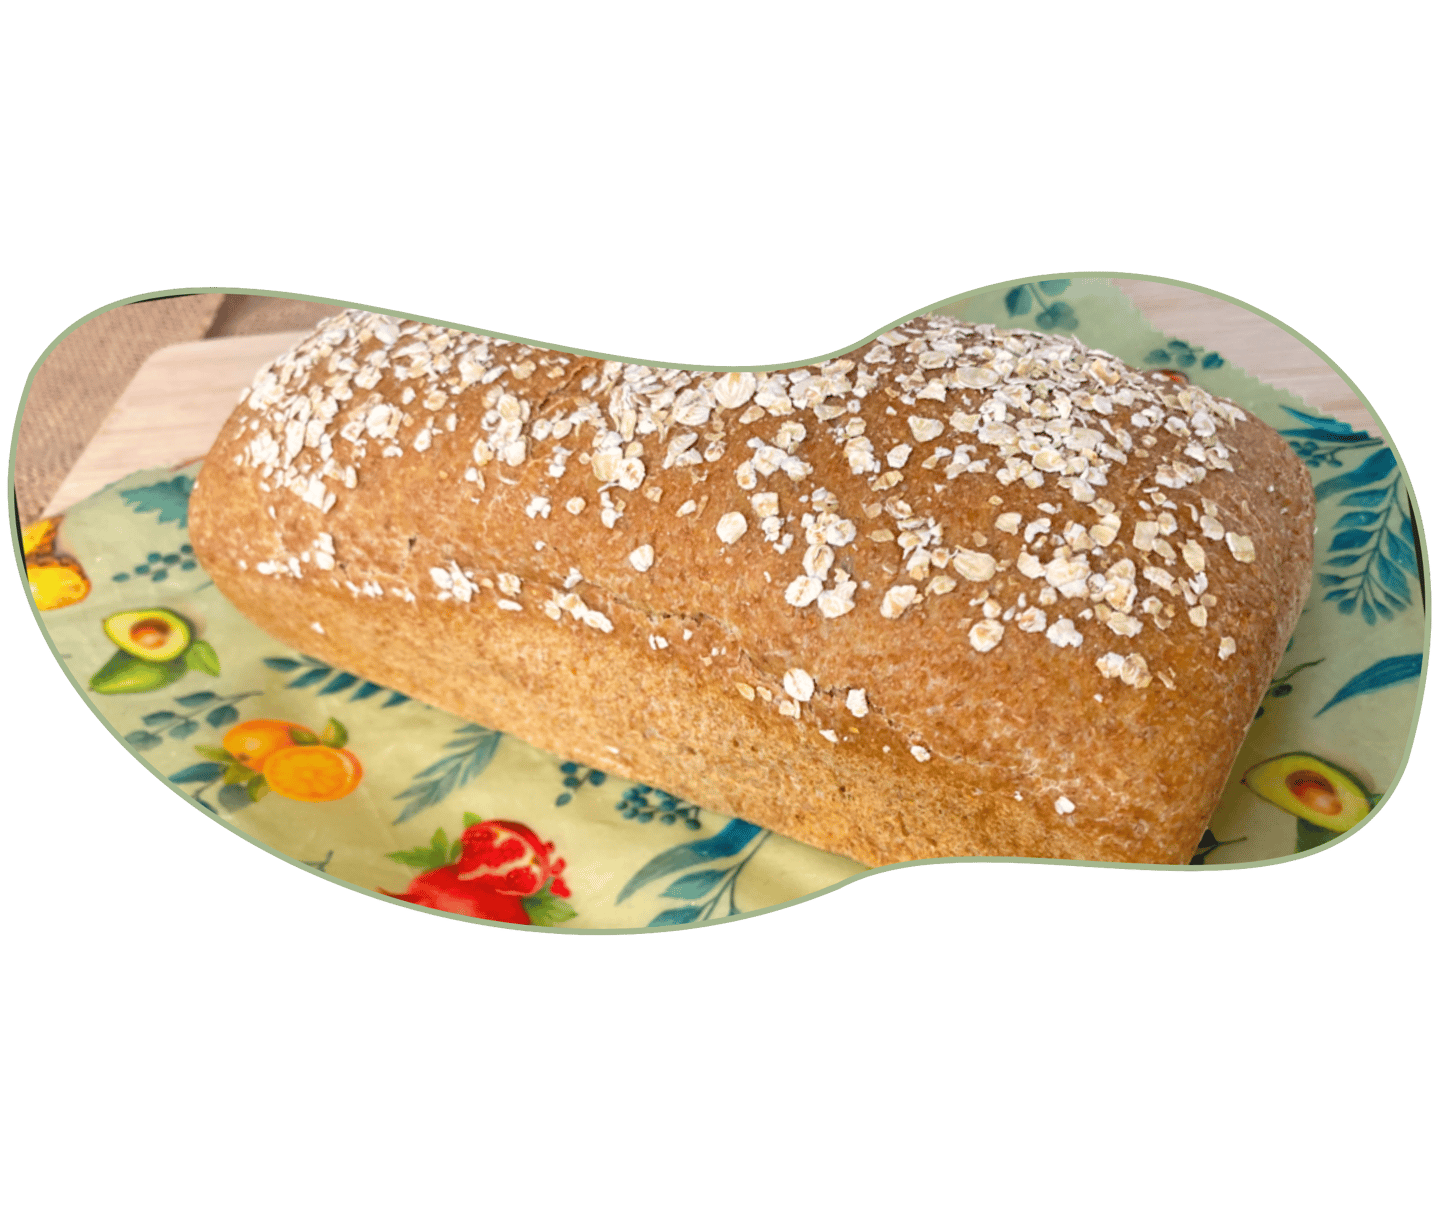
Topping right before baking
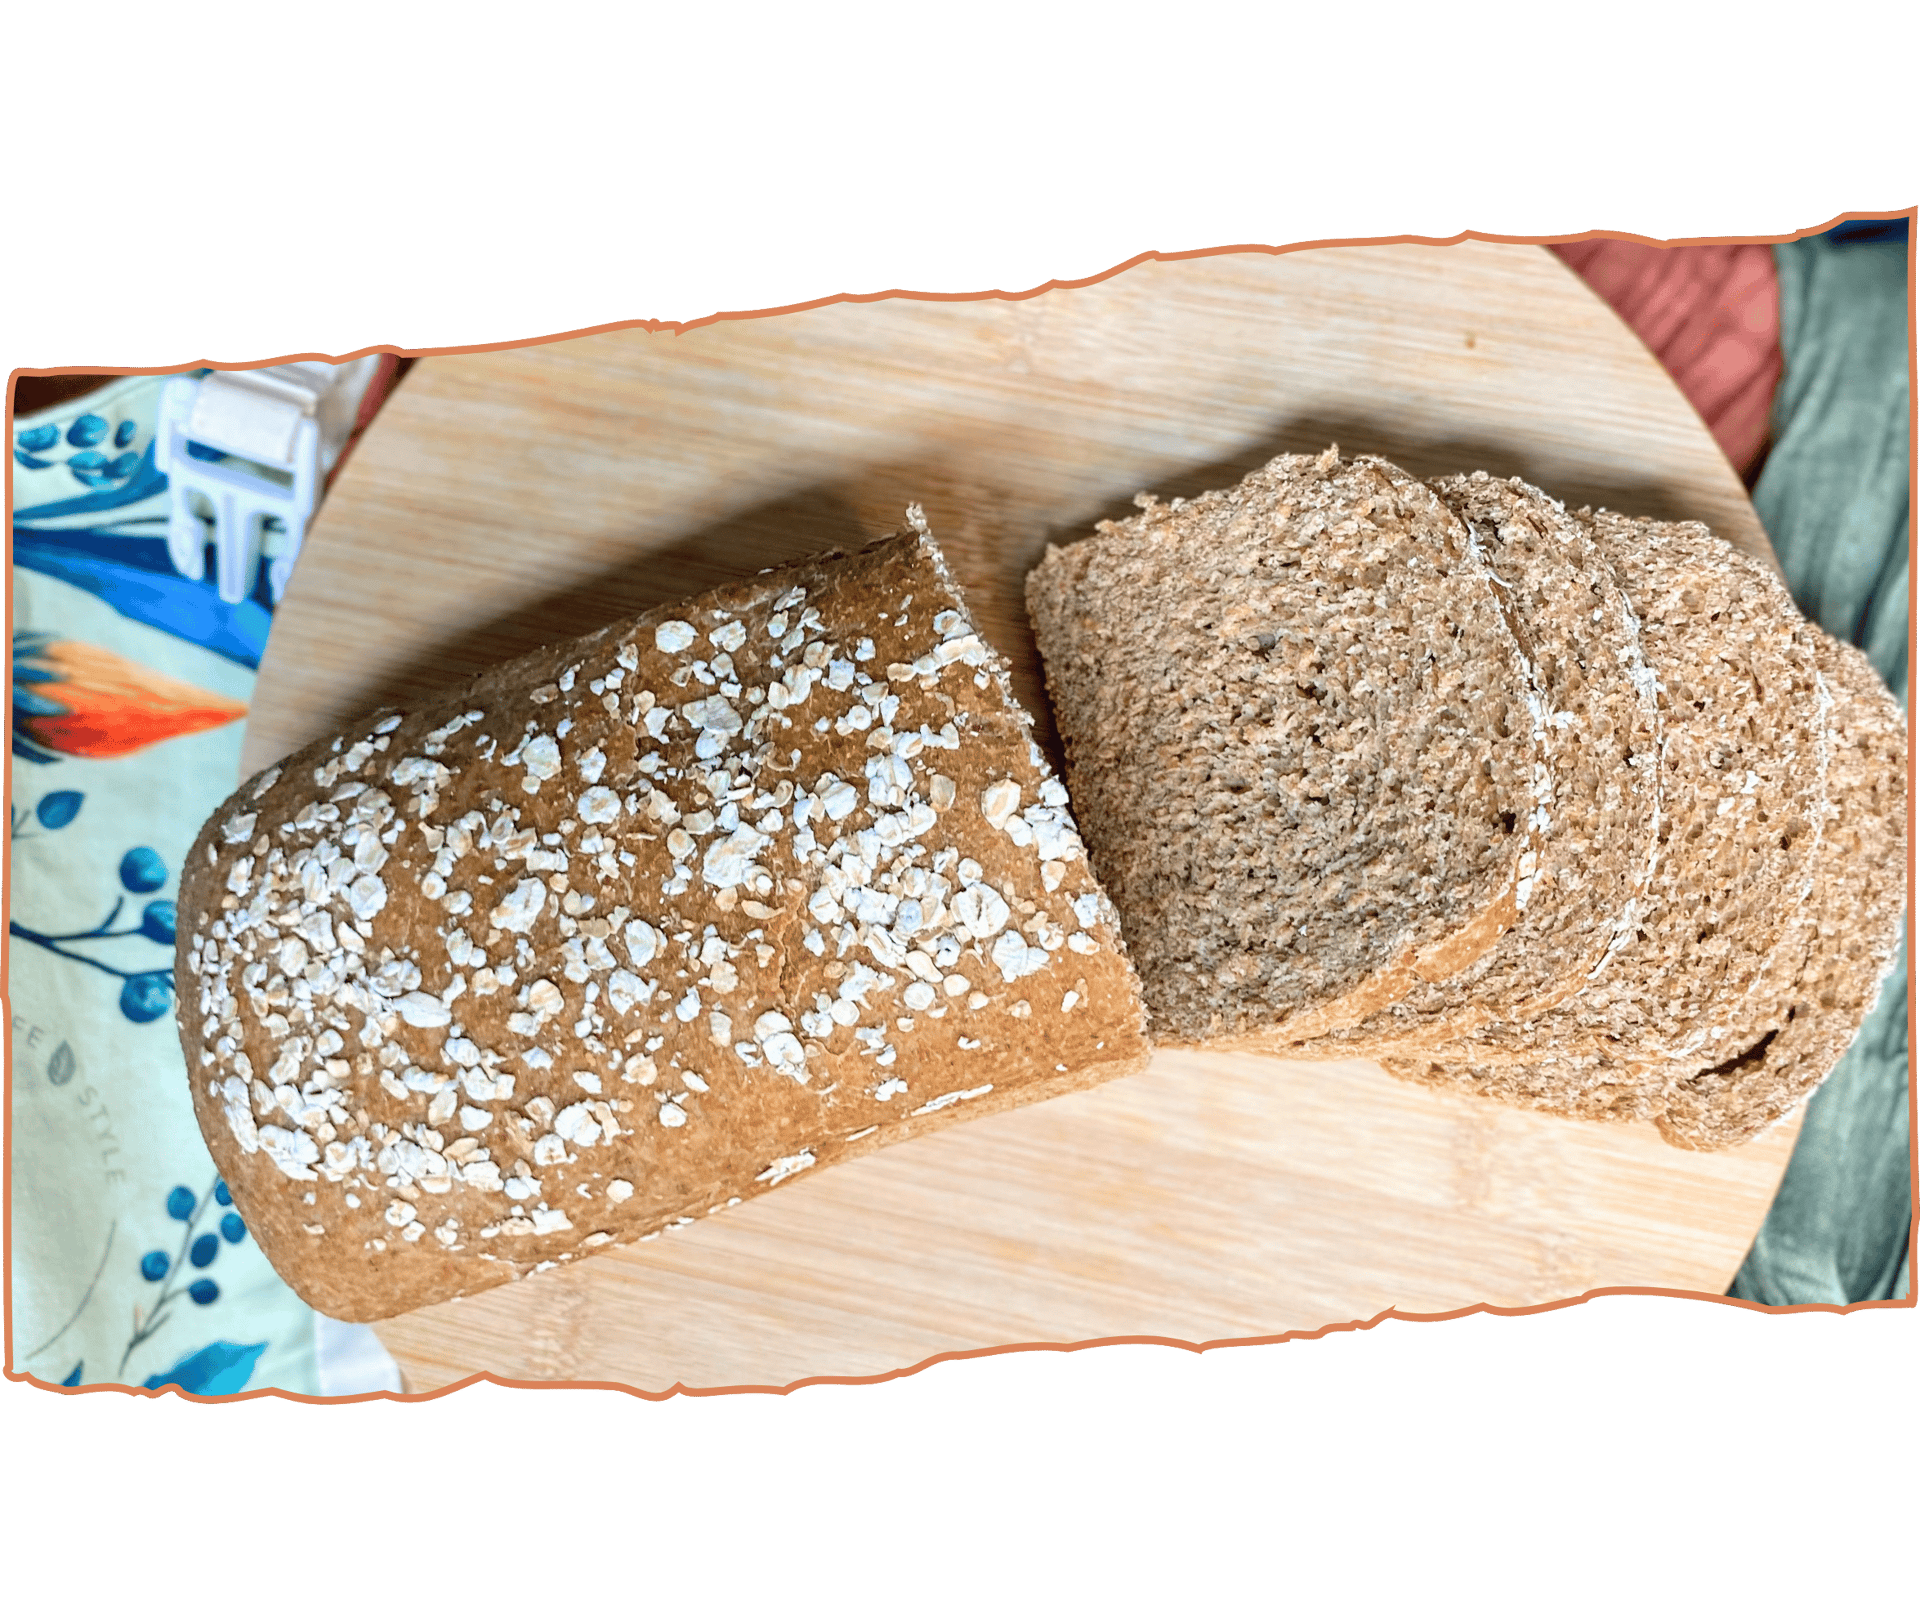
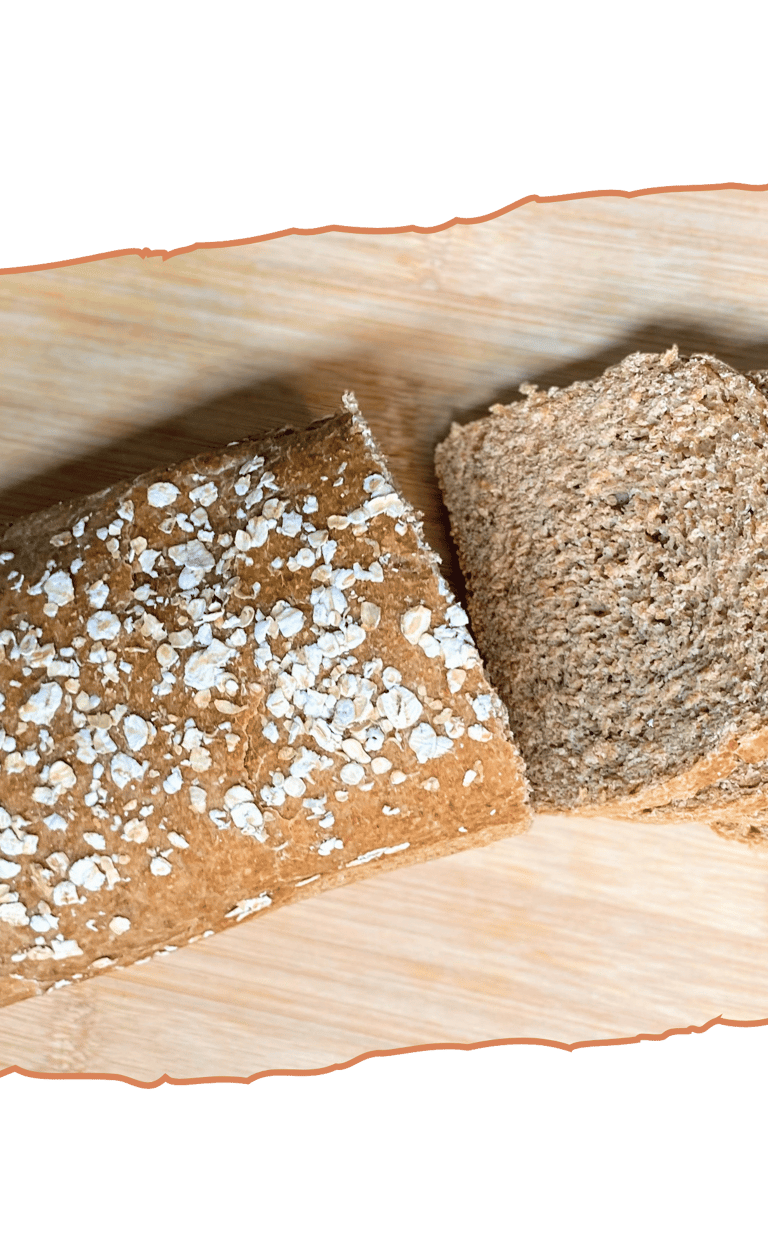
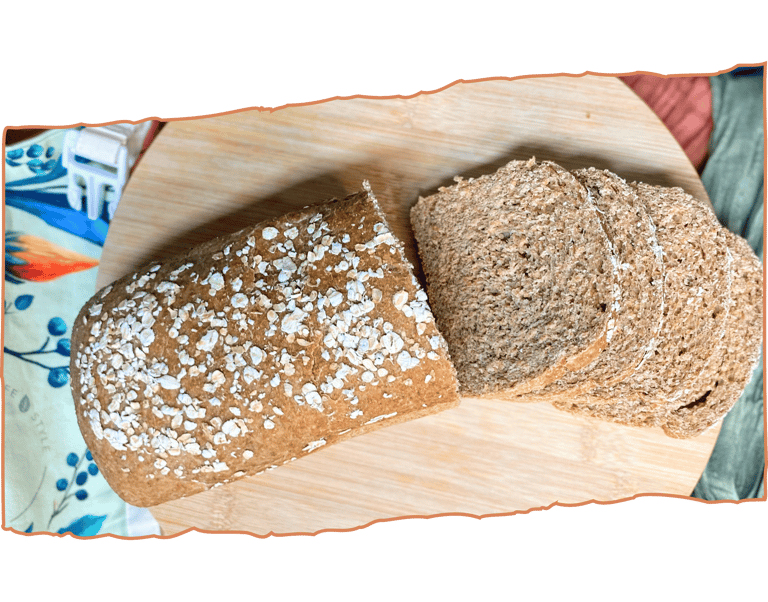
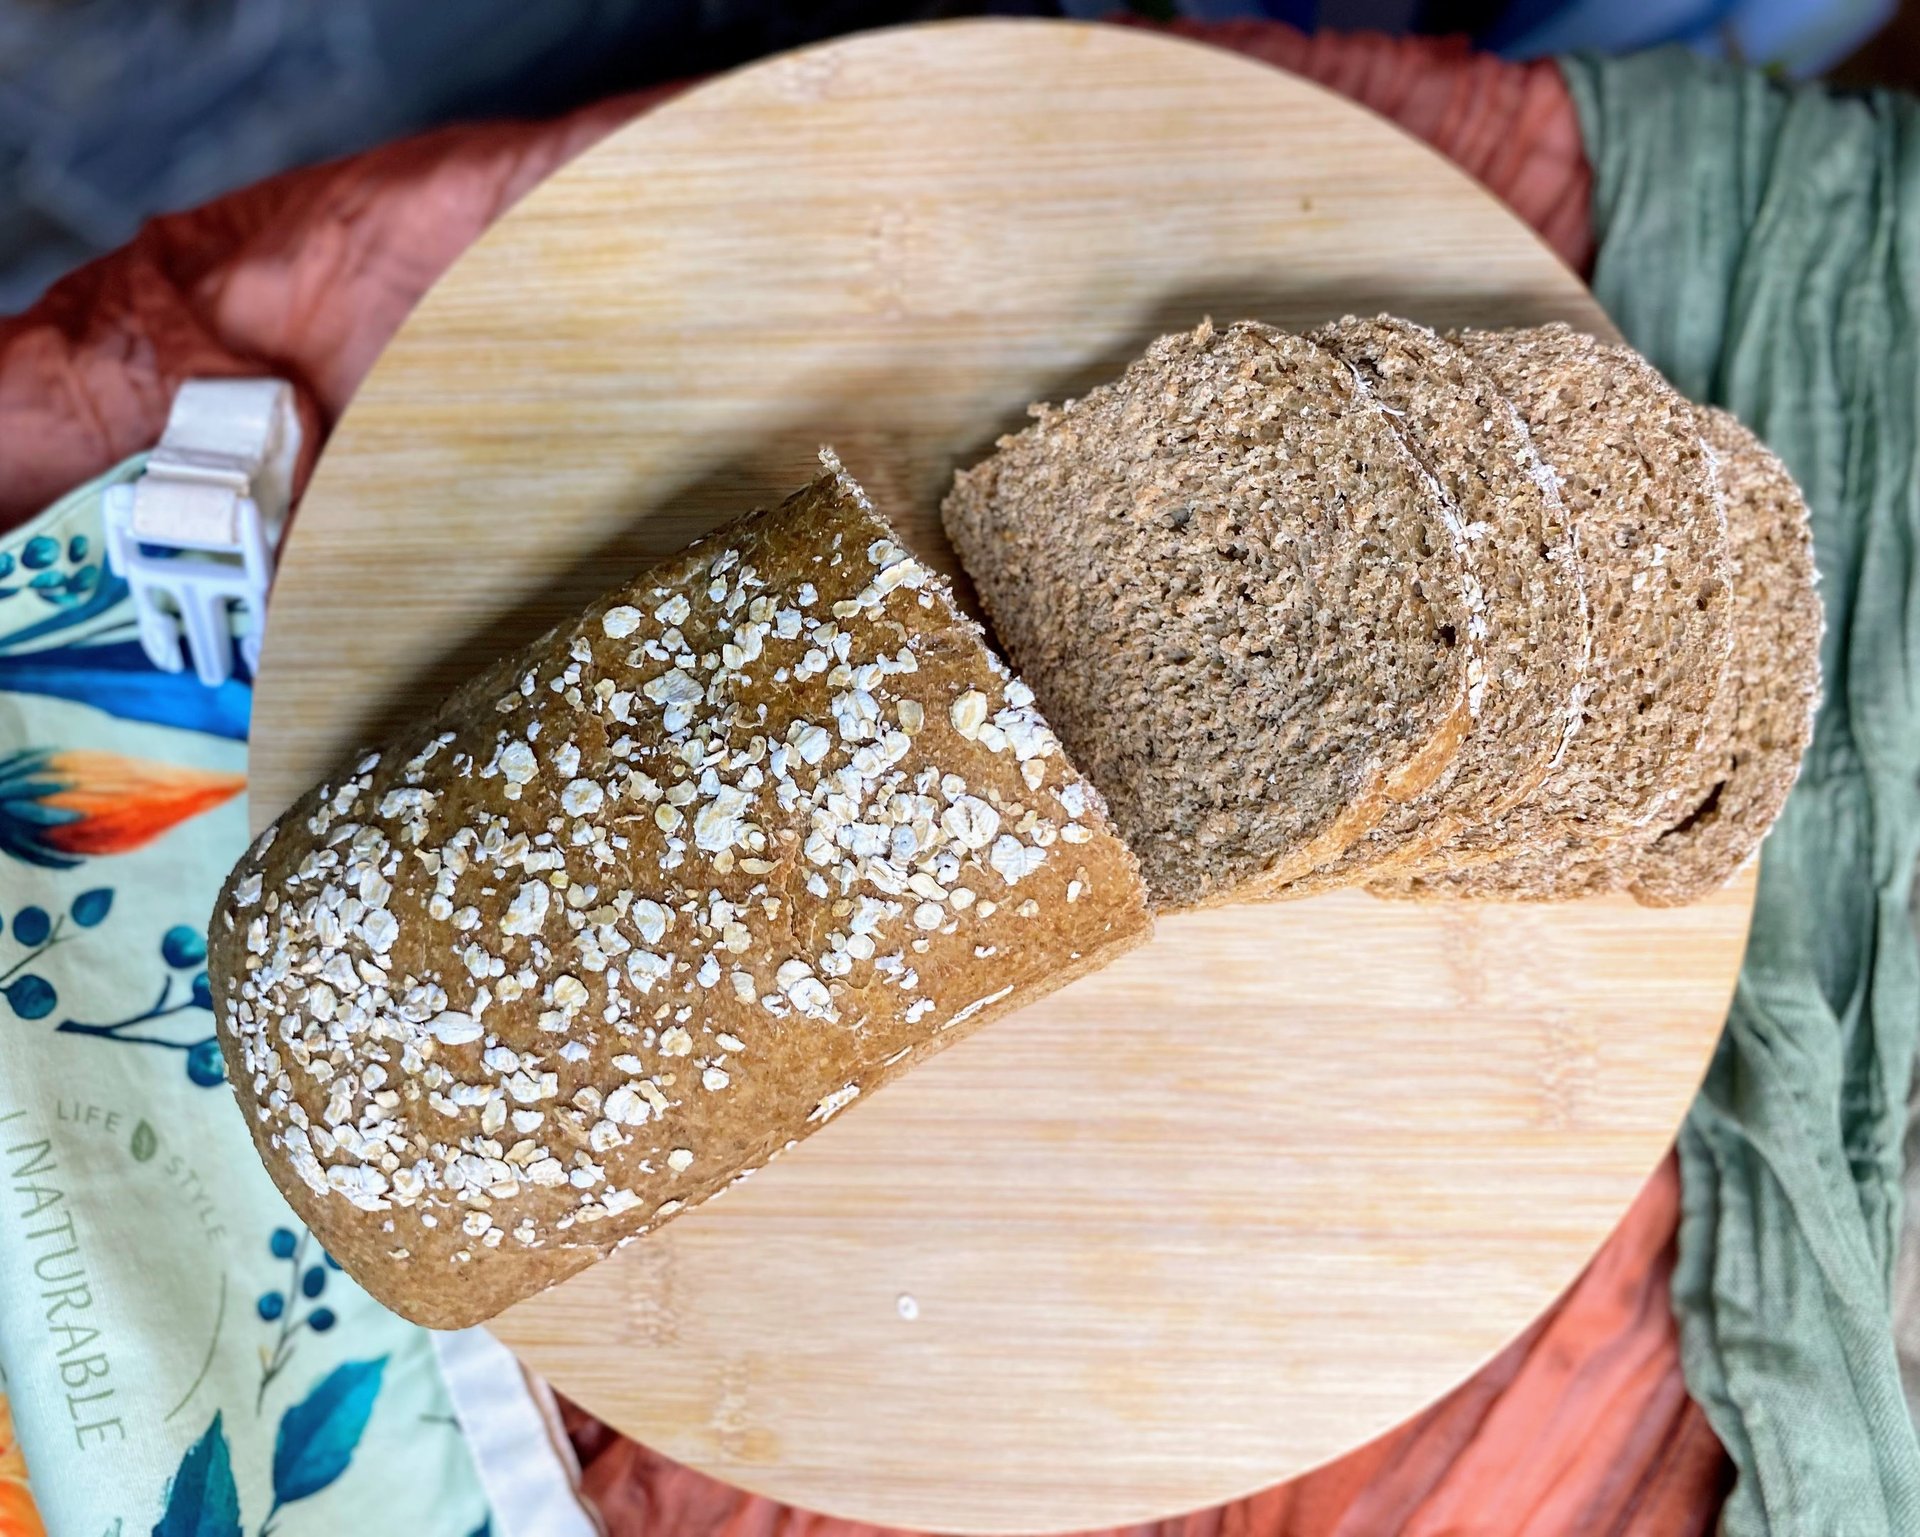
If using an oat topping, apply it just before baking. Once the loaf is fully proofed, lightly brush the surface with milk and sprinkle the oats on top. Bake immediately. This method gives a clean finish and prevents the topping from interfering with the final rise.
Baking and cooling
Bake the loaf at 180 °C (356 °F) with top and bottom heat for 30 to 35 minutes.
If the top starts browning too quickly before the loaf is fully baked, loosely cover it with a baking tray or aluminum foil and continue baking until the inside is fully set. This prevents the crust from getting too dark while allowing the center to finish cooking properly.
Once baked, remove the loaf from the pan immediately and let it cool completely on a rack before slicing. Cutting the bread too early can compress the crumb and make it feel gummy, even if it is fully baked.

Storing & Freezing
Once fully cooled, it can be stored at room temperature for a couple of days, or kept in the refrigerator if your kitchen is warm.
It also freezes very well. The easiest option is to slice the loaf first and freeze it in slices, so you can take out only what you need. You can toast the slices straight from frozen, or let them thaw at room temperature.
If you like to plan ahead, you can bake more than one loaf at a time and keep them frozen for the week. Stored properly, the bread keeps its texture and flavor, making everyday meals simpler and more organized.
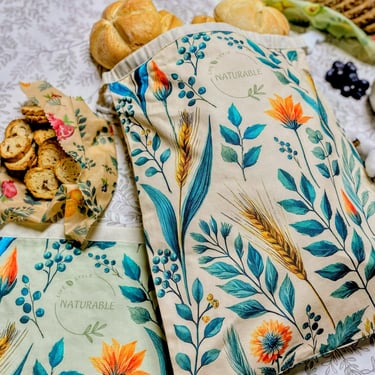
Using Our Reusable Bread Bags & Wraps
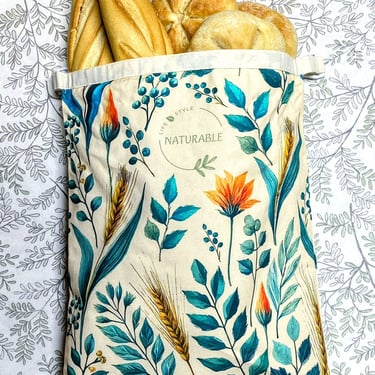
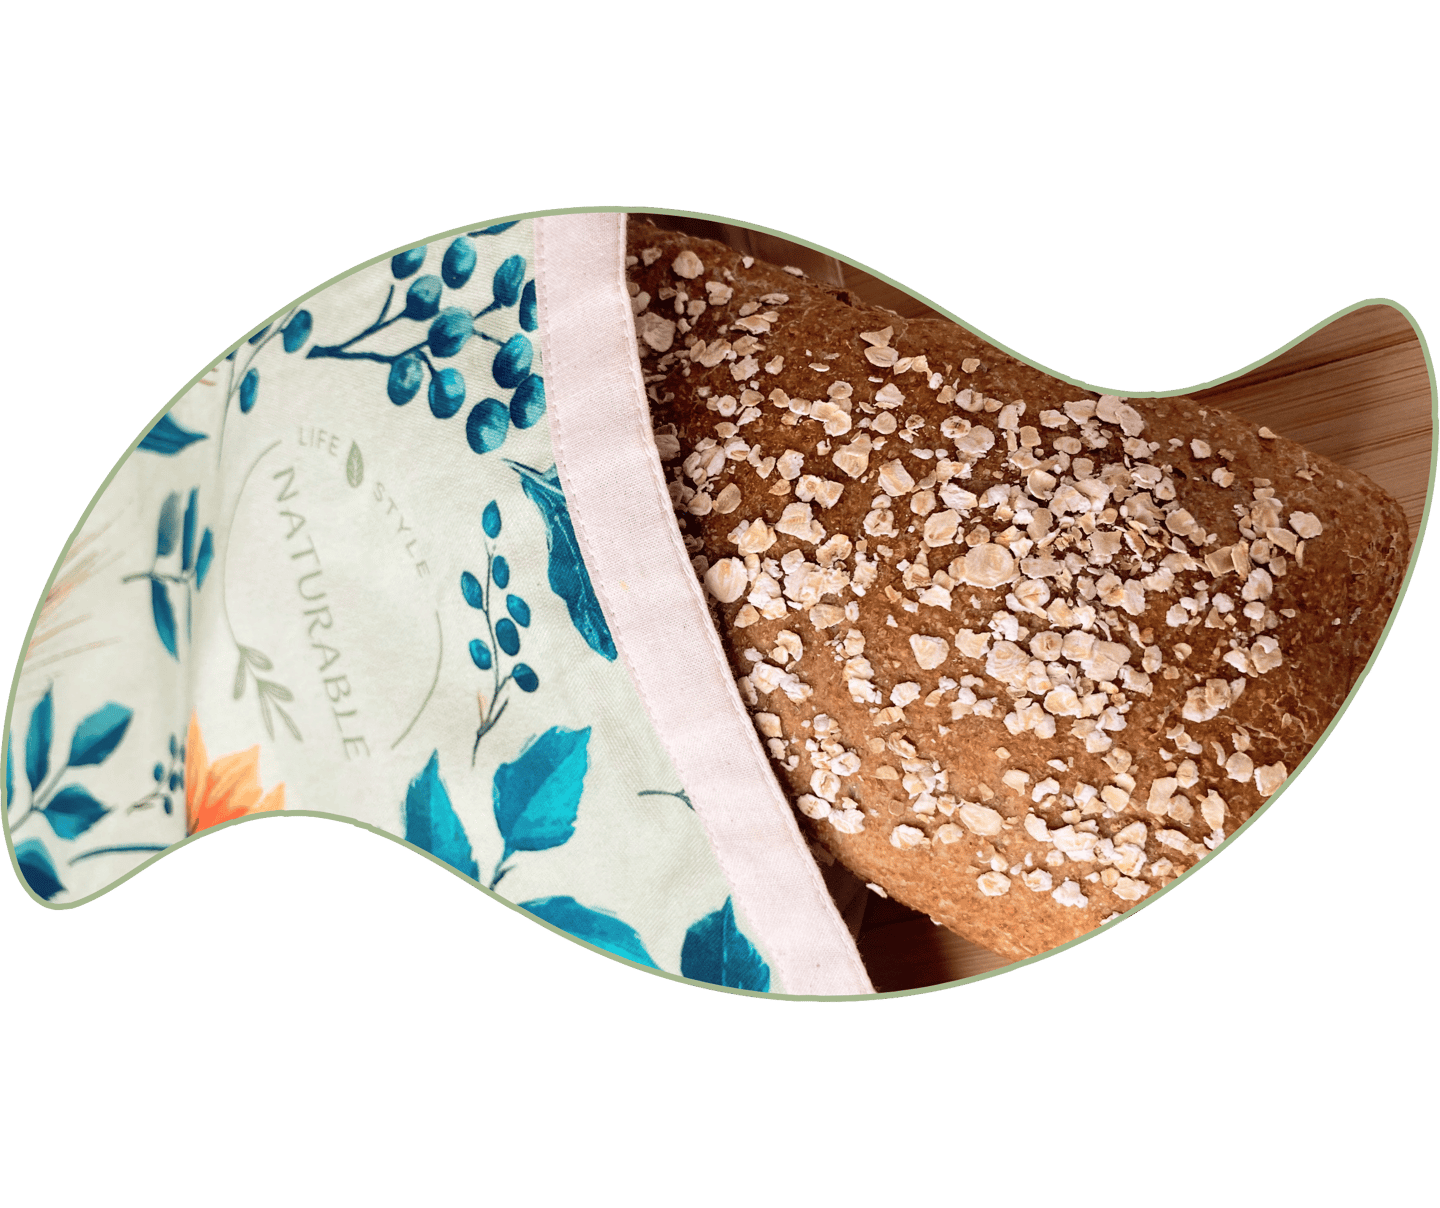
This loaf can be stored perfectly in our Naturable bread bags and beeswax wraps set.
Our reusable bread bags and beeswax wraps are ideal for this type of bread, as they help keep it fresh at room temperature for longer. After the third or fourth day, the loaf can be moved to the refrigerator or even frozen, as the wraps are freezer-safe.
You can store the loaf whole inside the bread bag, or slice it and keep part of it in the bag and a few slices in the beeswax wraps for everyday use. If freezing, it’s recommended to let the wraps sit at room temperature for a few minutes before opening, so the wax softens naturally and doesn’t crack when unwrapping.
If you’d like to get your own Naturable bread bags and beeswax wraps set, you can find it here.


Curious about why swapping plastic wraps and plastic bags for beeswax is such a simple yet powerful upgrade for your kitchen?
Discover how small changes can make a real difference in our post: Swap Plastic for Beeswax: The Kitchen Upgrade You Didn’t Know You Needed
This loaf is a reminder that good bread doesn’t always look impressive during the process. Especially with whole grain and enriched doughs, strength, elasticity, and speed aren’t the main goals.
What matters is how the dough is handled, how fermentation is managed, and how the bread fits into real life. A loaf that slices cleanly, keeps well, and can be baked, stored, and frozen with ease.
This bread isn’t about perfection. It’s about confidence, understanding, and baking in a way that feels sustainable and realistic.
Have You Tried Our Beeswax Bags & Wraps?
A natural way to keep your food and bread fresh while reducing plastic in your kitchen.
Each set includes 2 reusable bread bags and 2 wraps, made from 100% cotton, beeswax, jojoba oil, and pine resin.
Simple, sustainable, and long-lasting.


Let’s Connect on Instagram

This is not a fast bread, and it’s not meant to be.
It’s a whole grain sourdough loaf, enriched with milk, butter, honey, and panela, baked in a loaf pan for a soft crumb, reliable slices, and everyday use.
Because of the flours and the enrichment, this dough behaves differently from white sourdough. It won’t pass a perfect windowpane test, and that’s completely fine.
This recipe is about understanding the dough, giving it time, and focusing on what really matters: structure, fermentation, and how the bread fits into daily life.
Ingredients
300 g whole wheat flour
100 g rye flour
100 g active sourdough starter (100% hydration)
300 g milk (used as most or all of the liquid)
30 g butter, softened
15 g sugar (panela, white sugar, or any sugar you prefer)
6–7 g salt
Notes:
The flour combination is flexible. You can use any whole grain flours you like and adjust the blend to your preference. The rye flour can be replaced with spelt, or you can make the loaf using 100% whole wheat flour if you prefer. Feel free to combine whole grain flours in a way that works for you.
This dough uses mostly milk as the liquid, but hydration may need slight adjustment depending on the flour you choose. You can add about 15 g of water if the dough feels too stiff, then adjust gradually if needed. Whole grain flours absorb liquid differently, so it’s best to add water little by little and let the dough guide you.
What you will need
A large bowl for mixing the dough
A spoon or your hands to combine the ingredients
A bench scraper (very helpful for handling the dough and keeping the surface clean)
A rolling pin, to shape the dough evenly before rolling
A sandwich loaf pan
A cooling rack, to let the loaf cool completely before slicing
Optional but helpful:
Parchment paper or a light coating of oil for the pan, to prevent sticking
A kitchen thermometer, if you like checking internal temperature for doneness
That’s all you need. No stand mixer, no special tools. Just simple equipment and time.
Step by Step
Mixing
Start by mixing all the ingredients except the butter. In a large bowl, combine the whole wheat flour and the rye flour with most of the milk as the main liquid. Add the active sourdough starter, followed by the honey and the panela, and finally the salt. Mix until no dry flour remains and the dough looks fully combined. At this stage, the dough will feel soft and slightly weak, which is completely normal when working with whole wheat and rye, especially in enriched doughs made with milk.
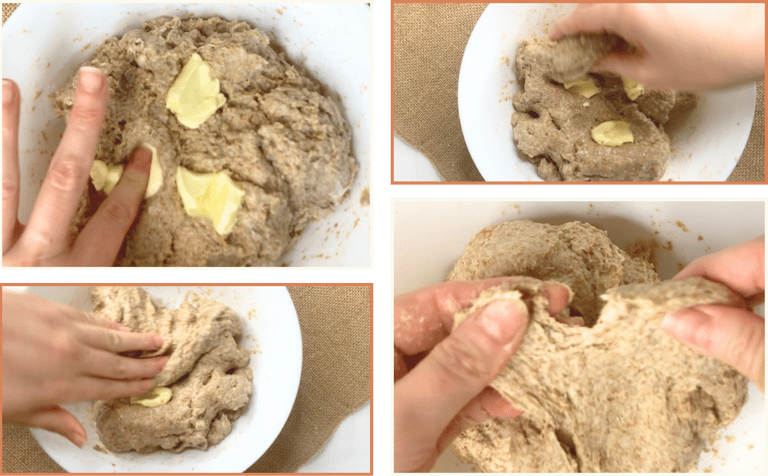

Adding the butter and expectations around gluten development
Once the dough is cohesive, add the softened butter. Work it into the dough until it is fully absorbed and the dough no longer feels greasy. Continue kneading gently, just enough to bring everything together and give the dough some initial strength. Knead for about five to eight minutes, until the dough feels smoother than it did right after mixing.
Note: At this stage, it’s important to adjust expectations. This dough is not meant to develop strong or highly elastic gluten. Gluten development in this loaf depends heavily on the flours used. Whole wheat flour naturally develops less elastic gluten than white flour, and when it’s combined with other flours that are not wheat, such as rye or spelt, the gluten structure becomes even weaker. In addition, the presence of milk, butter, and sugar further softens the dough and limits elasticity.
Because of this, the dough will not feel as stretchy or elastic as a white sourdough dough, and it is not expected to pass a strong windowpane test. This is normal and not a sign of poor mixing. The goal at this point is simply a cohesive, evenly mixed dough, not maximum gluten development.
Rest and folds to build structure
After kneading, let the dough rest for thirty minutes. Perform the first fold to help the dough gain structure without overworking it. Let the dough rest for another thirty minutes, then repeat the fold. Two folds are used because gluten development is slower and weaker in doughs high in whole wheat and rye. These folds help organize the existing gluten network and improve the final structure of the loaf.
Shaping with a rolling pin
After the last fold and rest, shape the dough using a rolling pin. Gently roll the dough into a rectangle, keeping the thickness as even as possible. Roll it up tightly into a log, seal the seam, and tuck the ends so the loaf fits neatly into the pan. Adjust the length of the log so it matches the loaf pan. This shaping method helps create a tighter crumb and cleaner slices, which are ideal for a sandwich-style loaf.
Into the pan and a short room temperature start
Lightly oil the loaf pan and place the shaped dough inside. Let the dough rest briefly at room temperature to start fermentation. The dough should rise only slightly at this stage. The goal is not to fully proof the loaf, but simply to avoid placing it into the refrigerator completely inactive.
Overnight cold fermentation
Cover the pan and place it in the refrigerator, ideally in the early evening. Leave the dough to ferment cold for about fourteen hours. During this time, the dough may show very little visible rise, which is normal for enriched doughs made with whole wheat and rye. The cold fermentation is used mainly for scheduling, gentle flavor development, and controlled fermentation.
Final proof the next day
Remove the loaf from the refrigerator and let it finish proofing at room temperature. This stage can feel slow, especially with this flour blend, but patience is important. Allow the dough to warm up and become active again. The loaf is ready to bake when it rises close to the top of the pan. If the rise is uneven, focus on the slower side and wait until it catches up and the overall height is near the rim.
Topping right before baking
If using an oat topping, apply it just before baking. Once the loaf is fully proofed, lightly brush the surface with milk and sprinkle the oats on top. Bake immediately. This method gives a clean finish and prevents the topping from interfering with the final rise.
Baking and cooling
Bake the loaf at 180 °C (356 °F) with top and bottom heat for 30 to 35 minutes.
If the top starts browning too quickly before the loaf is fully baked, loosely cover it with a baking tray or aluminum foil and continue baking until the inside is fully set. This prevents the crust from getting too dark while allowing the center to finish cooking properly.
Once baked, remove the loaf from the pan immediately and let it cool completely on a rack before slicing. Cutting the bread too early can compress the crumb and make it feel gummy, even if it is fully baked.
If you enjoy practical, nourishing recipes like this one, you might also like:
High Protein Oat Muffins: Soft, Simple & Naturally Nourishing: A simple, everyday bake designed to keep you full and energized, without complicated ingredients or techniques.
Sourdough Made Simple: A Beginner’s Guide to Your First Loaf: A gentle introduction to sourdough, focused on understanding the process and building confidence in your kitchen.
Storing & Freezing
Once fully cooled, it can be stored at room temperature for a couple of days, or kept in the refrigerator if your kitchen is warm.
It also freezes very well. The easiest option is to slice the loaf first and freeze it in slices, so you can take out only what you need. You can toast the slices straight from frozen, or let them thaw at room temperature.
If you like to plan ahead, you can bake more than one loaf at a time and keep them frozen for the week. Stored properly, the bread keeps its texture and flavor, making everyday meals simpler and more organized.

Using Our Reusable Bread Bags & Wraps
This loaf can be stored perfectly in our Naturable bread bags and beeswax wraps set.
Our reusable bread bags and beeswax wraps are ideal for this type of bread, as they help keep it fresh at room temperature for longer. After the third or fourth day, the loaf can be moved to the refrigerator or even frozen, as the wraps are freezer-safe.
You can store the loaf whole inside the bread bag, or slice it and keep part of it in the bag and a few slices in the beeswax wraps for everyday use. If freezing, it’s recommended to let the wraps sit at room temperature for a few minutes before opening, so the wax softens naturally and doesn’t crack when unwrapping.
If you’d like to get your own Naturable bread bags and beeswax wraps set, you can find it here.
Curious about why swapping plastic wraps and plastic bags for beeswax is such a simple yet powerful upgrade for your kitchen?
Discover how small changes can make a real difference in our post: Swap Plastic for Beeswax: The Kitchen Upgrade You Didn’t Know You Needed
This loaf is a reminder that good bread doesn’t always look impressive during the process. Especially with whole grain and enriched doughs, strength, elasticity, and speed aren’t the main goals.
What matters is how the dough is handled, how fermentation is managed, and how the bread fits into real life. A loaf that slices cleanly, keeps well, and can be baked, stored, and frozen with ease.
This bread isn’t about perfection. It’s about confidence, understanding, and baking in a way that feels sustainable and realistic.
Have You Tried Our Beeswax Bags & Wraps?
A natural way to keep your food and bread fresh while reducing plastic in your kitchen.
Each set includes 2 reusable bread bags and 2 wraps, made from 100% cotton, beeswax, jojoba oil, and pine resin.
Simple, sustainable, and long-lasting.
Let’s Connect on Instagram
Subscribe to Our Newsletter
Join the Naturable Blog! Stay updated with our tips, kitchen hacks, and much more

Subscribe to Our Newsletter
Join the Naturable Blog! Stay updated with our tips, kitchen hacks, and much more
Stay connected! Follow us for tips, updates, and a little extra inspiration for your home and kitchen.
Have a question or need assistance?
Feel free to contact us!
© 2025. Naturable – A brand of Horizon Origin LLC