Naturally fresh, beautifully stored

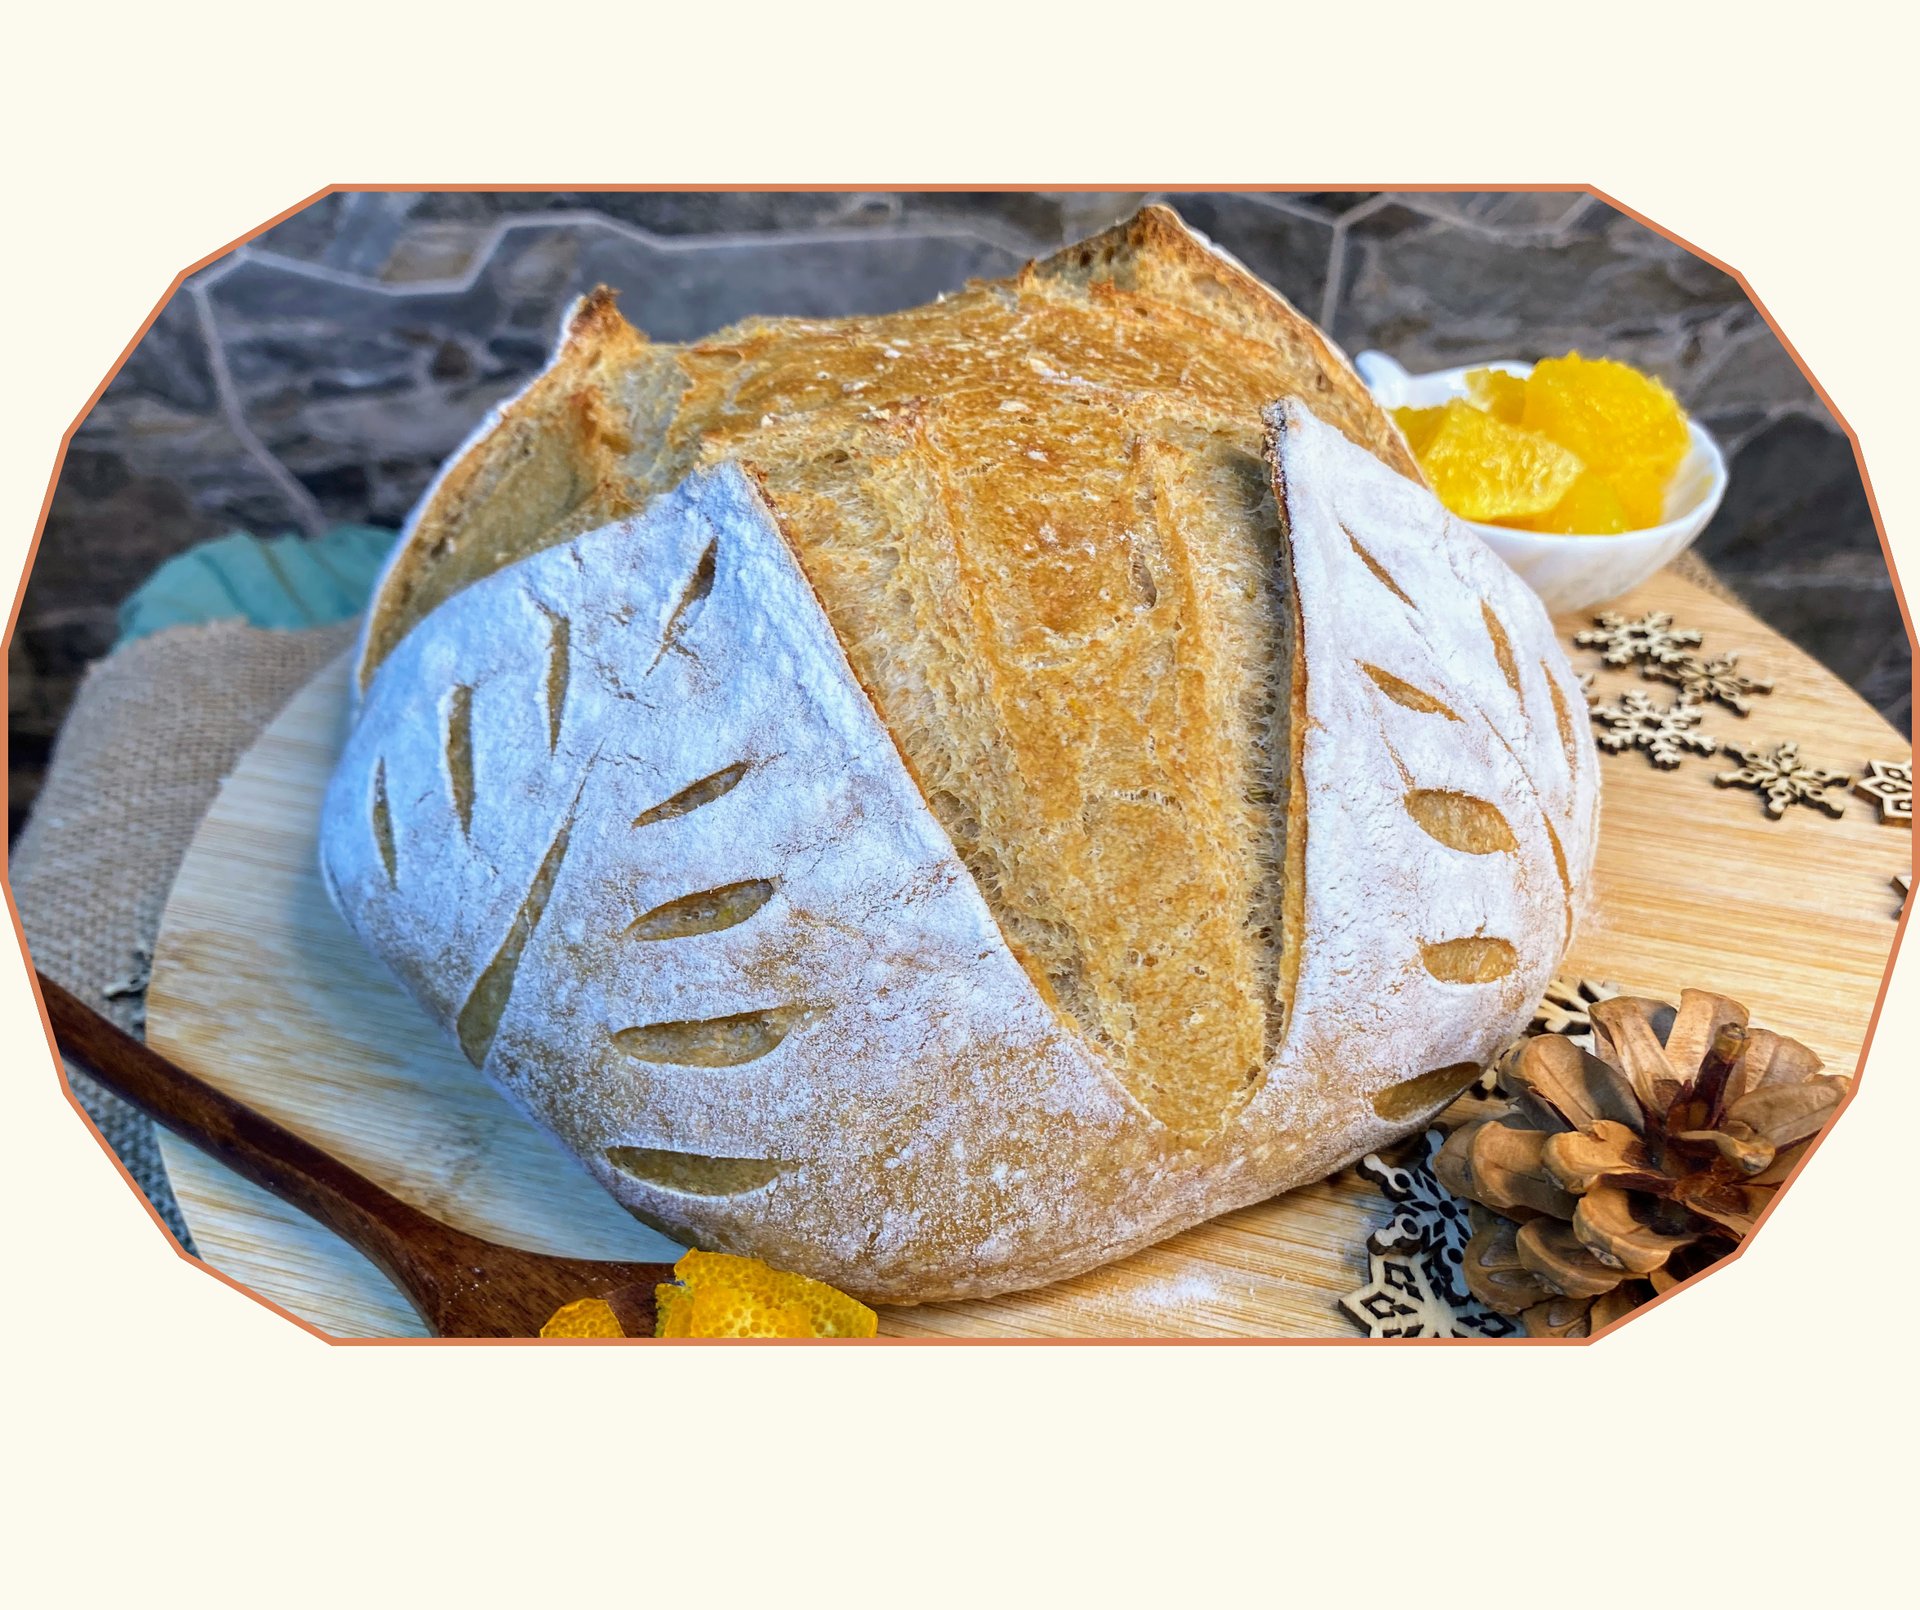
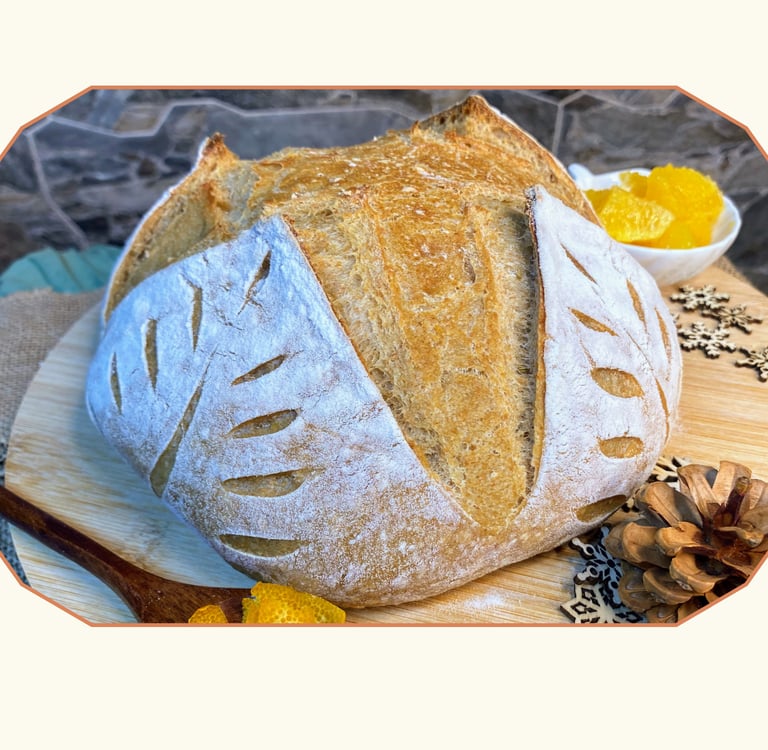
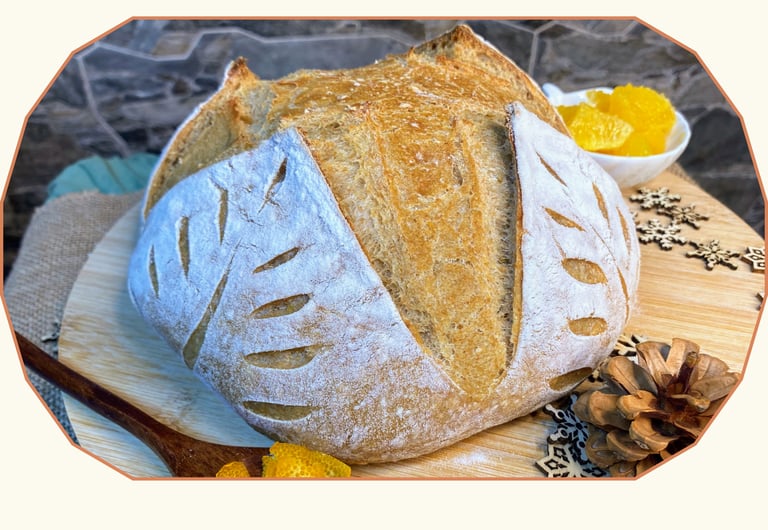
Winter Orange Sourdough with a Touch of Honey and Rosemary
Discover a cozy winter sourdough loaf made with orange juice, honey and spelt that fills your kitchen with warmth from the very beginning. In this post you will learn the complete step by step, why each technique matters and how to get a tender, aromatic crumb every time. A comforting bread with bright citrus notes, perfect for slow mornings and winter meals.
A


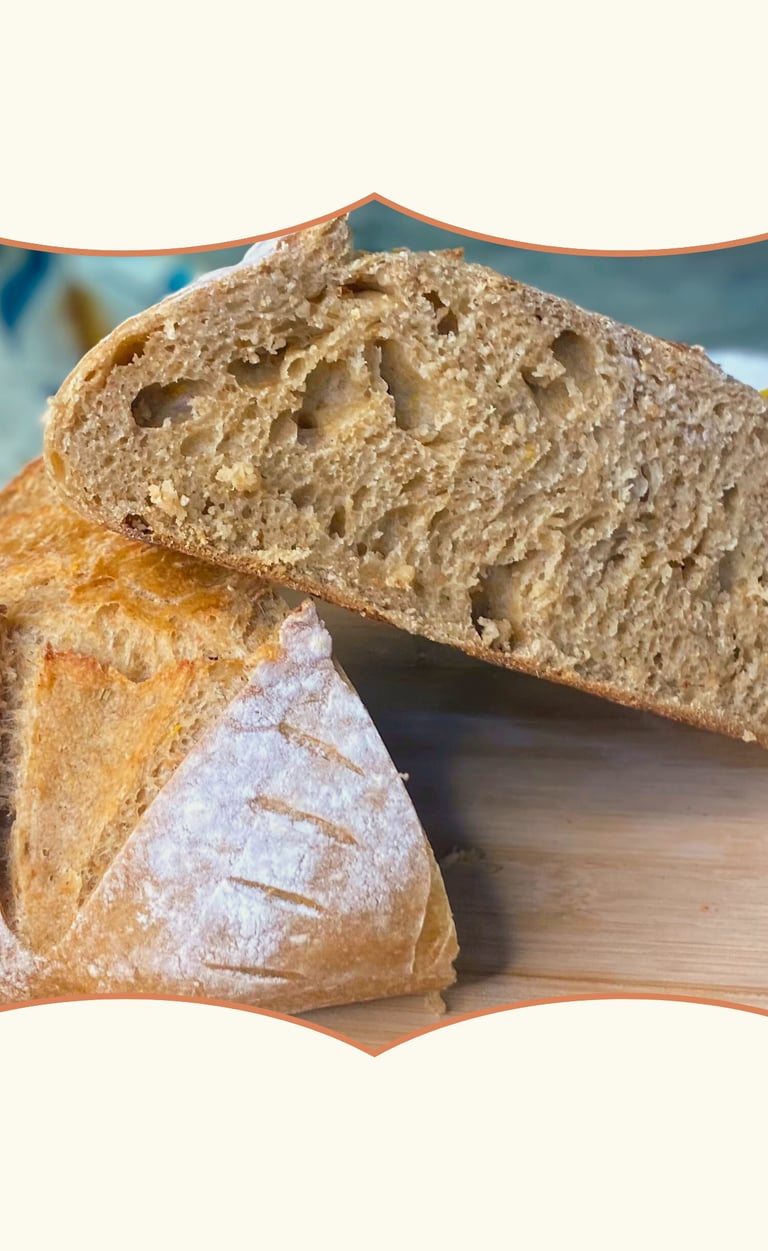
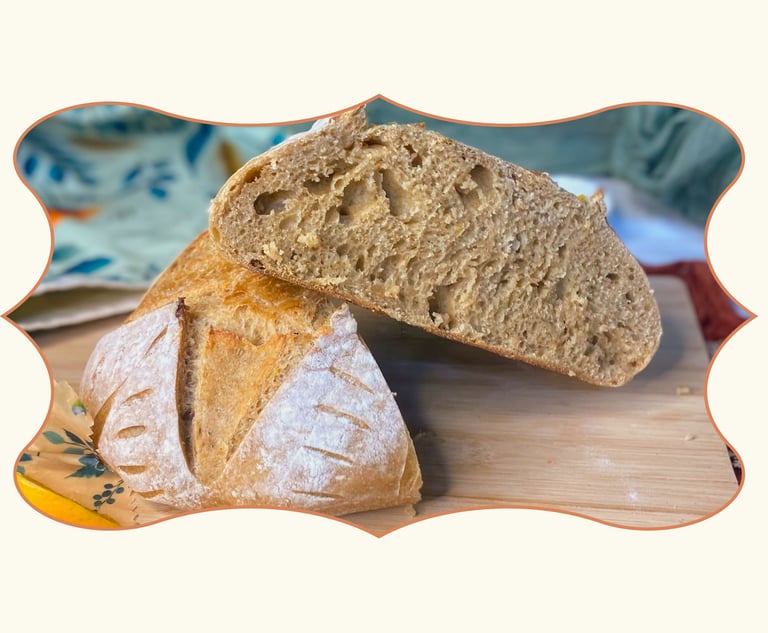
Some breads perfume your kitchen the moment you begin making them and instantly turn your home into a warmer place. This sourdough loaf with orange, honey and spelt is one of them. Its tender, juicy crumb, subtle citrus aroma and gentle sweetness make it a perfect choice for the winter season.
In this article you will find the full recipe along with the “why” behind every technical decision. This loaf is meant to teach while you bake and to bring a comforting, seasonal touch to your everyday bread.
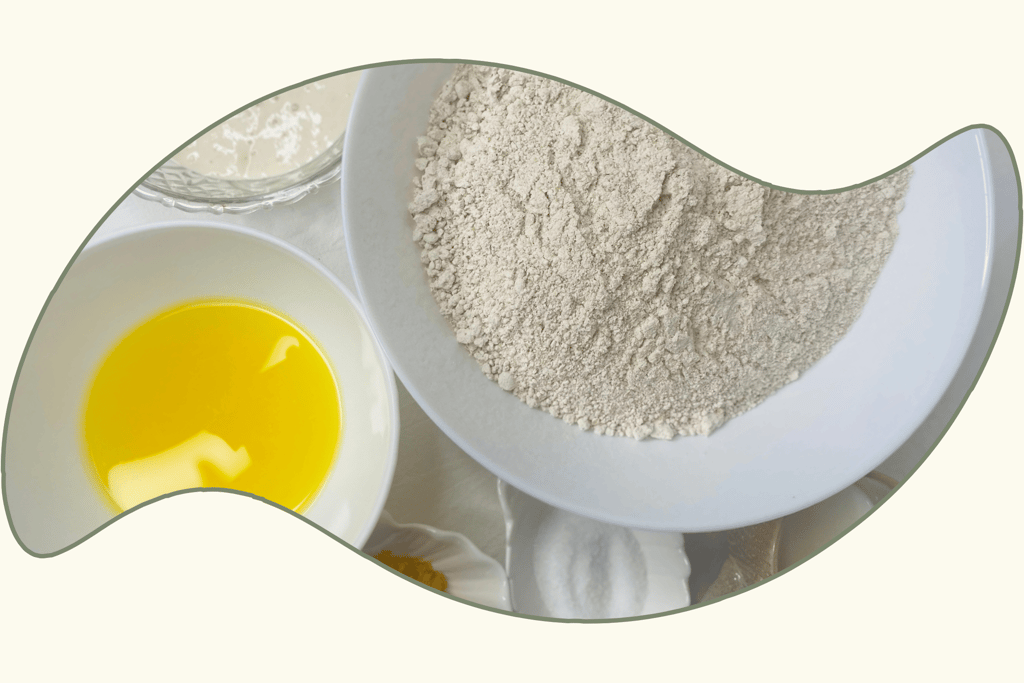
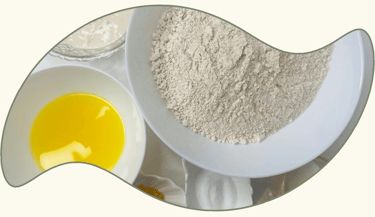
Ingredients
350 g bread flour
150 g whole spelt flour
100 g active sourdough starter at 100 percent hydration
200 g water
100 g strained orange juice
50 g warm milk
10 g salt
15 g honey
Zest of 1 orange
3-5 g finely chopped fresh rosemary
½ teaspoon ground ginger
Optional a tiny pinch of cardamom
Tools you will need
A large mixing bowl
A flexible dough scraper
A spoon or spatula
A banneton
A Dutch oven
Parchment paper
A clean kitchen towel
A microplane or fine zester
A digital scale
If you do not have a Dutch oven or a banneton, do not worry. You can still make this loaf using simple home substitutes. In our guide Sourdough Made Simple: A Beginner’s Guide to Your First Loaf you can find different alternatives you can use if you are missing some of these tools. I will add the link on the website.

How This Dough Behaves & Why
Spelt
Spelt absorbs water quickly, develops gluten quickly and loses strength quickly. It needs a long autolyse so its fiber hydrates properly and the crumb stays soft and flexible.
Honey and orange juice
Both increase enzymatic activity.
The dough softens and ferments faster.
They also caramelize early in the oven.
This is why the initial baking temperature is lower than in a classic sourdough loaf.
Milk
Milk softens gluten and produces a tender crumb, but it also makes the dough more delicate.
This means fewer folds and much earlier ones.
Aromatics
Zest, rosemary and ginger act as small “interruptions” in the gluten network.
They need to be integrated gently with a light kneading.
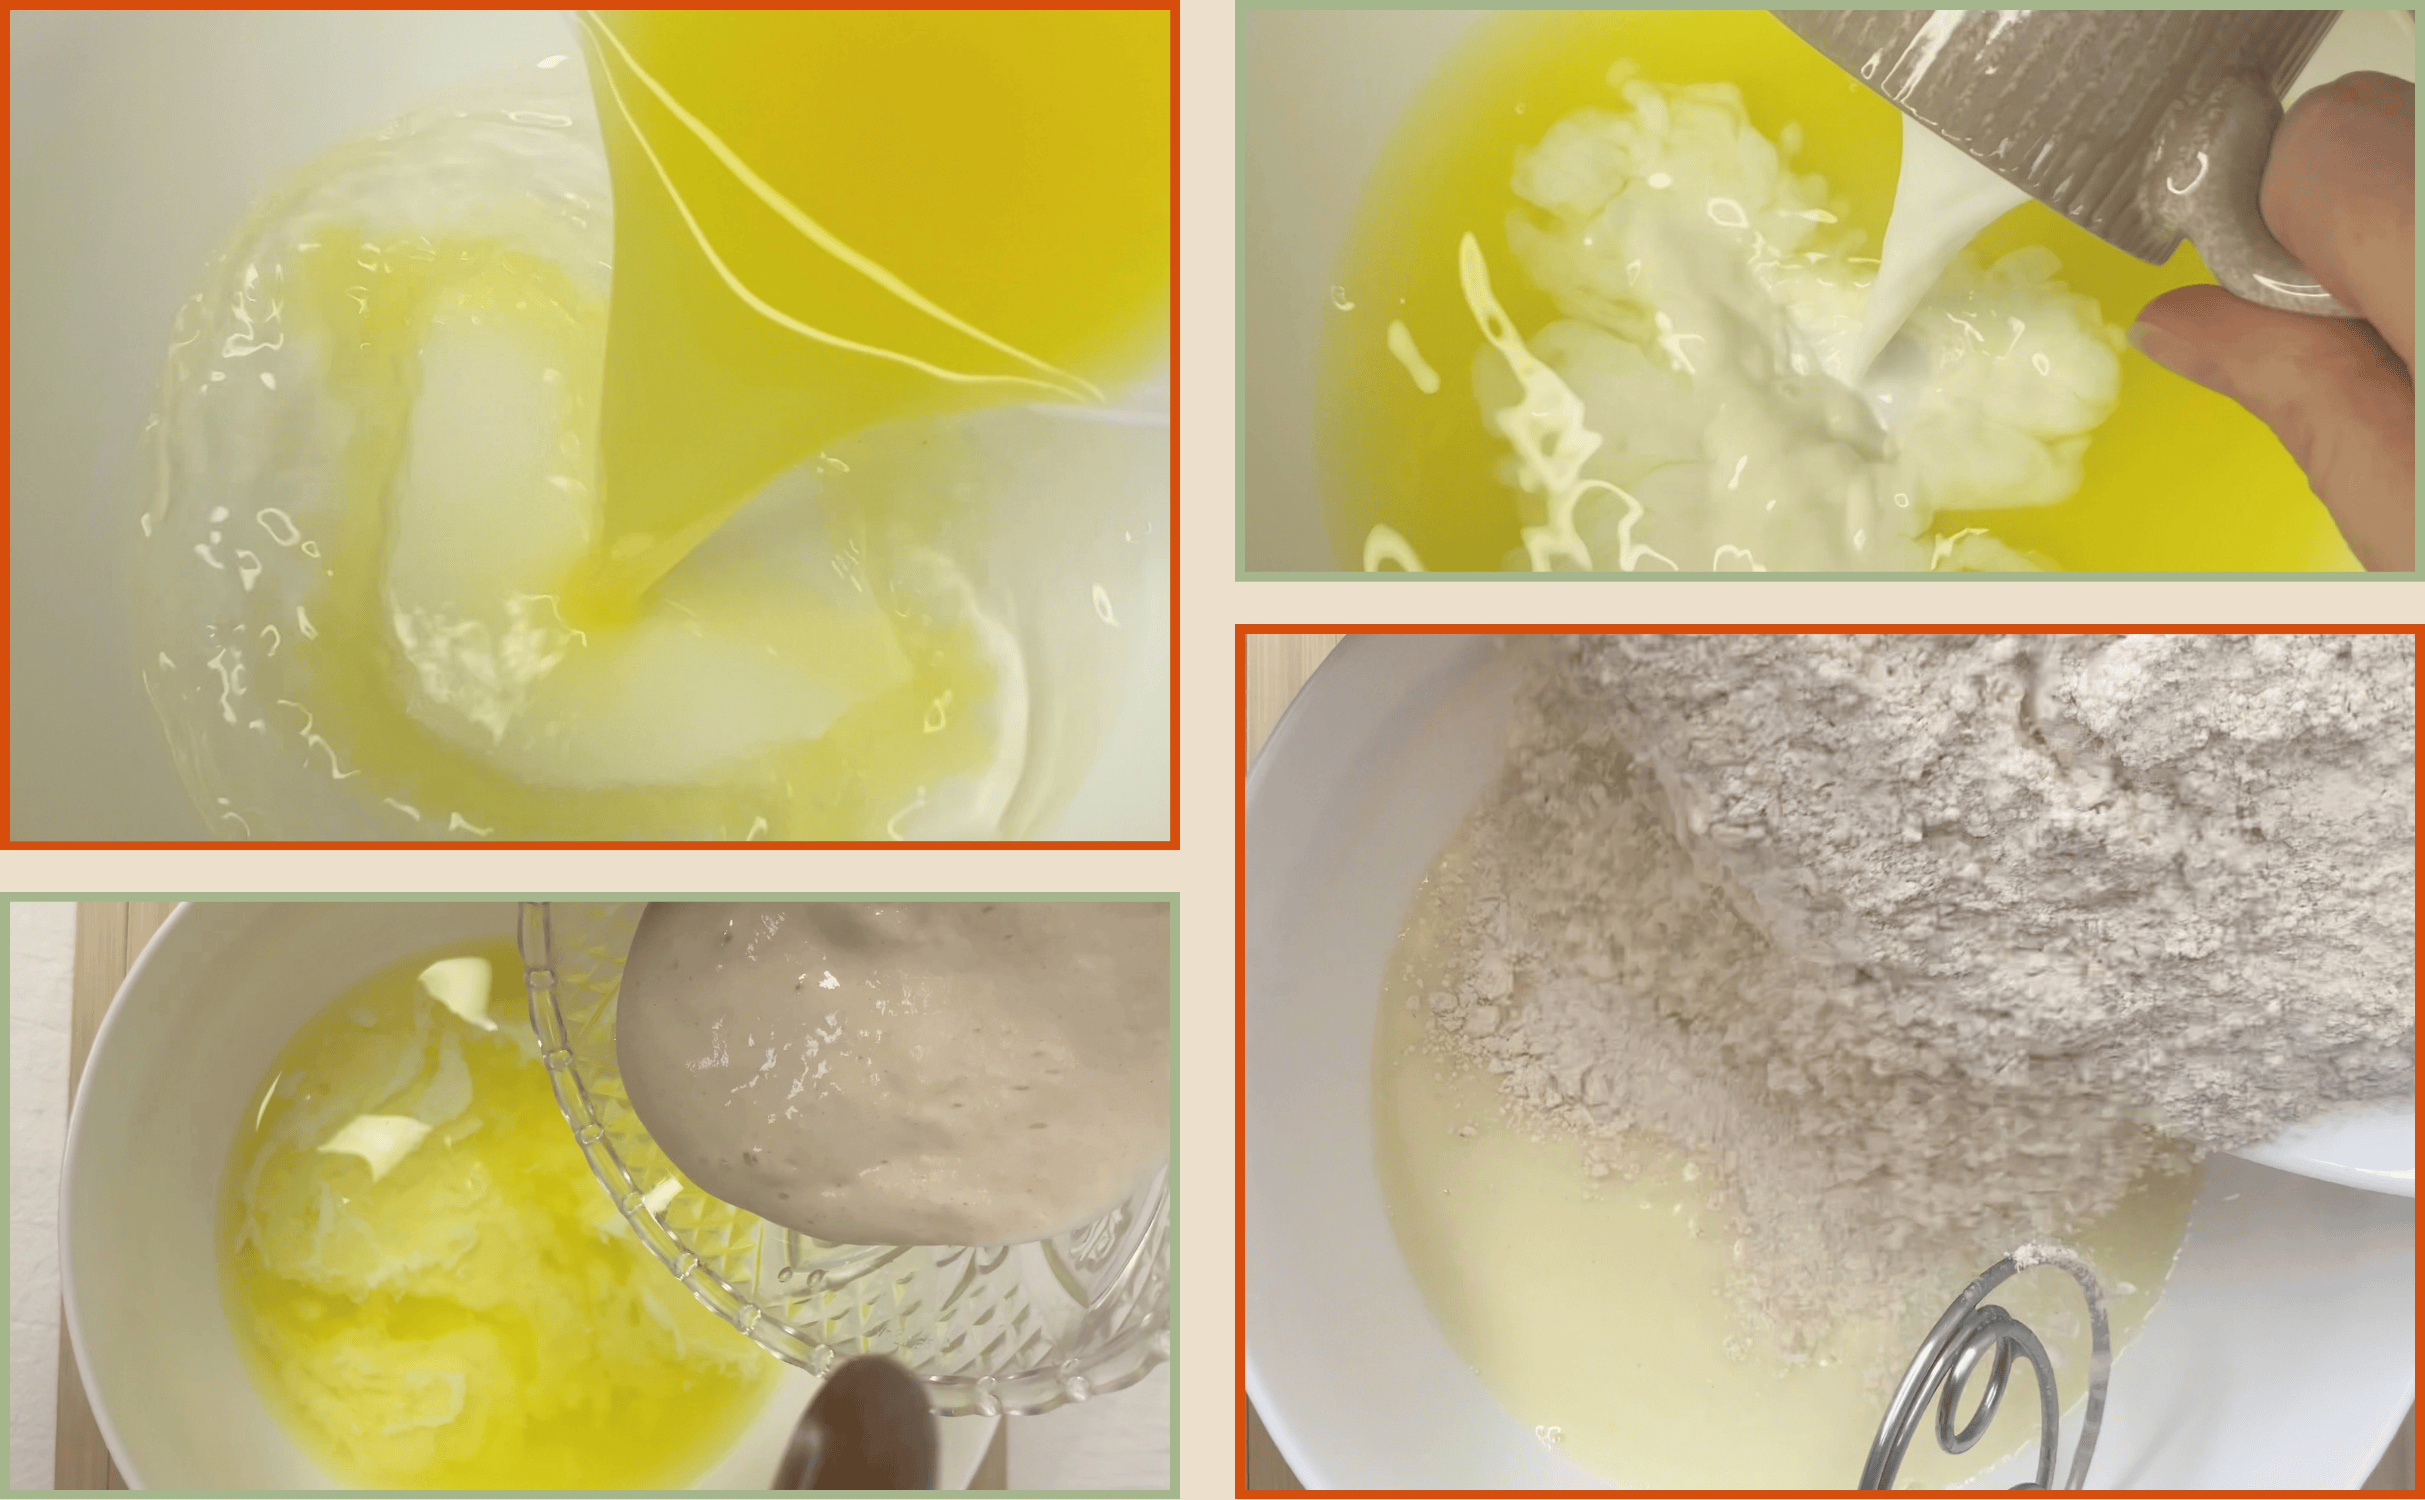
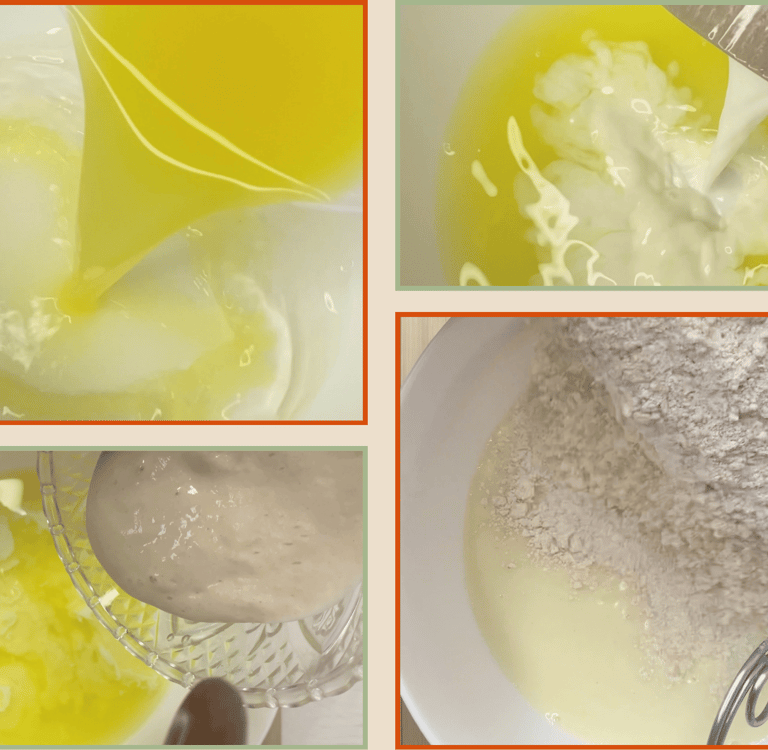
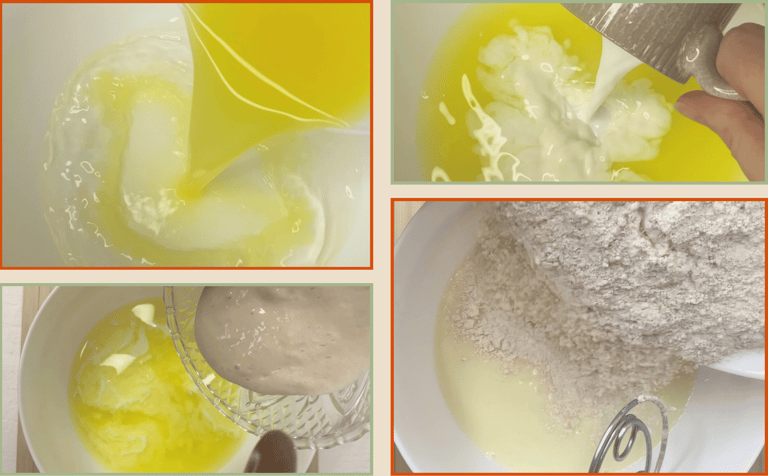
Initial mix and autolyse
Add the water, orange juice, milk and the sourdough starter to a large bowl.
Whisk or stir briefly until the starter dissolves into the liquids.
Add the bread flour and the spelt flour on top.
Mix until no dry flour remains. You don’t need to knead; just bring everything together into a cohesive dough.
Let it rest for 1 hour.
This autolyse allows the spelt to hydrate fully and gives the gluten a head start so the dough becomes more flexible, easier to handle and naturally lighter.
Note: If you prefer, you can mix only the liquids and flours first, autolyse for 1 hour, and add the sourdough starter afterwards. This method is often recommended by professional bakers because adding the starter after the autolyse helps organize the gluten more cleanly and avoids overworking the dough early. To do this, create a small well in the center, place the starter inside, and fold the dough toward the middle while turning the bowl until it is partially incorporated.
Step by Step
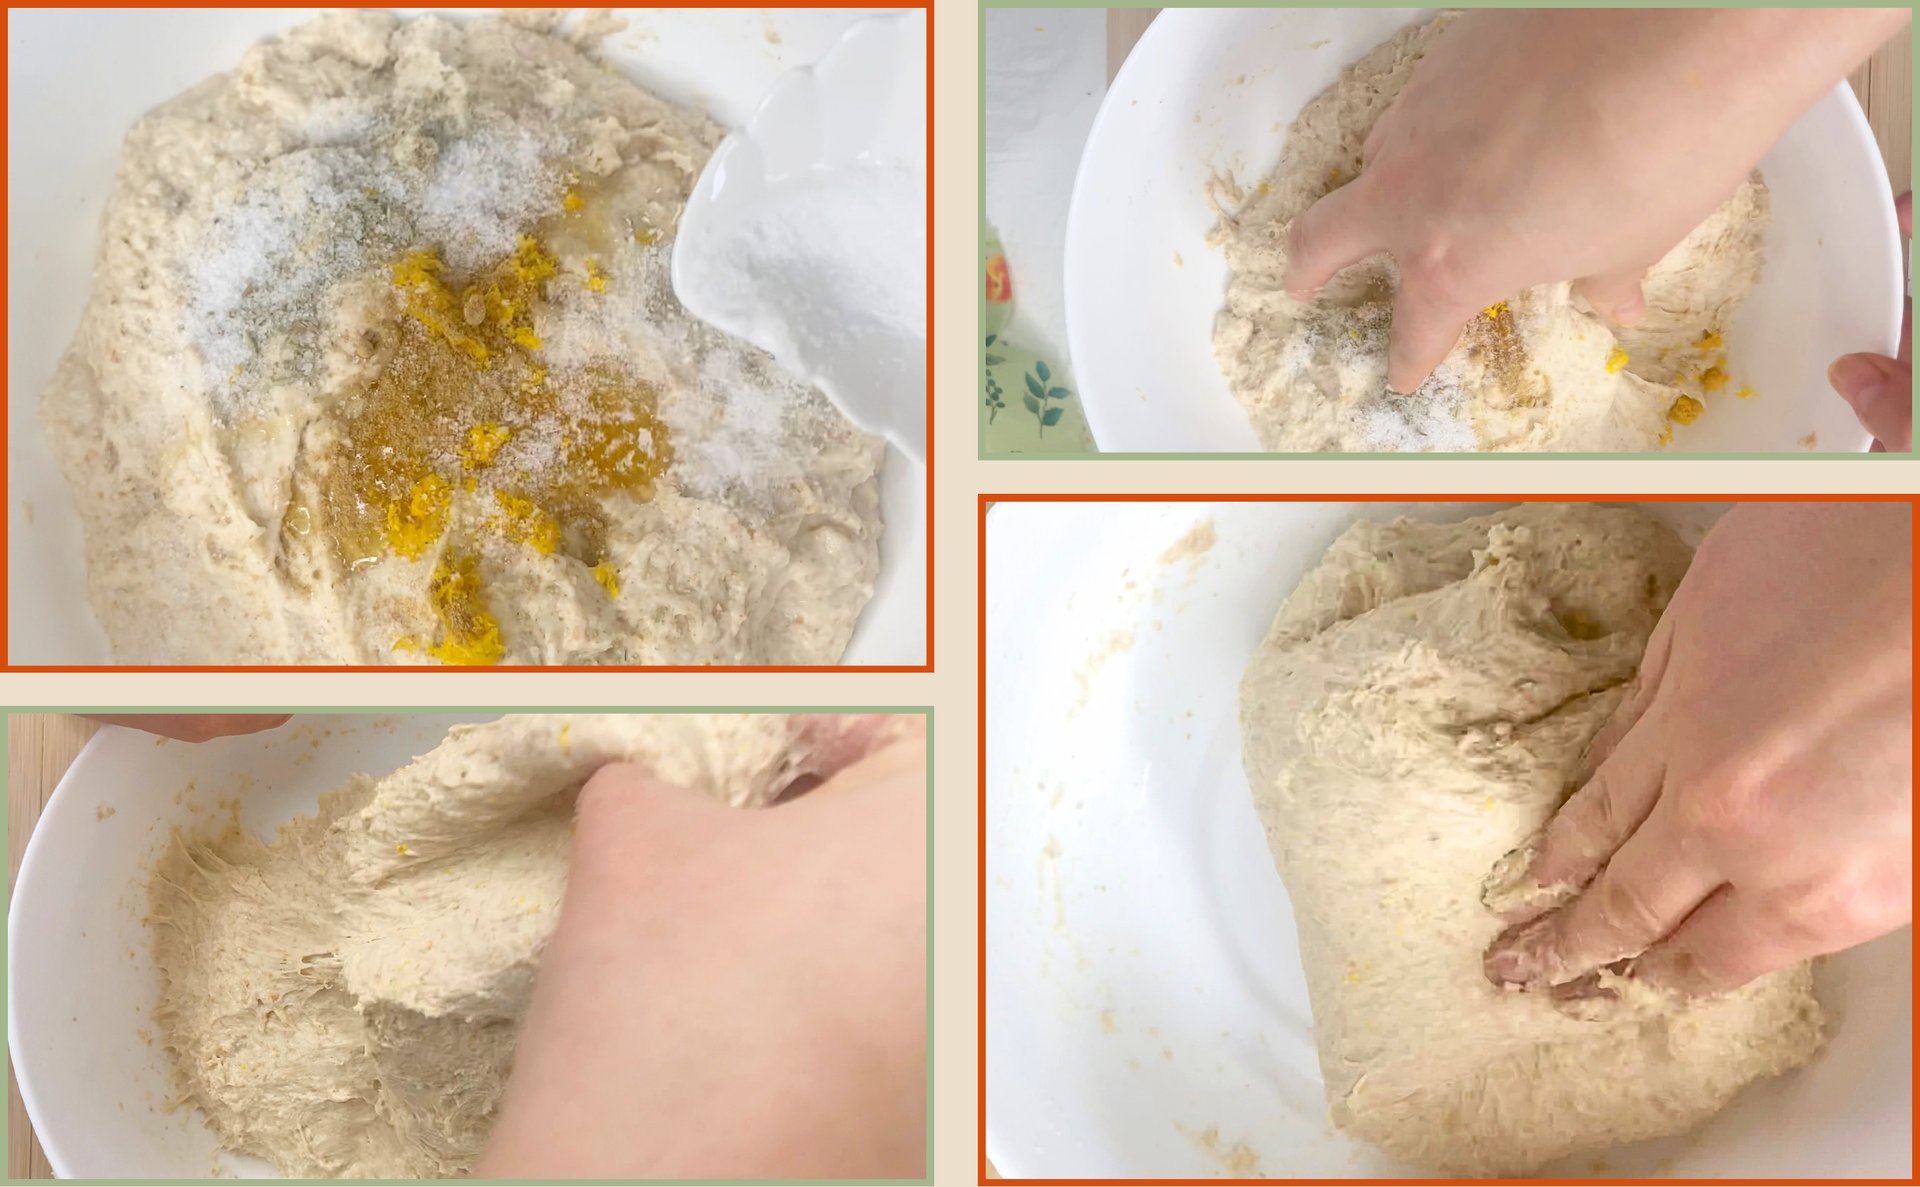
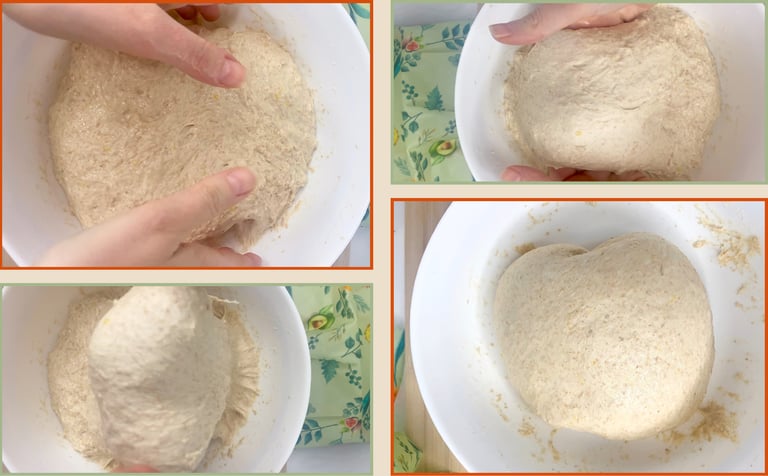
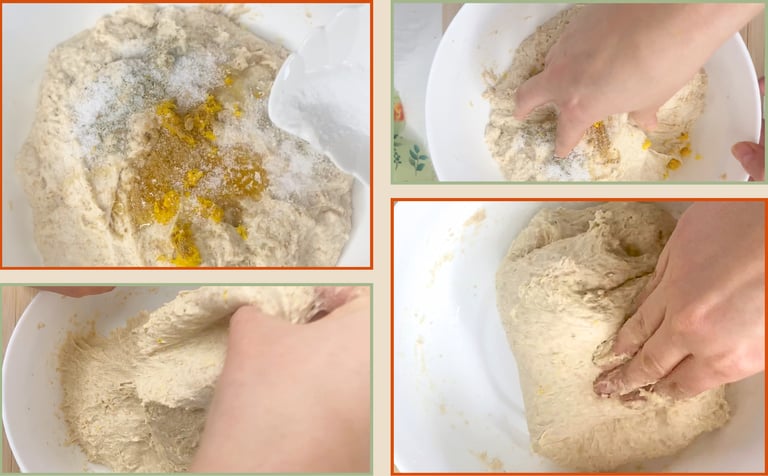
Add the honey and aromatics
Add the honey, the orange zest, the chopped rosemary and the ground ginger all at once.
Sprinkle the salt evenly over the surface and begin a gentle integration knead.
Lightly moisten your hand and knead inside the bowl using pinching and folding movements. This short kneading distributes the salt, honey and aromatics evenly and brings the dough together before the folding steps.
You are not building a strong gluten network here; you only need a cohesive and uniform dough.
Note: Even though in this recipe everything is added at the same time, you can choose to integrate the honey first. Many bakers prefer adding the honey on its own because it dissolves more easily and blends faster into the dough before adding the aromatics, especially if the dough feels stiff or the honey is thick.
If you want to make this step even easier, you can reserve a small amount of the mixing water at the beginning and use it to loosen the honey before adding it to the dough.

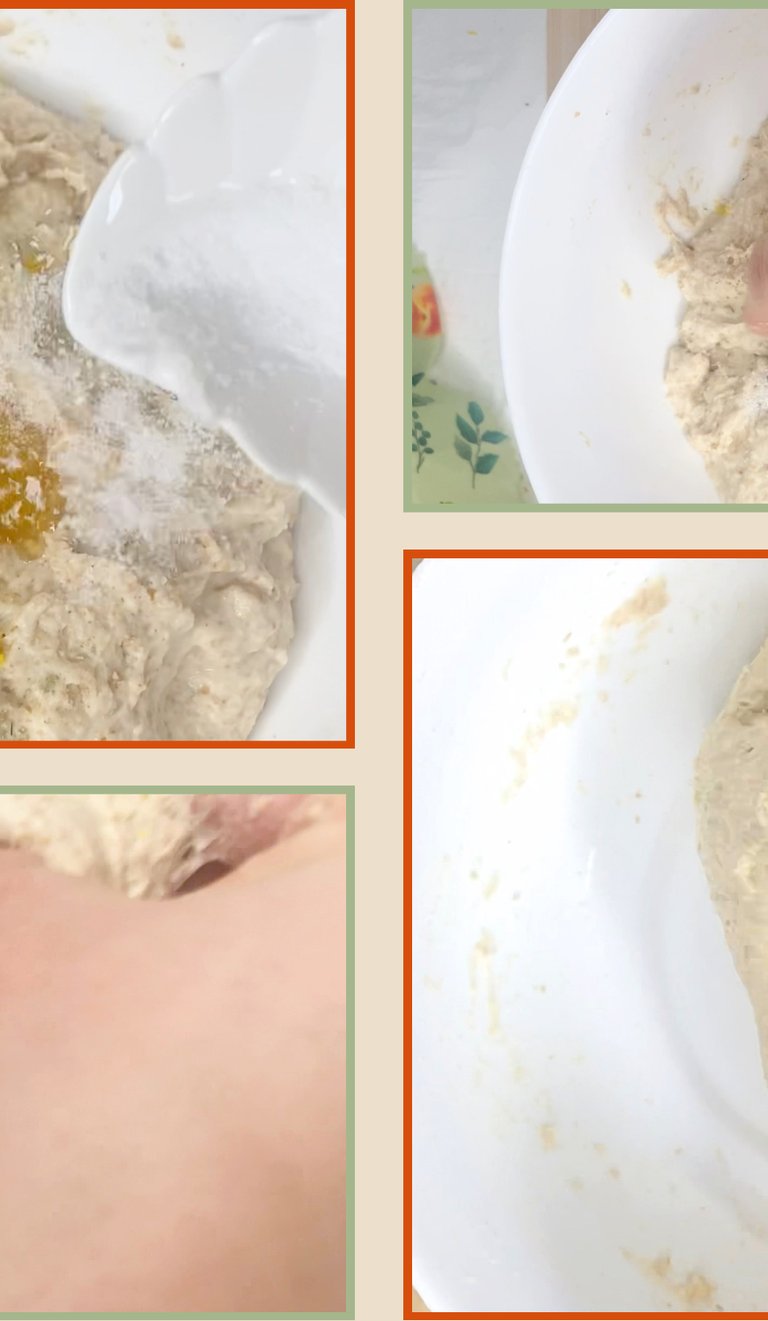
First fold
Wait 20 minutes.
Do a stretch and fold: lift one side of the dough and fold it into the center. Repeat around the entire dough.
This early fold is necessary because spelt, milk and honey weaken gluten faster than usual.
Second fold
Wait 20 more minutes and repeat the fold.
Two folds are enough for this dough.
More folds would break the structure.
Pre-shape
Transfer the dough to the counter gently.
Shape a light round by bringing the edges toward the center.
Let it rest for 20 minutes with the smooth side facing up.
This rest relaxes the dough and makes the final shape much cleaner.
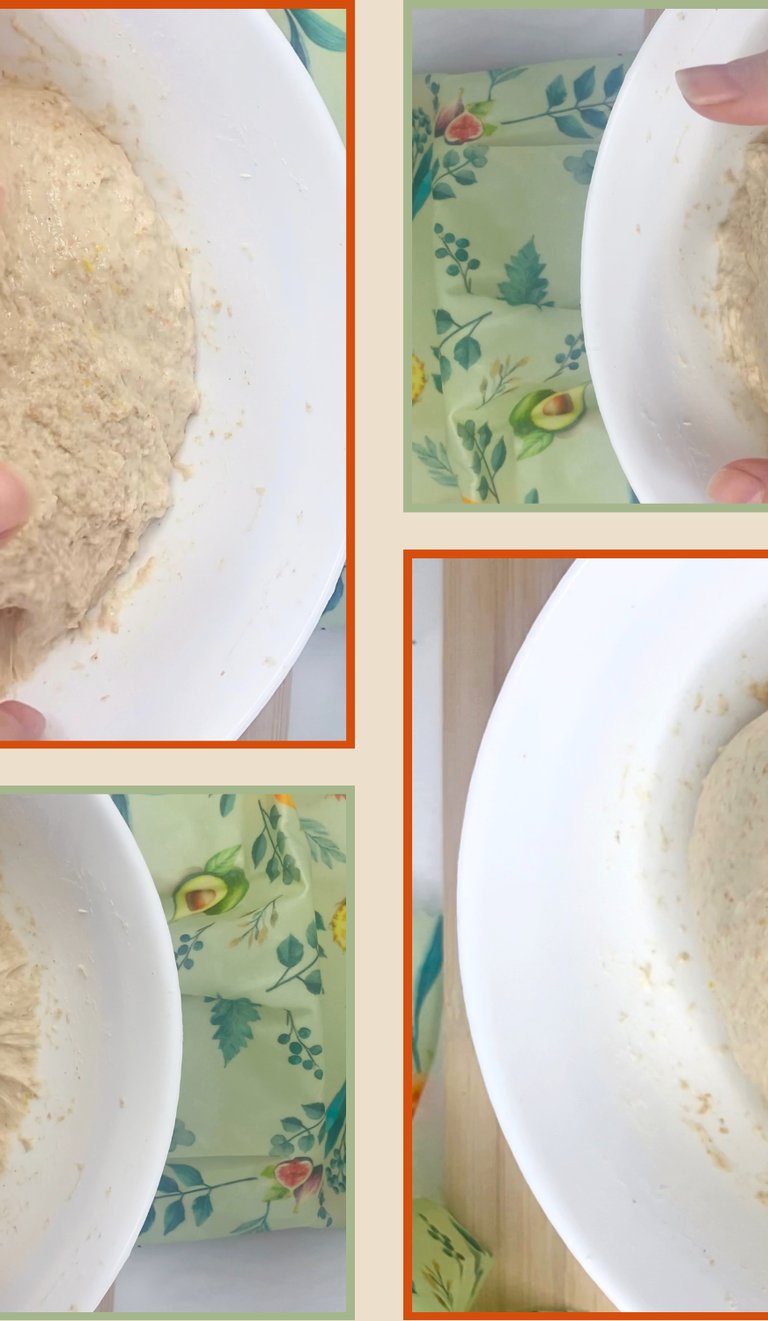
Bulk fermentation
Let the dough rise about 60 to 70 percent.
At 23 to 24 degrees Celsius this usually takes around 3 hours.
You want a dough that feels airy and flexible.
Final shaping
Flip the dough so the rough side is facing up.
Take the edges and fold them toward the center, but not just to the center; fold them slightly past the center to create more surface tension. Repeat around the entire dough until you have a clear, firm seam.
Flip the dough so the seam is now on the counter.
Time to round the dough.
Place your hands in front of the dough and slide it gently toward you while rotating it slightly at the same time. This double movement of pulling and turning builds tension on the surface without tearing the dough.
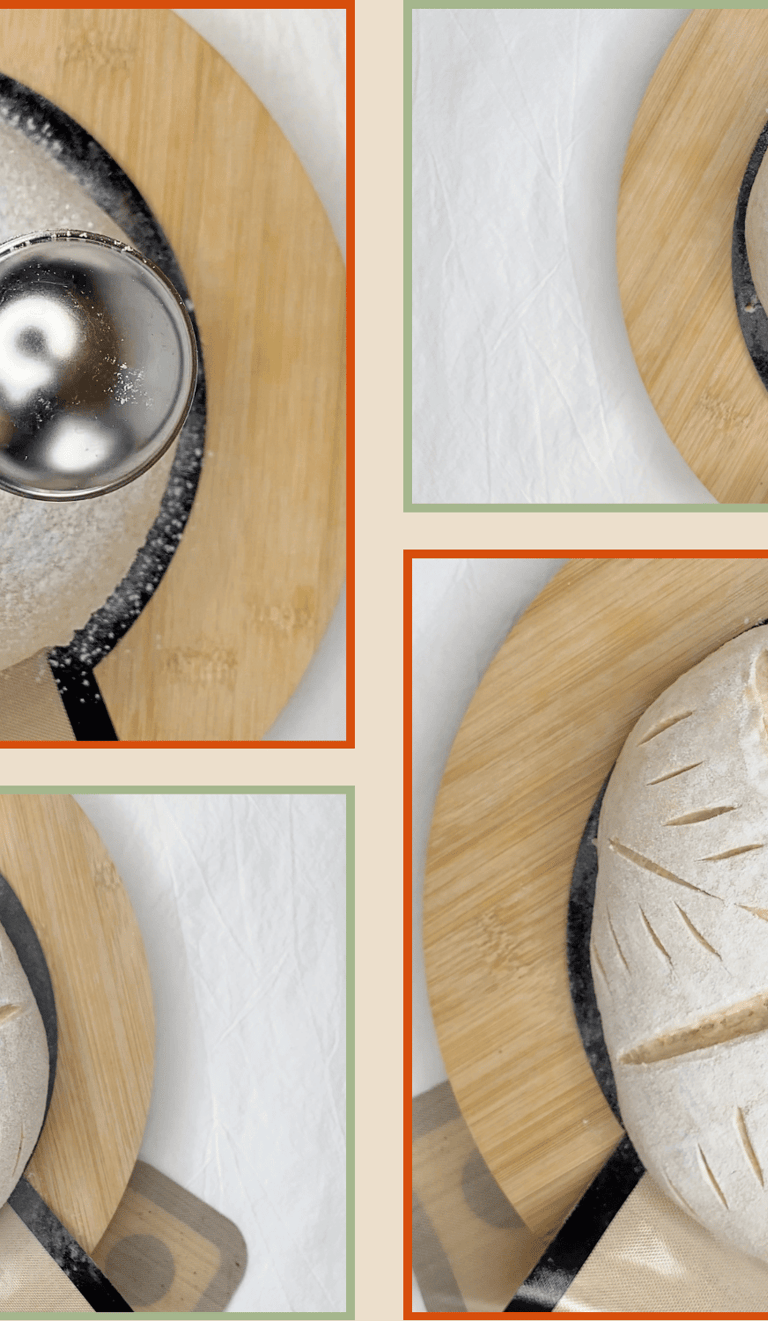
Once the dough feels firm and stable, place it seam side up in a well floured banneton.
Do you enjoy cozy sourdough recipes like this one?
Try our Maple Pecan Loaf with a Touch of Coffee and dive deeper into winter baking inspiration.
Looking for sustainable kitchen inspiration?
Read Swap Plastic for Beeswax: The Kitchen Upgrade You Didn’t Know You Needed
and discover how small changes can make a big difference.


Cold fermentation
Refrigerate the dough for 10 to 12 hours.
This slow rest enhances the flavor and stabilizes this enriched dough.
Baking
Preheat the oven to 230°C with the Dutch oven inside.
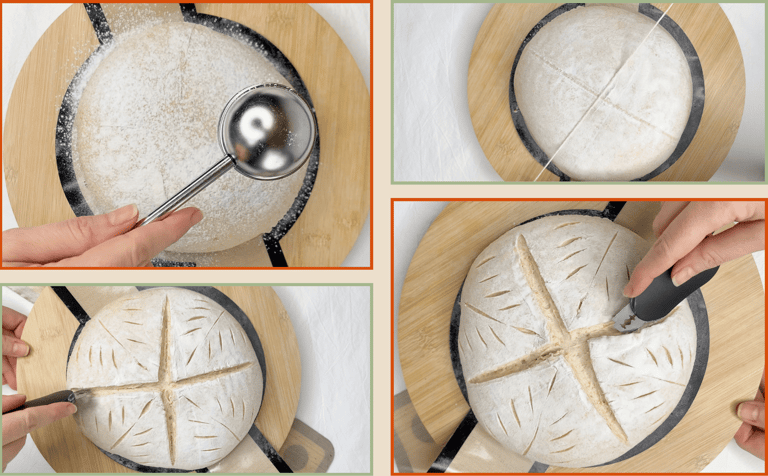
Turn the dough out onto parchment paper. If you want a more floured finish, dust the top lightly before scoring. Rice flour works best because it does not disappear in the oven, you can use it alone or mixed with a little wheat flour.
Score the dough cleanly and place it in the hot pot.
Bake for 20 minutes covered.
Uncover, reduce to 200°C and bake for 20 to 25 minutes more.
This temperature combination keeps the crust thin and prevents the honey and milk from caramelizing too quickly.
Cooling
Cool the loaf on a rack with a kitchen towel on top for the first 30 minutes.
Then remove the towel and let the loaf cool completely before slicing.

How to Enjoy This Loaf
This bread pairs beautifully with flavors that complement its winter aroma and tender crumb:
Cream cheese
Salted butter
Aromatic olive oil
Orange, peach or apricot jam
Winter vegetable soups
Herbed hummus
Mild pesto
Spiced tea or coffee
It tastes incredible toasted the next day because the honey and spelt help retain moisture.
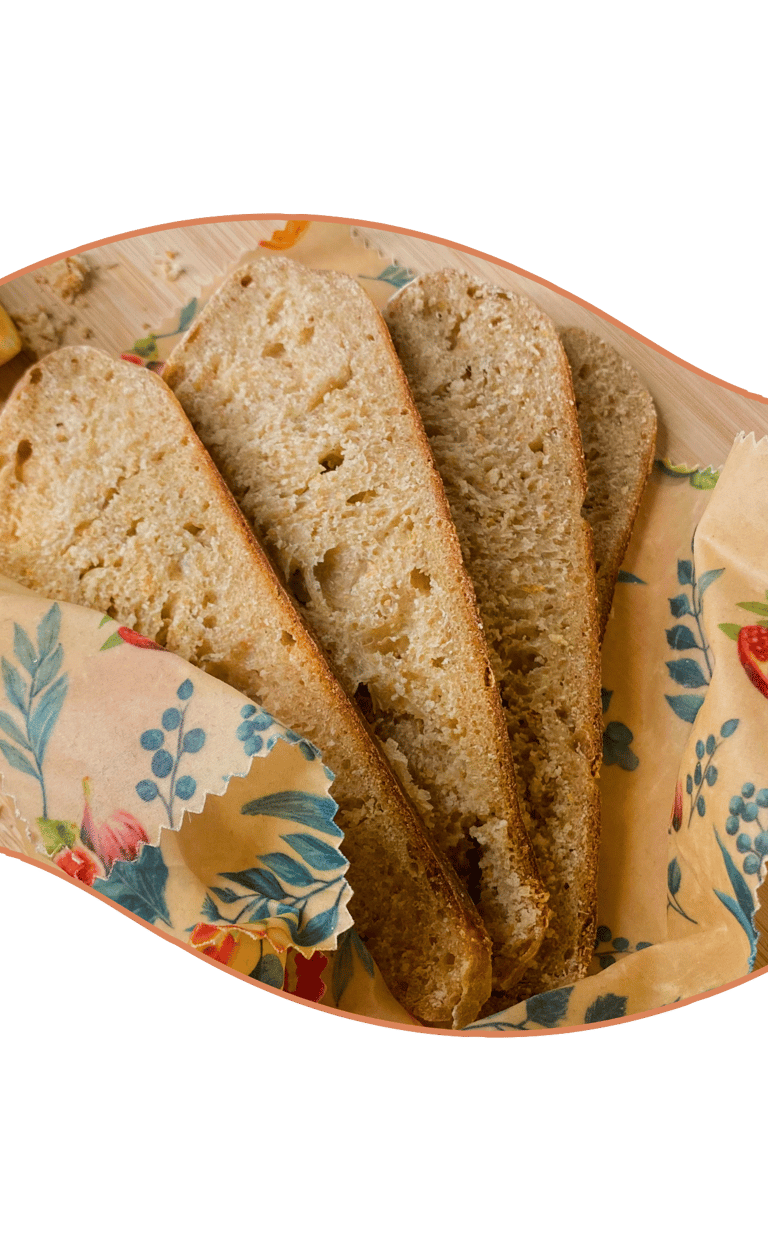
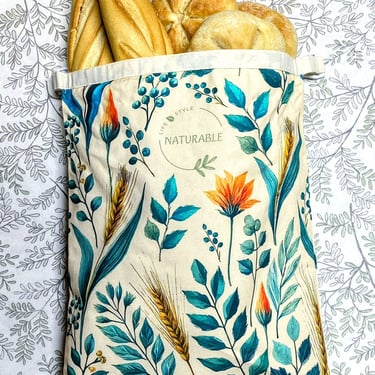
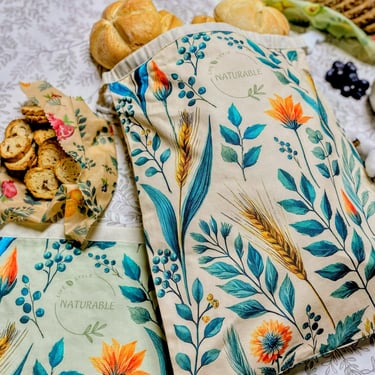
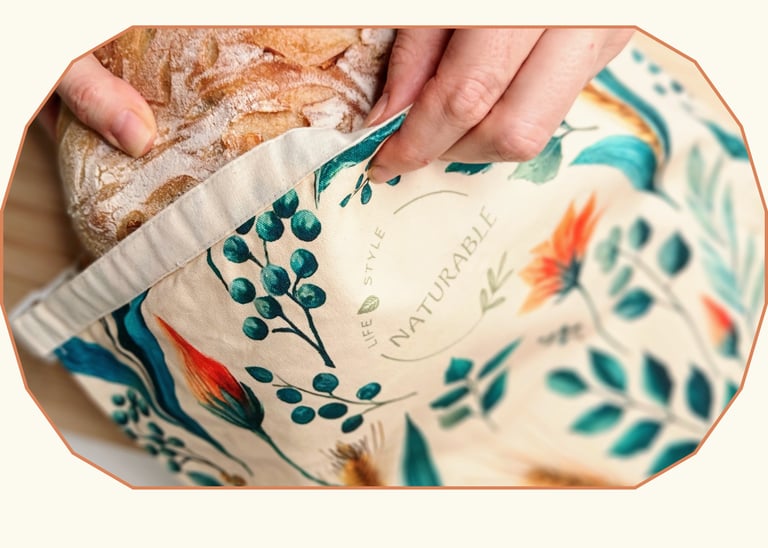
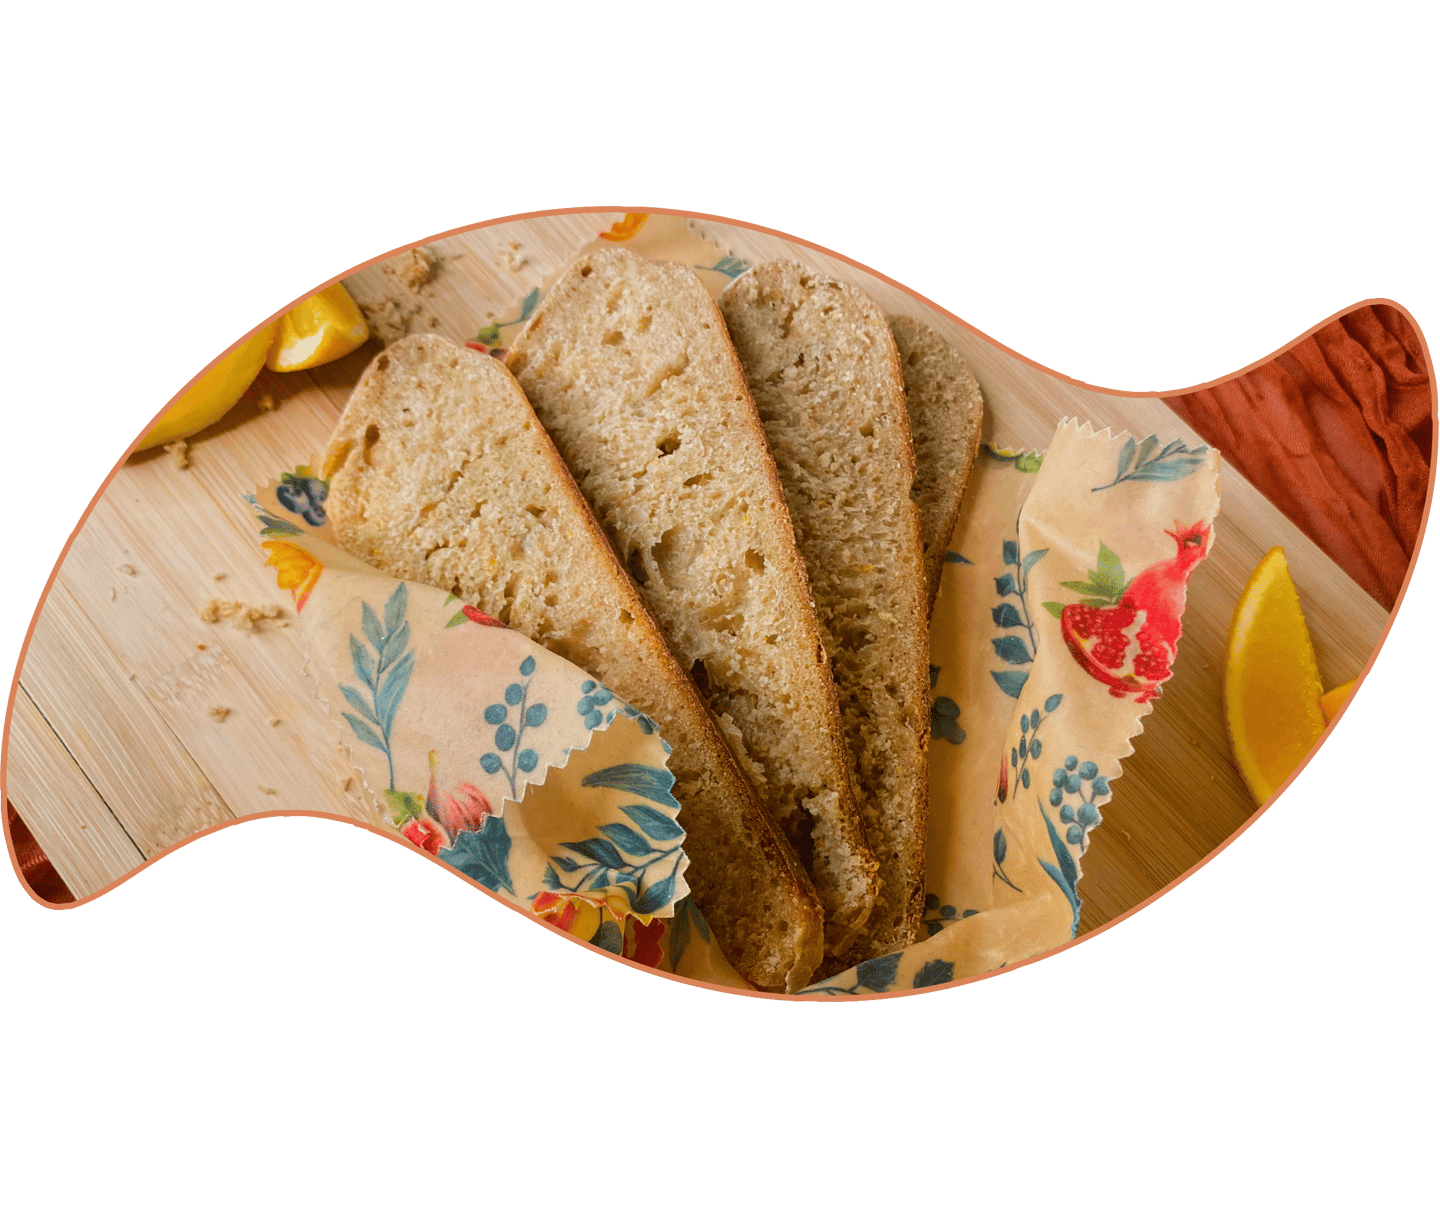
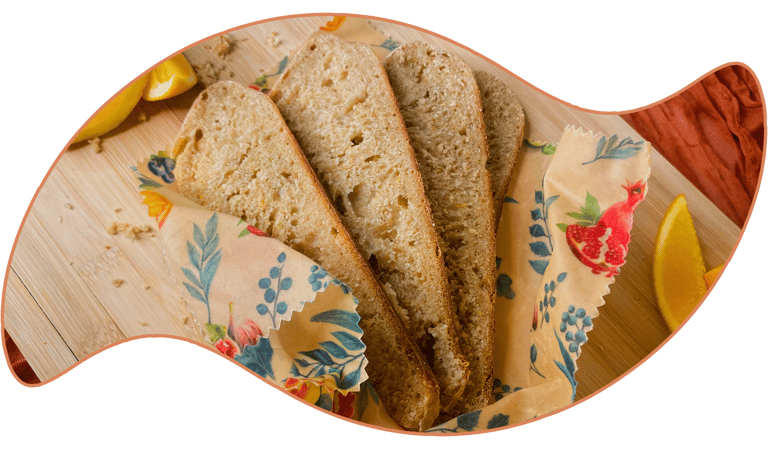
How to Store It
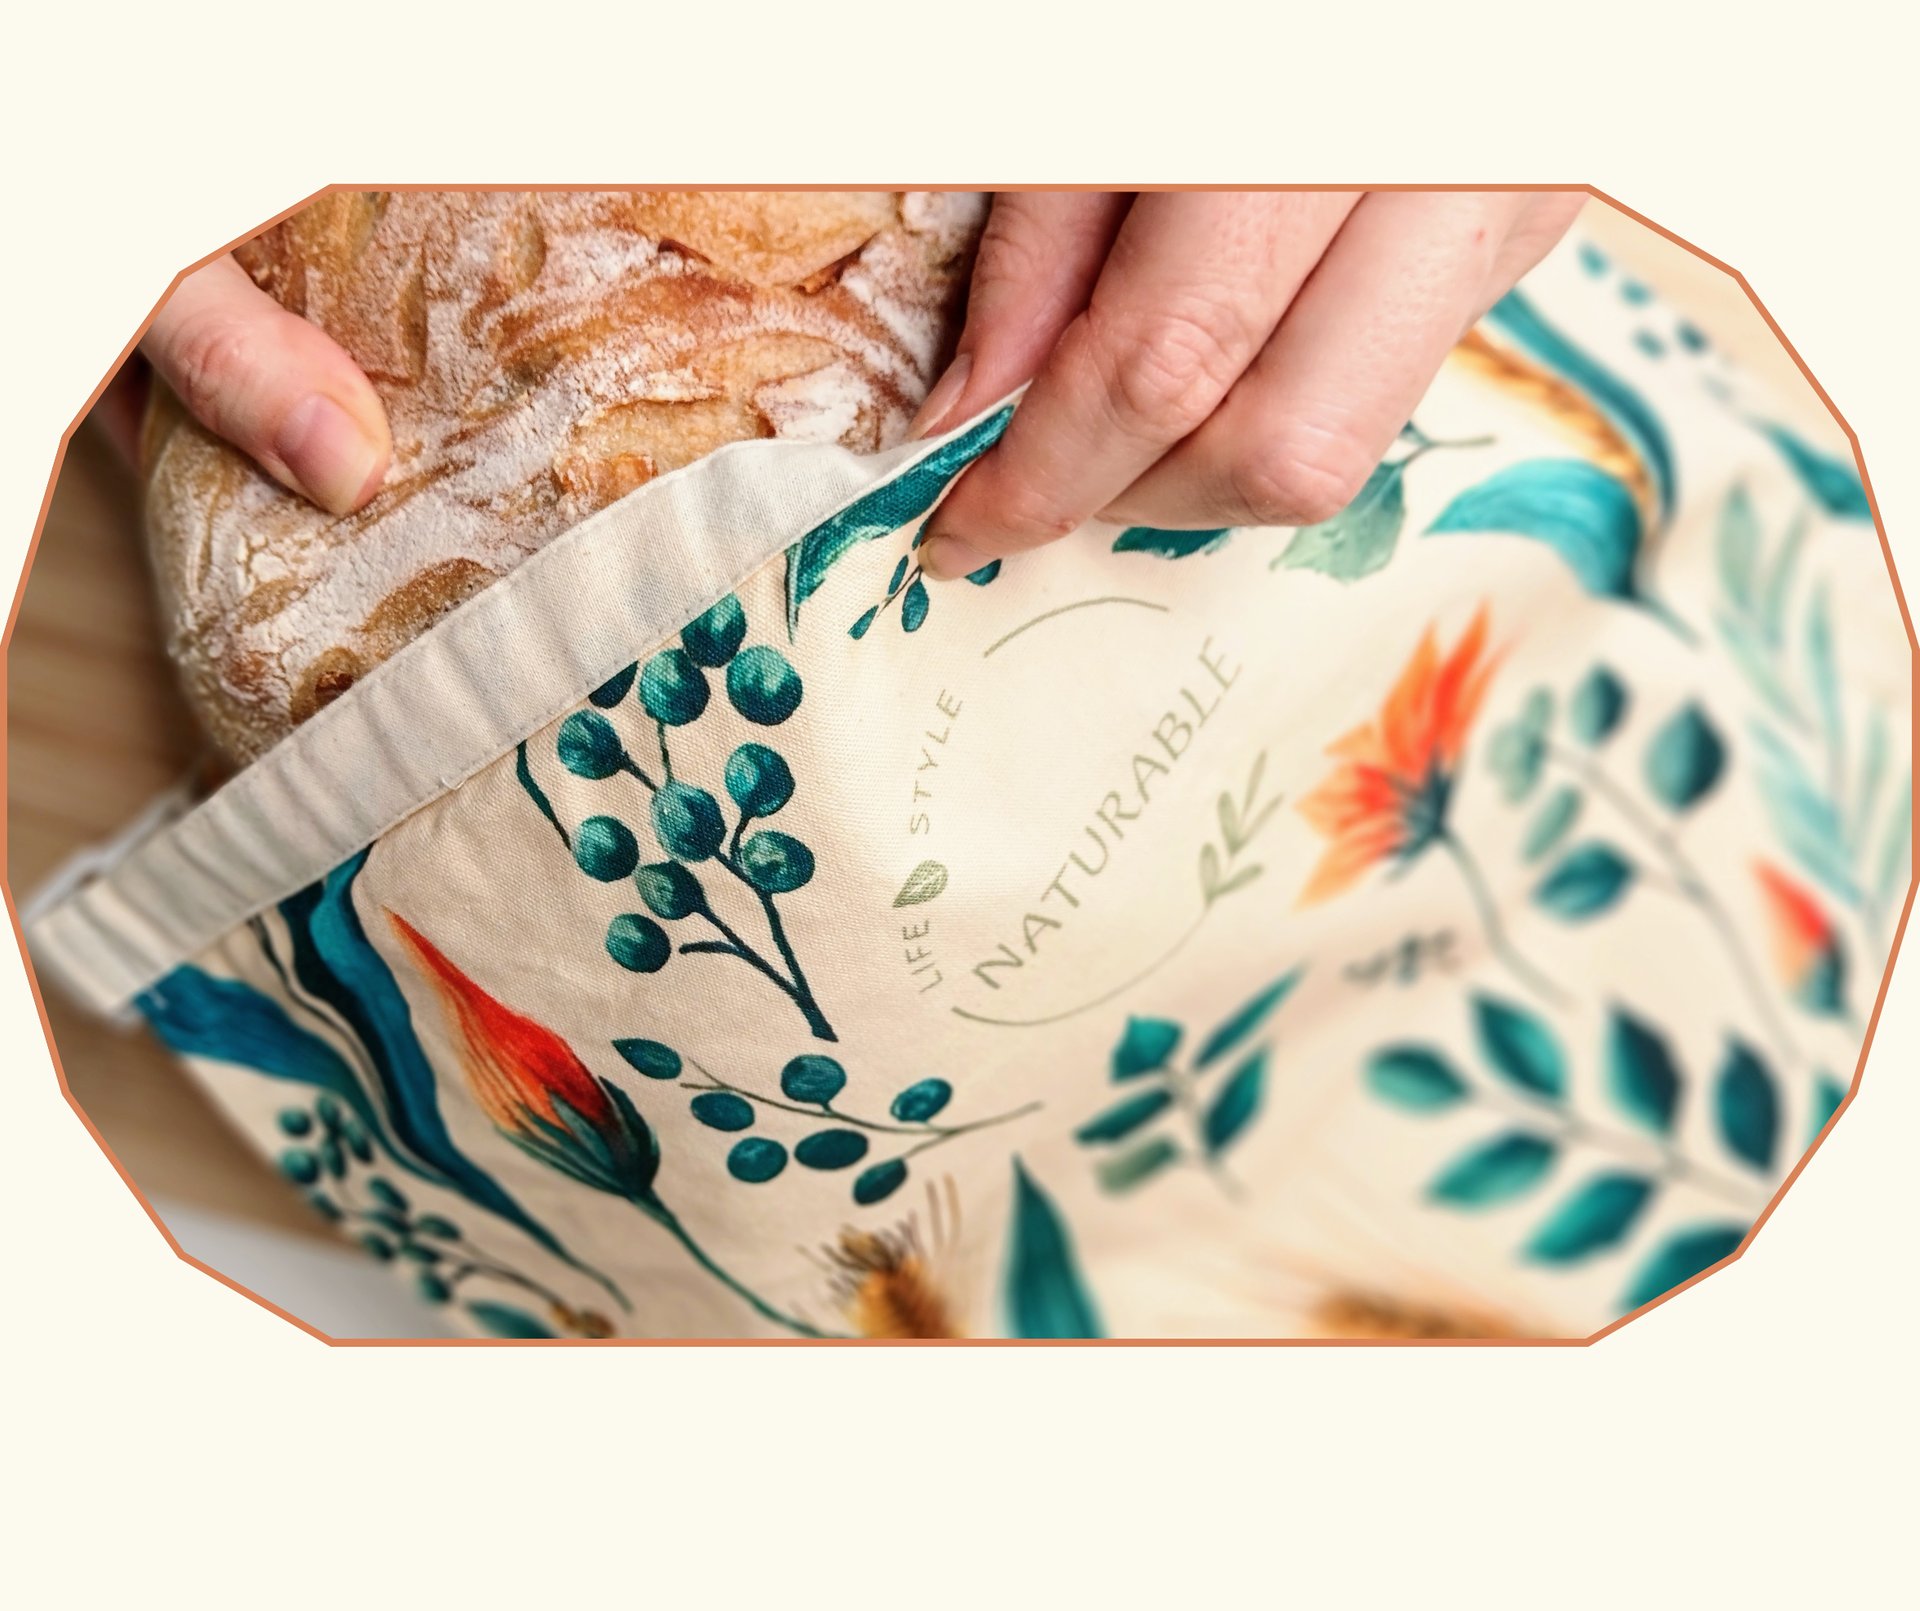
To keep your loaf fresh for longer, our Naturable reusable beeswax bread bags work especially well. In our experience, this loaf stays tender for more than 4 days when stored inside our bags. Just like our beeswax wraps, they are completely safe for both refrigeration and freezing, so you can use them with full confidence.
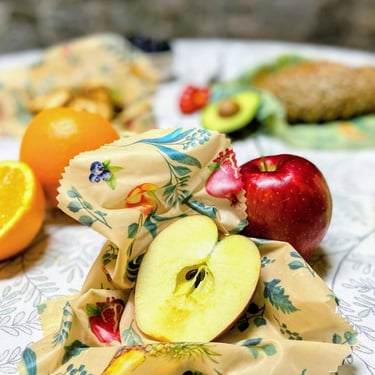
If you want to freeze the loaf, you have two options depending on how you plan to enjoy it.
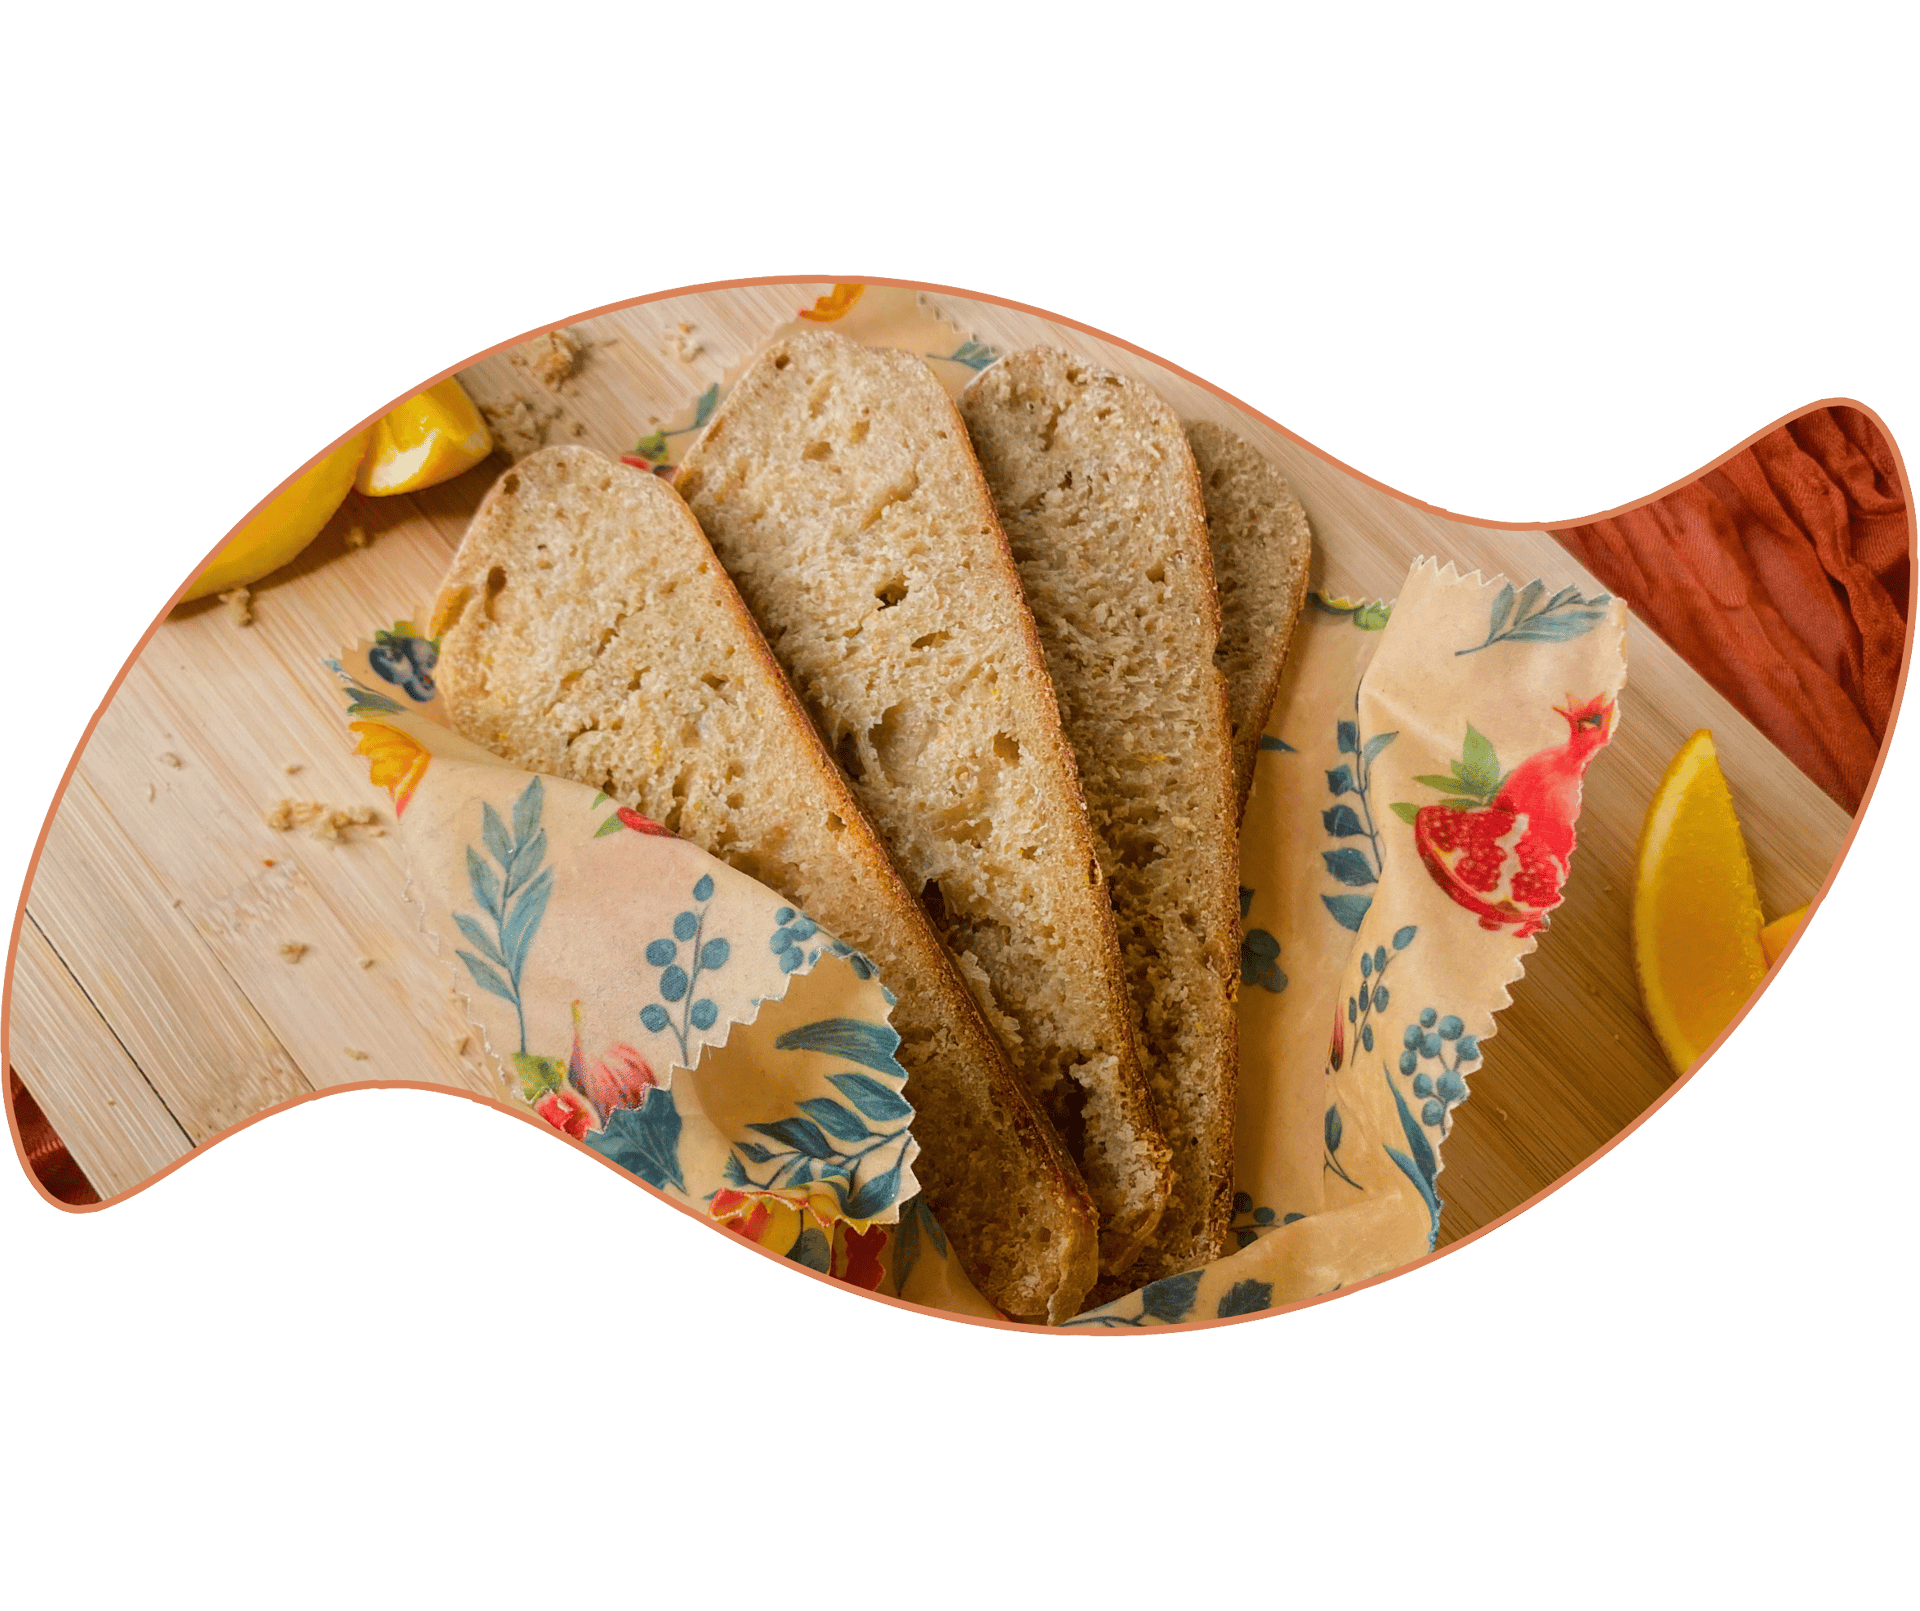
You can slice the loaf and freeze the slices on a plate or tray. Once frozen, place them inside the bag.
Or you can portion the loaf using wraps. Wrap 2 or 3 slices together, or any amount you prefer, and freeze them like that. This is very practical if you like defrosting small portions.
When you want to use them, leave the bag or wrap at room temperature for a few minutes until the wax becomes flexible again. Then take out only the slices you need and store the rest in the fridge or freezer.
If you want to get your own set of beeswax bread bags and beeswax wraps from Naturable, click here. I will add the link on the site.

Checklist of Important Tips
Autolyse 1 hour: The spelt hydrates fully, the dough relaxes and the gluten organizes naturally.
Knead lightly after adding salt and aromatics: A short integration knead keeps the aromatics evenly distributed without overworking the spelt.
Stick to only 2 folds: Spelt, honey and milk soften the gluten quickly, so extra folds will weaken the dough instead of strengthening it.
Build tension in the final shaping: A firm, even surface helps the loaf rise upward instead of spreading.
Bake at 230°C and finish at 200°C: Protects the crust from over-browning due to honey, milk and orange juice.
Cool the loaf completely: Cutting too early compresses the crumb in enriched doughs like this one.
Store in beeswax bread bags or wraps: They preserve tenderness and aroma better than plastic or cloth.
This loaf brings together softness, aroma and technique in a recipe designed to make winter baking simple, cozy and deeply satisfying. Every ingredient adds something meaningful and every step serves a purpose. I hope this bread becomes part of many warm moments in your home and that you enjoy making it as much as sharing it.
See you in the next recipe at Living Naturable.
Have You Tried Our Beeswax Bags & Wraps?
A natural way to keep your food and bread fresh while reducing plastic in your kitchen.
Each set includes 2 reusable bread bags and 2 wraps, made from 100% cotton, beeswax, jojoba oil, and pine resin.
Simple, sustainable, and long-lasting.

Let’s Connect on Instagram

Some breads perfume your kitchen the moment you begin making them and instantly turn your home into a warmer place. This sourdough loaf with orange, honey and spelt is one of them. Its tender, juicy crumb, subtle citrus aroma and gentle sweetness make it a perfect choice for the winter season.
In this article you will find the full recipe along with the “why” behind every technical decision. This loaf is meant to teach while you bake and to bring a comforting, seasonal touch to your everyday bread.
Ingredients
350 g bread flour
150 g whole spelt flour
100 g active sourdough starter at 100 percent hydration
200 g water
100 g strained orange juice
50 g warm milk
10 g salt
15 g honey
Zest of 1 orange
3-5 g finely chopped fresh rosemary
½ teaspoon ground ginger
Optional a tiny pinch of cardamom
Tools you will need
A large mixing bowl
A flexible dough scraper
A spoon or spatula
A banneton
A Dutch oven
Parchment paper
A clean kitchen towel
A microplane or fine zester
A digital scale
If you do not have a Dutch oven or a banneton, do not worry. You can still make this loaf using simple home substitutes. In our guide Sourdough Made Simple: A Beginner’s Guide to Your First Loaf you can find different alternatives you can use if you are missing some of these tools. I will add the link on the website.
How This Dough Behaves & Why
Spelt
Spelt absorbs water quickly, develops gluten quickly and loses strength quickly. It needs a long autolyse so its fiber hydrates properly and the crumb stays soft and flexible.
Honey and orange juice
Both increase enzymatic activity.
The dough softens and ferments faster.
They also caramelize early in the oven.
This is why the initial baking temperature is lower than in a classic sourdough loaf.
Milk
Milk softens gluten and produces a tender crumb, but it also makes the dough more delicate.
This means fewer folds and much earlier ones.
Aromatics
Zest, rosemary and ginger act as small “interruptions” in the gluten network.
They need to be integrated gently with a light kneading.
Step by Step

Initial mix and autolyse
Add the water, orange juice, milk and the sourdough starter to a large bowl.
Whisk or stir briefly until the starter dissolves into the liquids.
Add the bread flour and the spelt flour on top.
Mix until no dry flour remains. You don’t need to knead; just bring everything together into a cohesive dough.
Let it rest for 1 hour.
This autolyse allows the spelt to hydrate fully and gives the gluten a head start so the dough becomes more flexible, easier to handle and naturally lighter.
Note: If you prefer, you can mix only the liquids and flours first, autolyse for 1 hour, and add the sourdough starter afterwards. This method is often recommended by professional bakers because adding the starter after the autolyse helps organize the gluten more cleanly and avoids overworking the dough early. To do this, create a small well in the center, place the starter inside, and fold the dough toward the middle while turning the bowl until it is partially incorporated.
Add the honey and aromatics
Add the honey, the orange zest, the chopped rosemary and the ground ginger all at once.
Sprinkle the salt evenly over the surface and begin a gentle integration knead.
Lightly moisten your hand and knead inside the bowl using pinching and folding movements. This short kneading distributes the salt, honey and aromatics evenly and brings the dough together before the folding steps.
You are not building a strong gluten network here; you only need a cohesive and uniform dough.
Note: Even though in this recipe everything is added at the same time, you can choose to integrate the honey first. Many bakers prefer adding the honey on its own because it dissolves more easily and blends faster into the dough before adding the aromatics, especially if the dough feels stiff or the honey is thick.
If you want to make this step even easier, you can reserve a small amount of the mixing water at the beginning and use it to loosen the honey before adding it to the dough.
First fold
Wait 20 minutes.
Do a stretch and fold: lift one side of the dough and fold it into the center. Repeat around the entire dough.
This early fold is necessary because spelt, milk and honey weaken gluten faster than usual.
Second fold
Wait 20 more minutes and repeat the fold.
Two folds are enough for this dough.
More folds would break the structure.
Bulk fermentation
Let the dough rise about 60 to 70 percent.
At 23 to 24 degrees Celsius this usually takes around 3 hours.
You want a dough that feels airy and flexible.
Pre-shape
Transfer the dough to the counter gently.
Shape a light round by bringing the edges toward the center.
Let it rest for 20 minutes with the smooth side facing up.
This rest relaxes the dough and makes the final shape much cleaner.
Final shaping
Flip the dough so the rough side is facing up.
Take the edges and fold them toward the center, but not just to the center; fold them slightly past the center to create more surface tension. Repeat around the entire dough until you have a clear, firm seam.
Flip the dough so the seam is now on the counter.
Time to round the dough.
Place your hands in front of the dough and slide it gently toward you while rotating it slightly at the same time. This double movement of pulling and turning builds tension on the surface without tearing the dough.
Once the dough feels firm and stable, place it seam side up in a well floured banneton.
Cold fermentation
Refrigerate the dough for 10 to 12 hours.
This slow rest enhances the flavor and stabilizes this enriched dough.
Baking
Preheat the oven to 230°C with the Dutch oven inside.
Turn the dough out onto parchment paper. If you want a more floured finish, dust the top lightly before scoring. Rice flour works best because it does not disappear in the oven, you can use it alone or mixed with a little wheat flour.
Score the dough cleanly and place it in the hot pot.
Bake for 20 minutes covered.
Uncover, reduce to 200°C and bake for 20 to 25 minutes more.
This temperature combination keeps the crust thin and prevents the honey and milk from caramelizing too quickly.
Cooling
Cool the loaf on a rack with a kitchen towel on top for the first 30 minutes.
Then remove the towel and let the loaf cool completely before slicing.
Do you enjoy cozy sourdough recipes like this one?
Try our Maple Pecan Loaf with a Touch of Coffee and dive deeper into winter baking inspiration.
Looking for sustainable kitchen inspiration?
Read Swap Plastic for Beeswax: The Kitchen Upgrade You Didn’t Know You Needed and discover how small changes can make a big difference.
How to Enjoy This Loaf
This bread pairs beautifully with flavors that complement its winter aroma and tender crumb:
Cream cheese
Salted butter
Aromatic olive oil
Orange, peach or apricot jam
Winter vegetable soups
Herbed hummus
Mild pesto
Spiced tea or coffee
It tastes incredible toasted the next day because the honey and spelt help retain moisture.

How to Store It
To keep your loaf fresh for longer, our Naturable reusable beeswax bread bags work especially well. In our experience, this loaf stays tender for more than 4 days when stored inside our bags. Just like our beeswax wraps, they are completely safe for both refrigeration and freezing, so you can use them with full confidence.
If you want to freeze the loaf, you have two options depending on how you plan to enjoy it.
You can slice the loaf and freeze the slices on a plate or tray. Once frozen, place them inside the bag.
Or you can portion the loaf using wraps. Wrap 2 or 3 slices together, or any amount you prefer, and freeze them like that. This is very practical if you like defrosting small portions.
When you want to use them, leave the bag or wrap at room temperature for a few minutes until the wax becomes flexible again. Then take out only the slices you need and store the rest in the fridge or freezer.
If you want to get your own set of beeswax bread bags and beeswax wraps from Naturable, click here. I will add the link on the site.
Checklist of Important Tips
Autolyse 1 hour: The spelt hydrates fully, the dough relaxes and the gluten organizes naturally.
Knead lightly after adding salt and aromatics: A short integration knead keeps the aromatics evenly distributed without overworking the spelt.
Stick to only 2 folds: Spelt, honey and milk soften the gluten quickly, so extra folds will weaken the dough instead of strengthening it.
Build tension in the final shaping: A firm, even surface helps the loaf rise upward instead of spreading.
Bake at 230°C and finish at 200°C: Protects the crust from over-browning due to honey, milk and orange juice.
Cool the loaf completely: Cutting too early compresses the crumb in enriched doughs like this one.
Store in beeswax bread bags or wraps: They preserve tenderness and aroma better than plastic or cloth.
This loaf brings together softness, aroma and technique in a recipe designed to make winter baking simple, cozy and deeply satisfying. Every ingredient adds something meaningful and every step serves a purpose. I hope this bread becomes part of many warm moments in your home and that you enjoy making it as much as sharing it.
See you in the next recipe at Living Naturable.
Have You Tried Our Beeswax Bags & Wraps?
A natural way to keep your food and bread fresh while reducing plastic in your kitchen.
Each set includes 2 reusable bread bags and 2 wraps, made from 100% cotton, beeswax, jojoba oil, and pine resin.
Simple, sustainable, and long-lasting.
Let’s Connect on Instagram

Subscribe to Our Newsletter
Join the Naturable Blog! Stay updated with our tips, kitchen hacks, and much more
Subscribe to Our Newsletter
Join the Naturable Blog! Stay updated with our tips, kitchen hacks, and much more
Stay connected! Follow us for tips, updates, and a little extra inspiration for your home and kitchen.
Have a question or need assistance?
Feel free to contact us!
© 2025. Naturable – A brand of Horizon Origin LLC